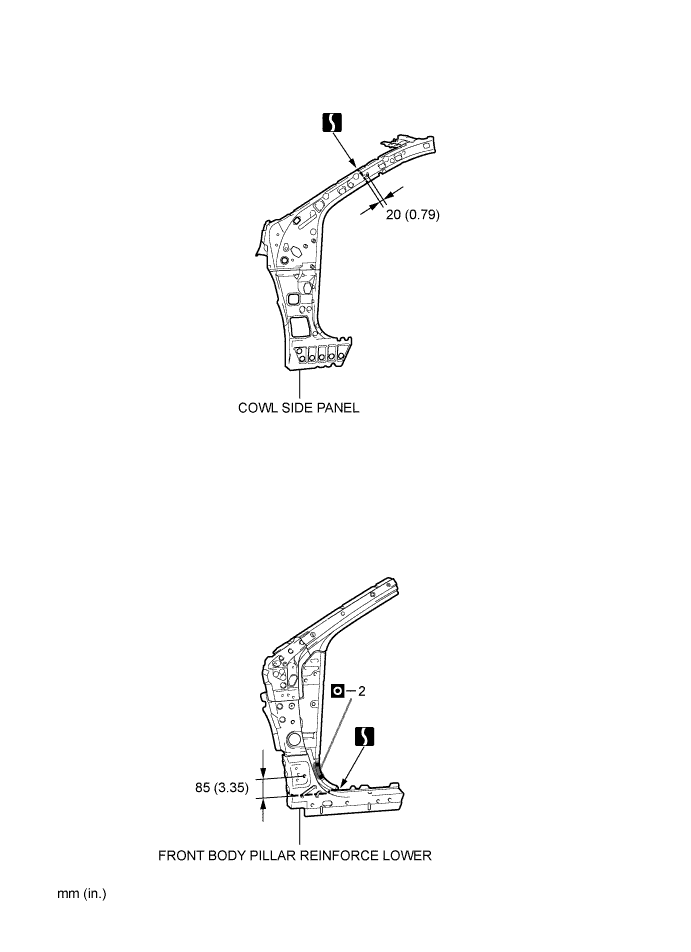
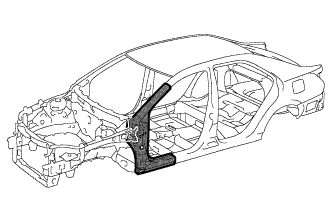
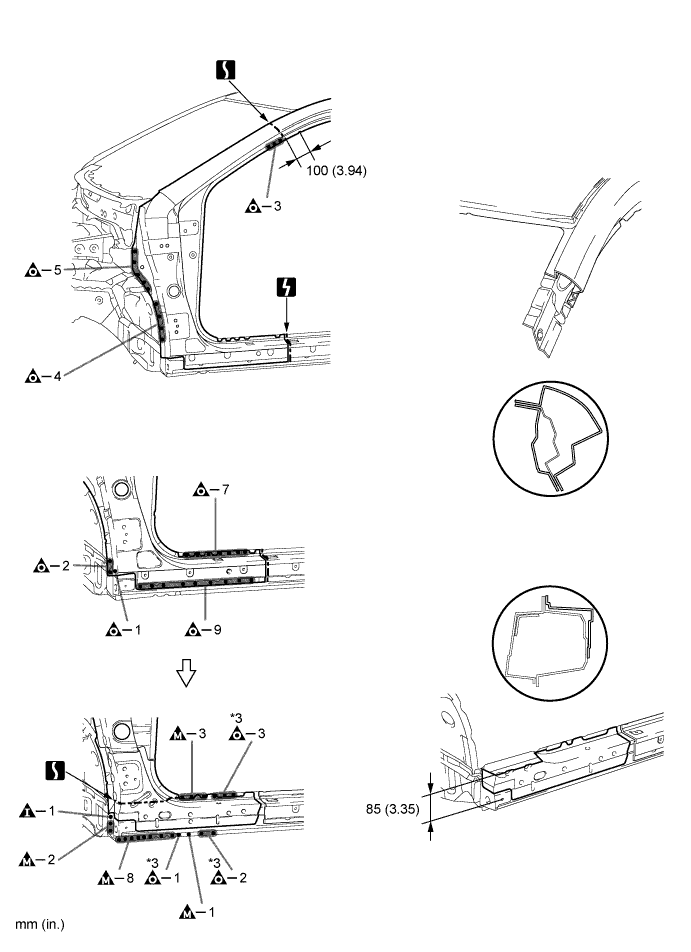
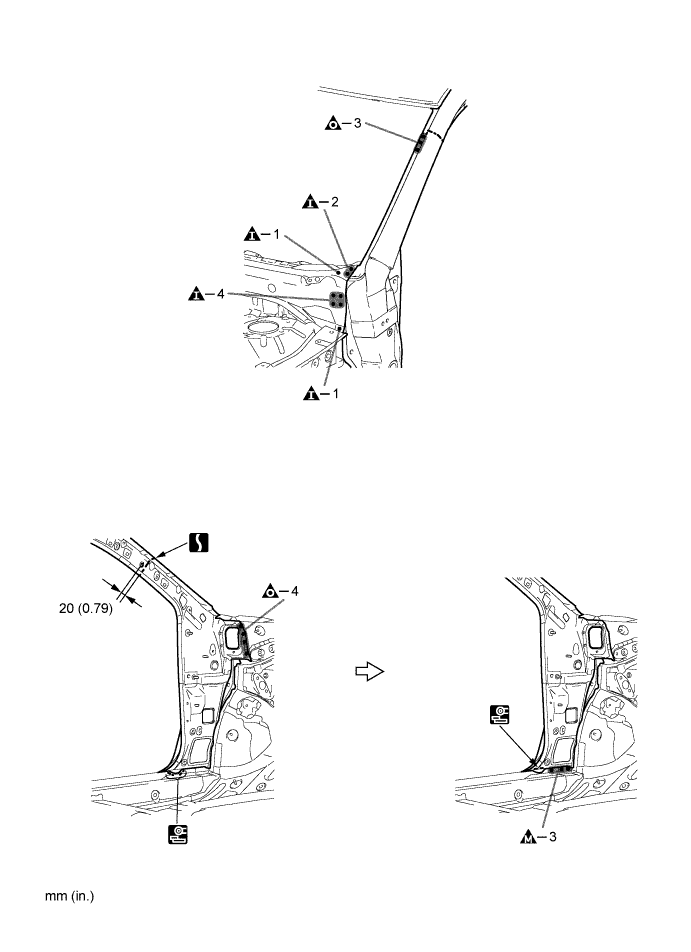
FRONT BODY PILLAR > CUT AND JOIN REPLACEMENT SECTIONS | |
- With the cowl top side upper panel and cowl top side panel removed.
-
Weld work for 980 MPa ultra high strength steel
Follow the welding conditions below when welding ultra high strength steel to assure sufficient weld strength. (When repairing this model)
- *1: When welding 2 panels together including 980 MPa ultra high strength steel.
Plug weld
| Plug diameter
| 10 mm (0.39 in.)
|
Wire type
| AWS A5.18 ER70S-3
|
Shield gas
| Metal active gas
|
- *2: When welding more than 3 panels together including 980 MPa ultra high strength steel. (When plug welding a third panel to 2 panels which are welded under the conditions described above.)
Plug weld
| Plug diameter
| Same as the standard method (See the introduction)
|
Wire type
| AWS A5.18 ER70S-3
|
Shield gas
| Metal active gas
|
- NOTICE:
- Be sure to use Metal active gas (Ar 80% + CO2 20%) as the shield gas when plug welding. Sufficient weld strength cannot be assured when using 100% CO2 shield gas.
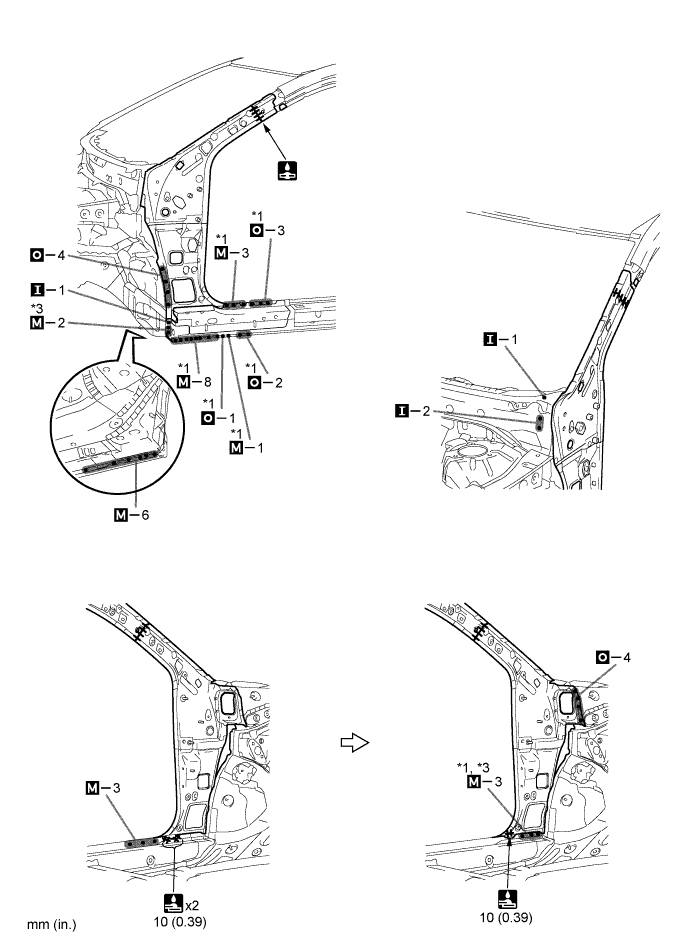
Symbol meaning
|

| Remove Weld Points
|

| Remove Weld Points
|

| Remove Weld Points
|

| Cut with Disc Sander etc.
|

| Cut and Join Location
|

| Cut Location for Supply Parts
|
REMOVAL POINT
- Do not butt weld or heat repair because the heat decreases the strength of areas where ultra high strength steel is used. (See the introduction)
- *3 indicates welds to remove for easier removal.
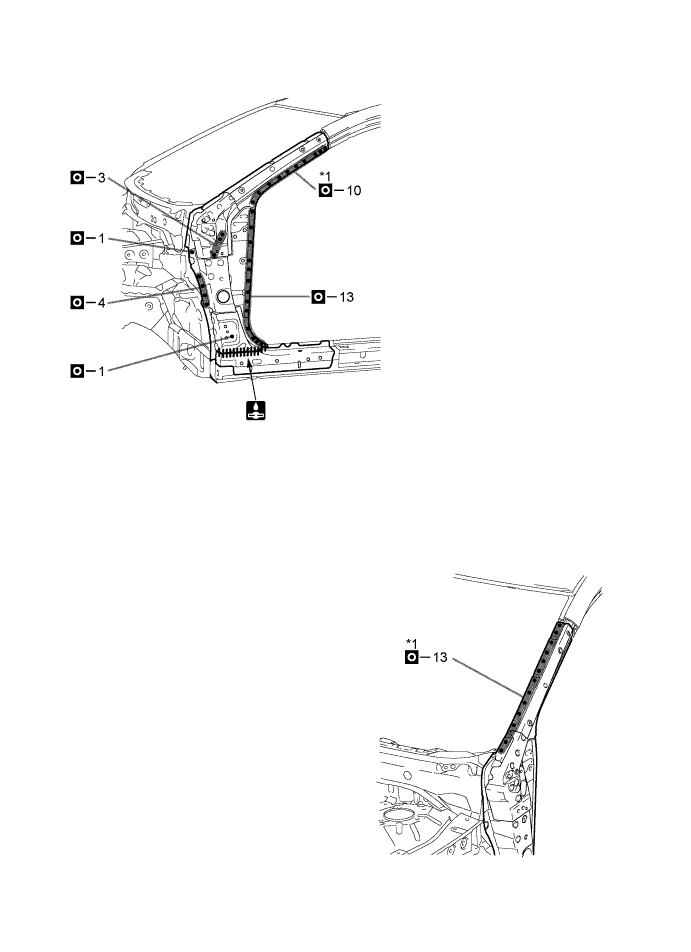
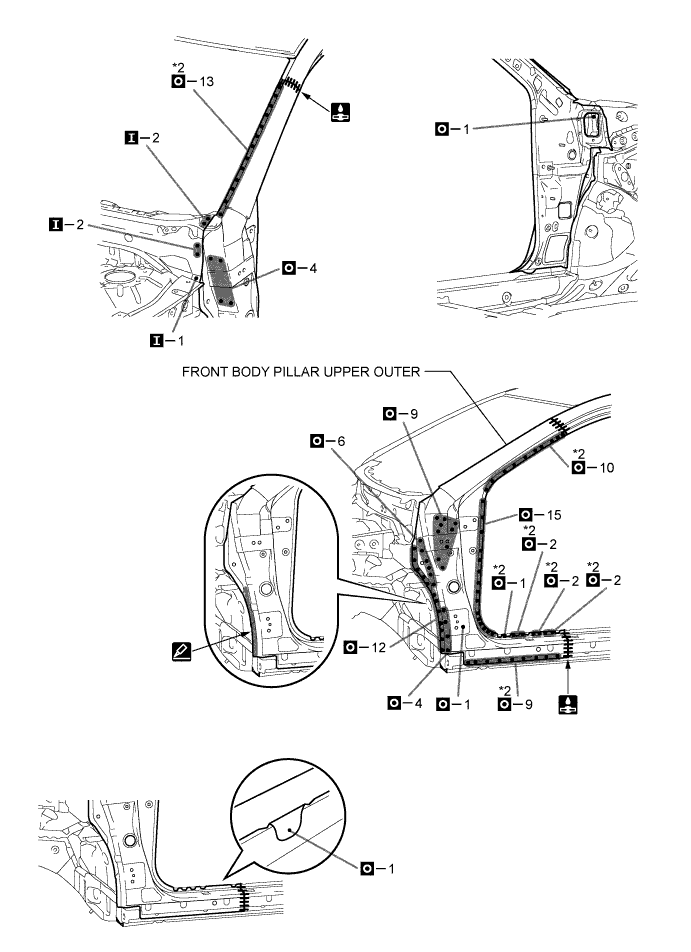
Symbol meaning
|

| Plug Weld
|

| Plug Weld
|

| Plug Weld
|
| Cut and Join Location
|

| Fillet Weld
|

| Butt Weld
|

| Body Sealer
|
INSTALLATION POINT
- Inspect the fitting of the related parts around the new parts before welding. This affects the appearance of the finish.
- Temporarily install the new parts and measure each part of the new parts in accordance with the body dimension diagram. (See the body dimensions)
- If the entire supply part is not needed, remove the part of the supply part that is needed.
- Before installing a new part, apply body sealer.
- HINT:
- Apply body sealer in an even, continuous bead.
- Follow the welding conditions when welding *1 and *2 to assure sufficient weld strength. (See the introduction)
- When welding *3, make a hole on a new part for plug welding and weld the panel with the panel behind completely.
- After welding the cowl side panel to the vehicle side, install the front body pillar reinforce lower.
- After welding the front body pillar reinforce lower to the vehicle side, install the front body pillar upper.
- After welding, apply the foamed sealing material to the corresponding parts. (See the painting / coating)
- After welding, apply body sealer to the corresponding parts. (See the painting / coating)
- After applying the top coat, apply anti-rust agent to the internal panel portion of the closed section structural weld points.