REAR FLOOR PAN > ASSEMBLY REPLACEMENT


  1. K101340
    With the rear floor rear inner crossmember removed.

REMOVAL

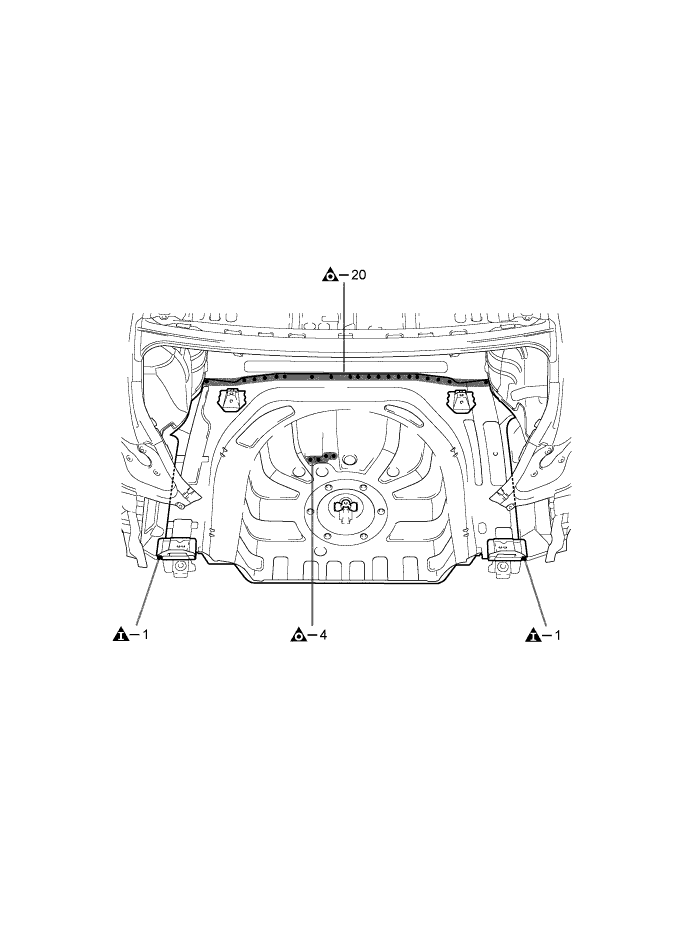
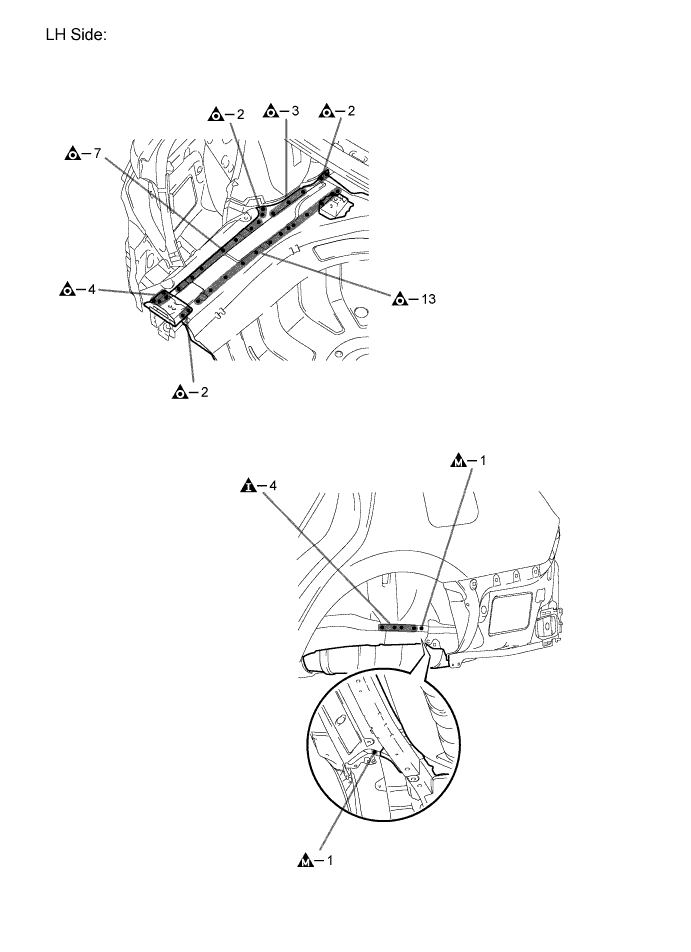
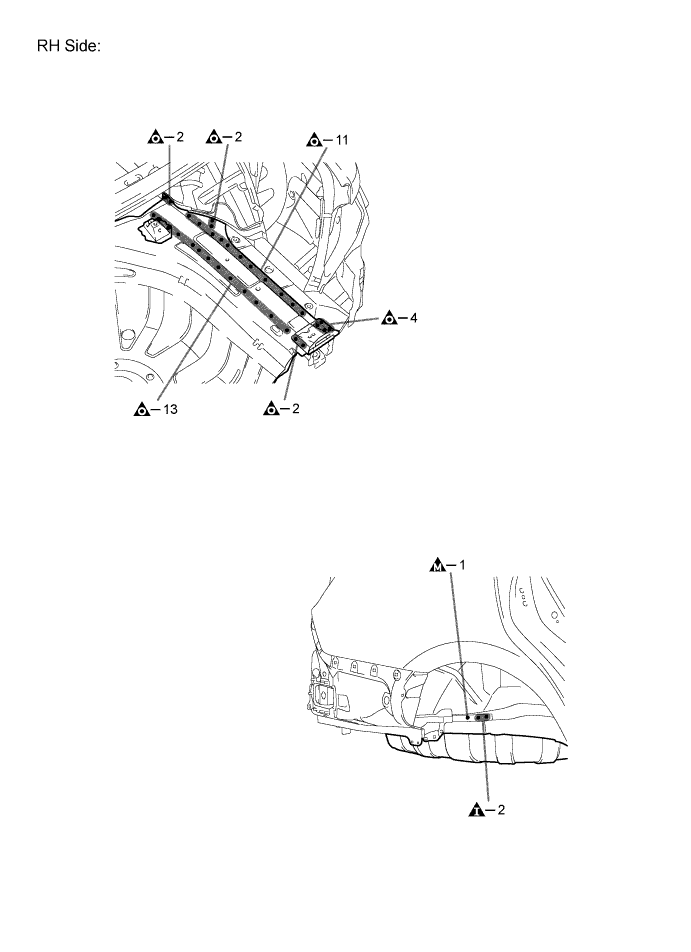
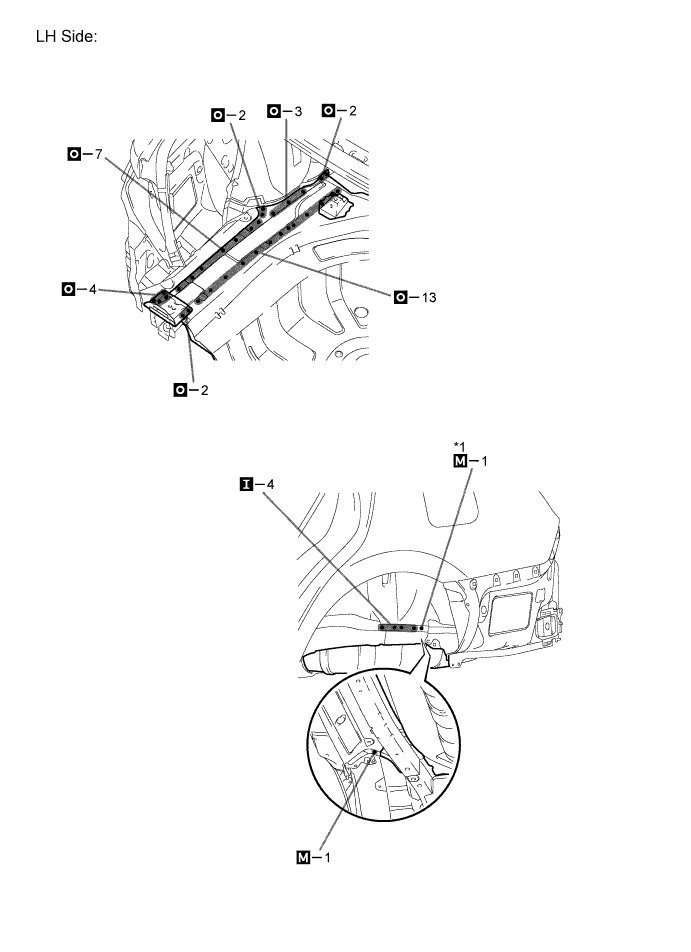
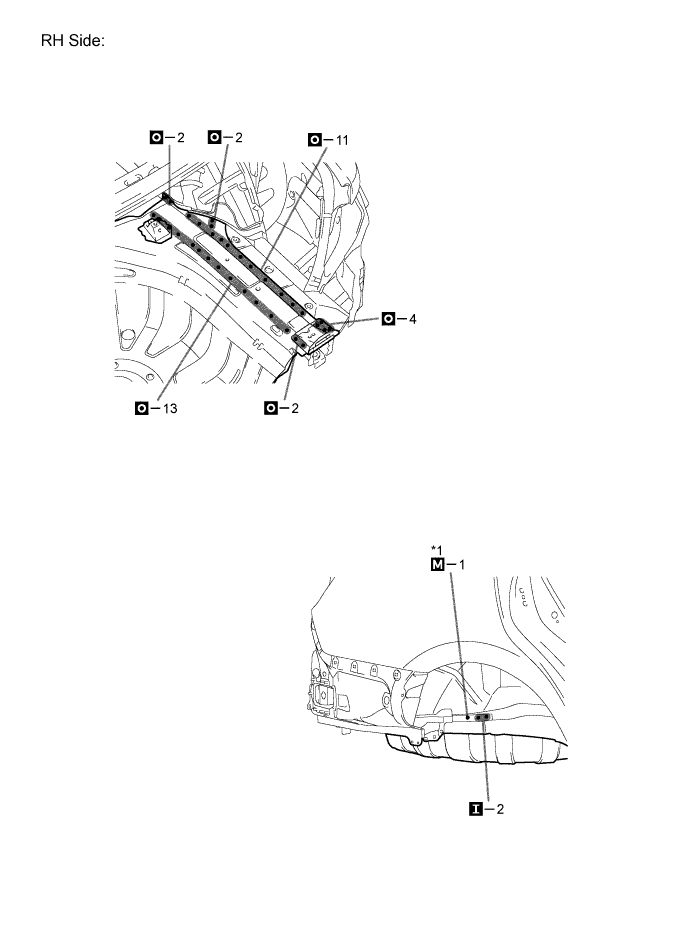
Symbol meaning
K100014
Remove Weld Points
K100015
Remove Weld Points
K100016
Remove Weld Points

K101836E01


K101837E01


K101838E01


INSTALLATION

Symbol meaning
K100019
Plug Weld
K100020
Plug Weld
K100021
Plug Weld
K100026
Fillet Weld
INSTALLATION POINT
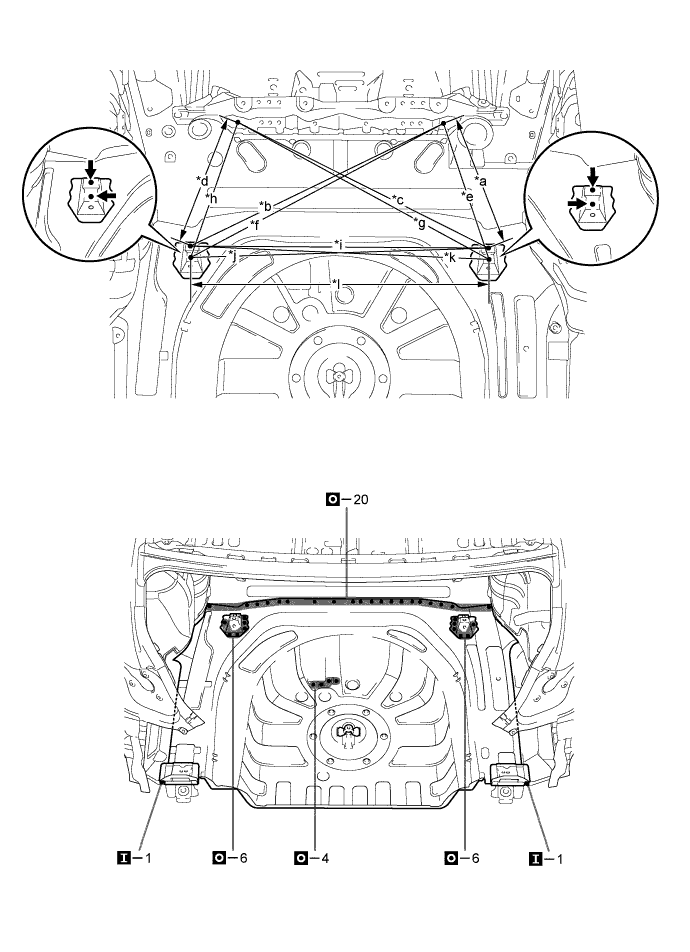
  1. Temporarily install the new parts and measure each part of the new parts in accordance with the body dimension diagram. (See the body dimension diagram)
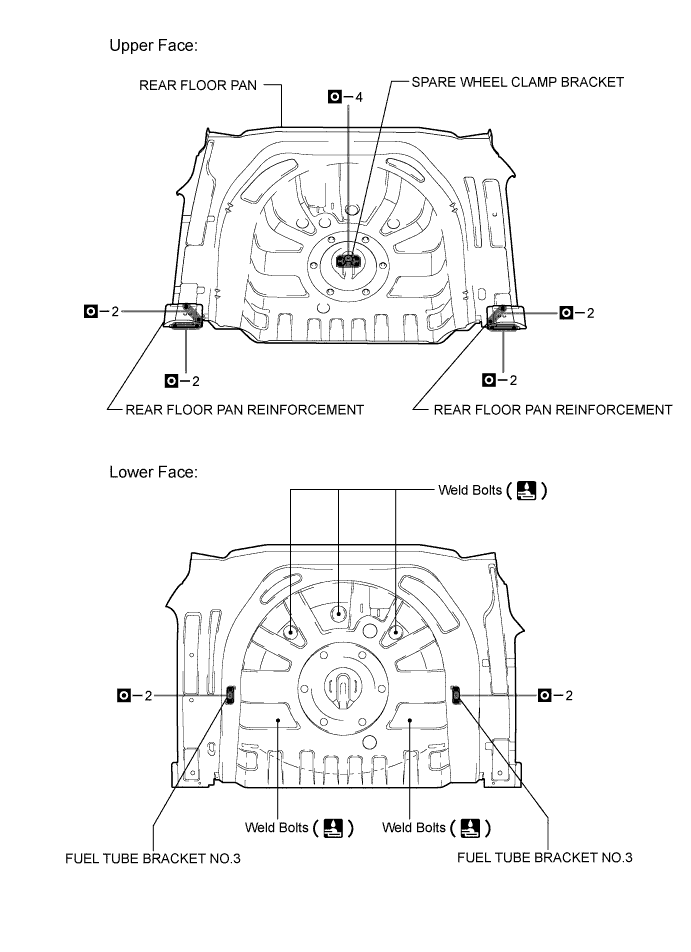
  2. Before temporarily installing the new parts, weld the spare wheel clamp bracket, rear floor pan reinforcement, fuel tube bracket No. 3, rear floor pan and weld bolts with the standard number of welding points.
  3. When welding *1, make a hole on a new part for plug welding and weld the panel with the panel behind completely.
  4. After welding, apply body sealer and undercoating to the corresponding parts. (See the painting / coating)
  5. After applying the top coat, apply anti-rust agent to the internal panel portion of the closed section structural weld points.

Reference Value 
Area
Measurement
Area
Measurement
*a
374 mm (14.72 in.)
*b
788 mm (31.02 in.)
*c
788 mm (31.02 in.)
*d
374 mm (14.72 in.)
*e
407 mm (16.02 in.)
*f
804 mm (31.65 in.)
*g
804 mm (31.65 in.)
*h
407 mm (16.02 in.)
*i
830 mm (32.68 in.)
*j
831 mm (32.72 in.)
*k
831 mm (32.72 in.)
*l
830 mm (32.68 in.)

K101344E01


K101839E01


K101840E01


K101841E01