 |
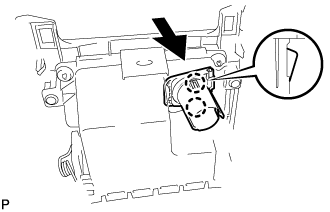
Engage the 2 claws to install the No. 2 power outlet socket cover.
POWER OUTLET SOCKET > INSTALLATION |
| 1. INSTALL NO. 2 POWER OUTLET SOCKET COVER |
|
Engage the 2 claws to install the No. 2 power outlet socket cover.
| 2. INSTALL NO. 3 POWER OUTLET SOCKET ASSEMBLY |
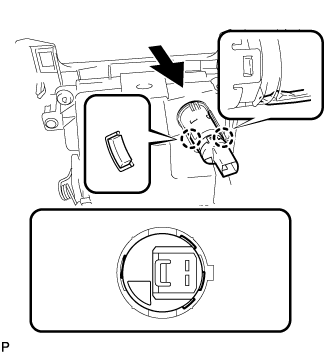 |
As shown in the illustration, align the protrusion of the No. 3 power outlet socket assembly and the notch of the No. 2 power outlet socket cover.
Engage the 2 claws to install the No. 3 power outlet socket assembly to the No. 2 power outlet socket cover.
| 3. INSTALL UPPER CONSOLE BOX SUB-ASSEMBLY |
Connect the 2 connectors.
Engage the clamp.
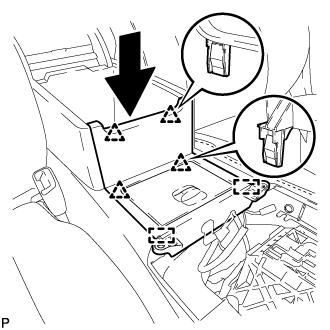 |
Engage the 2 guides and 4 clips as shown in the illustration.
Install the upper console box sub-assembly with the 2 screws.
| 4. INSTALL REAR CONSOLE UPPER PANEL SUB-ASSEMBLY |
Connect each connector.
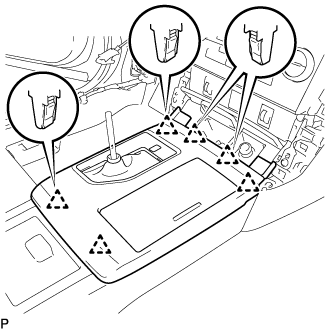 |
Engage the 6 clips to install the rear console upper panel sub-assembly.
Move the shift lever to P.
| 5. INSTALL SHIFT LEVER KNOB SUB-ASSEMBLY |
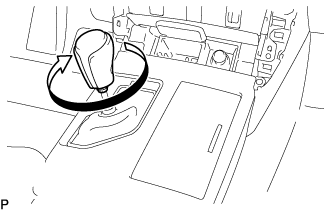 |
Turn the shift lever knob sub-assembly clockwise to install it.
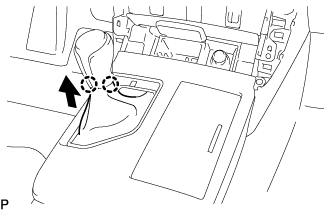 |
Engage the 2 claws to connect the shift hole cover sub-assembly as shown in the illustration.
| 6. INSTALL FRONT PANEL GARNISH RH |
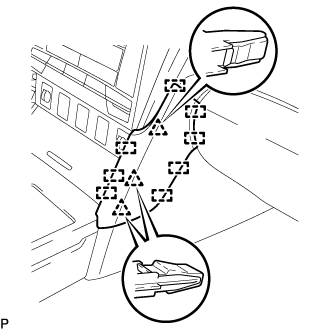 |
Engage the 3 clips and 8 guides to install the front panel garnish RH.
| 7. INSTALL FRONT PANEL GARNISH LH |
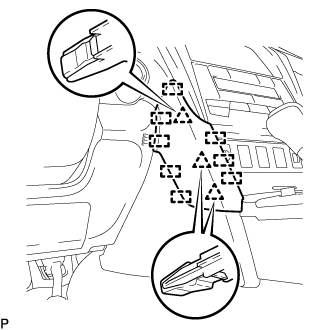 |
Engage the 3 clips and 8 guides to install the front panel garnish LH.