 |
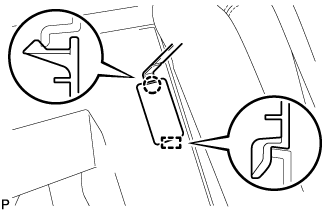
Using a moulding remover, disengage the claw and guide, and remove the No. 2 room partition cover.
BATTERY SMART UNIT > REMOVAL |
| 1. PRECAUTION |
| 2. REMOVE SERVICE PLUG GRIP |
| 3. SEPARATE REAR SEATBACK ASSEMBLY |
Fold down the rear seatback assembly RH.
|
Using a moulding remover, disengage the claw and guide, and remove the No. 2 room partition cover.
Disconnect the rear seat outer belt from the rear seat center shoulder belt guide.
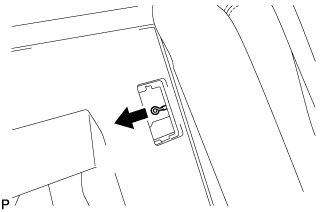 |
Pull the cable in the direction shown in the illustration to release the rear seatback lock and then fold the rear seatback assembly LH forward.
| 4. REMOVE CONNECTOR COVER ASSEMBLY |
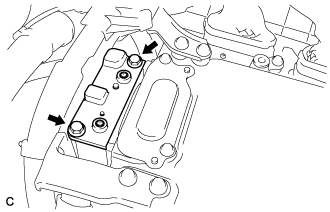 |
Remove the 2 bolts and connector cover assembly.
| 5. CHECK TERMINAL VOLTAGE |
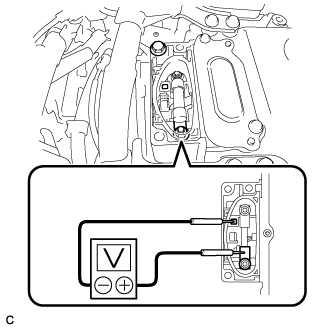 |
Using a voltmeter, measure the voltage between the terminals of the 2 phase connectors.
| 6. INSTALL CONNECTOR COVER ASSEMBLY |
Install the connector cover assembly with the 2 bolts.
| 7. REMOVE NO. 2 HYBRID VEHICLE BATTERY SHIELD PANEL |
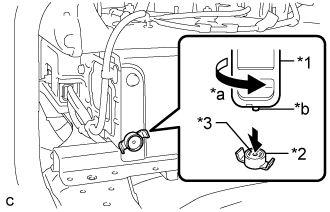 |
Using the service plug grip, remove the battery cover lock striker.
| *1 | Service Plug Grip |
| *2 | Battery Cover Lock Striker |
| *3 | Button |
| *a | Turn |
| *b | Projection |
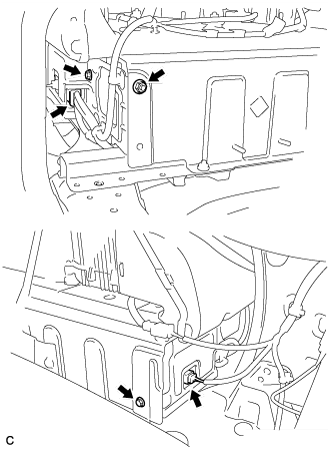 |
Disconnect the 2 connectors.
Remove the 2 bolts, nut and No. 2 hybrid vehicle battery shield panel.
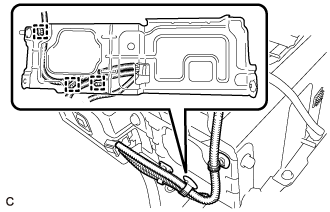 |
Disconnect the 3 wire harness clamps.
| 8. REMOVE BATTERY SMART UNIT |
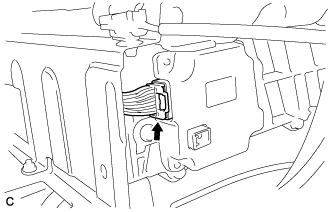 |
Disconnect the connector.
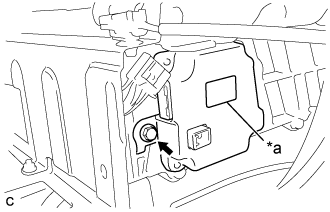 |
Remove the bolt and battery smart unit.
| *a | Black Label |