 |
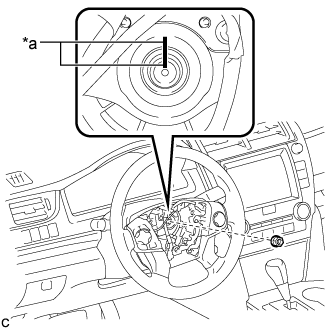
Remove the steering wheel assembly set nut.
| *a | Matchmark |
STEERING COLUMN ASSEMBLY > REMOVAL |
| 1. PRECAUTION |
| 2. TURN FRONT WHEELS TO FACE STRAIGHT AHEAD |
| 3. REMOVE FRONT WHEEL |
| 4. REMOVE HORN BUTTON ASSEMBLY |
| 5. REMOVE STEERING WHEEL ASSEMBLY |
|
Remove the steering wheel assembly set nut.
| *a | Matchmark |
Put matchmarks on the steering wheel assembly and steering main shaft.
Disconnect the connectors from the spiral cable sub-assembly.
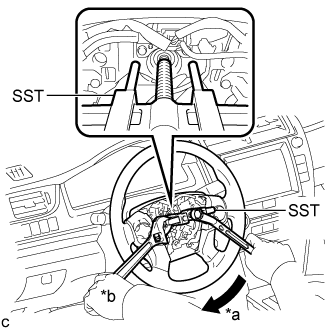 |
Using SST, remove the steering wheel assembly.
| *a | Turn |
| *b | Hold |
| 6. REMOVE FRONT DOOR SCUFF PLATE |
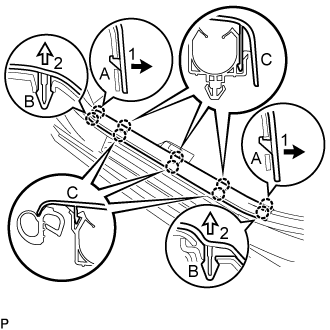 |
Disengage the 2 claws (A) in the direction indicated by the arrows (1) shown in the illustration.
Disengage the 2 claws (B) in the direction indicated by the arrows (2) shown in the illustration.
Disengage the 6 claws (C) to remove the front door scuff plate LH.
| 7. REMOVE COWL SIDE TRIM SUB-ASSEMBLY |
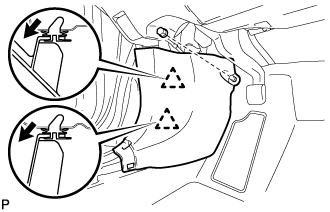 |
Remove the clip.
Pull the cowl side trim sub-assembly LH in the direction indicated by the arrow shown in the illustration to disengage the 2 clips and remove the cowl side trim sub-assembly LH.
| 8. DISCONNECT FRONT DOOR OPENING TRIM WEATHERSTRIP |
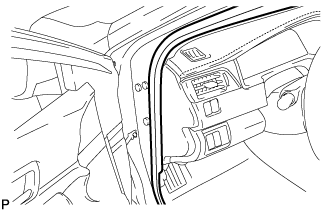 |
Disconnect the front door opening trim weatherstrip LH.
| 9. REMOVE INSTRUMENT SIDE PANEL |
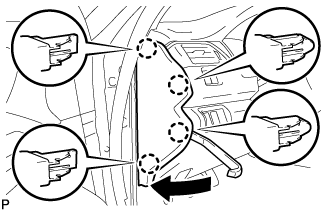 |
Using a moulding remover, disengage the 4 claws as shown in the illustration.
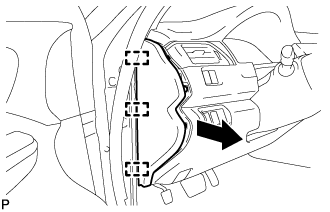 |
Disengage the 3 guides and remove the instrument side panel LH as shown in the illustration.
| 10. DISCONNECT HOOD LOCK CONTROL LEVER SUB-ASSEMBLY |
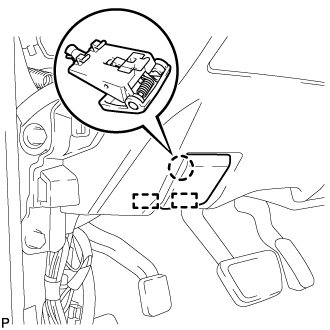 |
Disengage the claw and 2 guides to disconnect the hood lock control lever sub-assembly.
| 11. REMOVE INSTRUMENT PANEL SUB-ASSEMBLY |
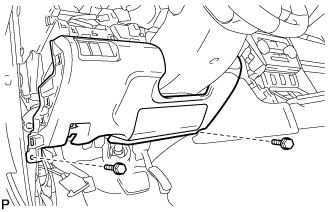 |
Remove the 2 bolts <B>.
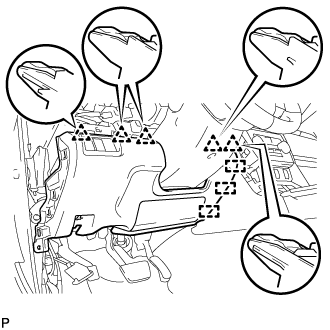 |
Disengage the 5 clips and 3 guides to remove the instrument panel sub-assembly.
| 12. REMOVE LOWER STEERING COLUMN COVER |
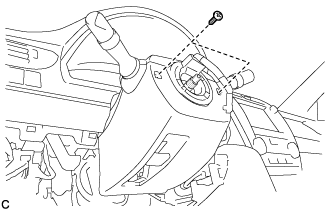 |
Remove the 2 screws.
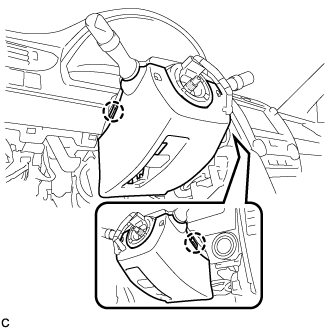 |
Push the right and left sides of the lower steering column cover, and disengage the 2 claws.
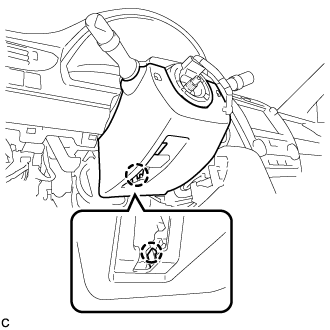 |
Insert a finger into the opening of the tilt lever of the lower steering column cover to disengage the claw and remove the lower steering column cover.
| 13. REMOVE UPPER STEERING COLUMN COVER |
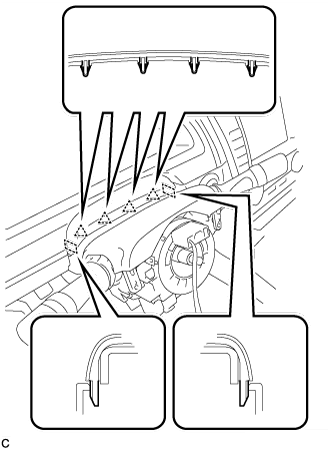 |
Disengage the 4 clips and 2 guides from the upper steering column cover.
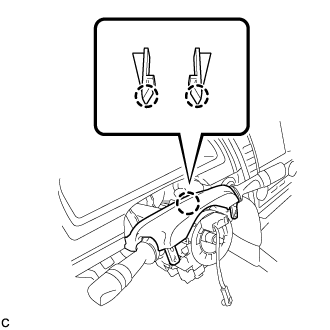 |
Disengage the 2 claws to remove the upper steering column cover.
| 14. REMOVE TURN SIGNAL SWITCH ASSEMBLY WITH SPIRAL CABLE SUB-ASSEMBLY |
Disconnect the connectors from the turn signal switch assembly with spiral cable sub-assembly.
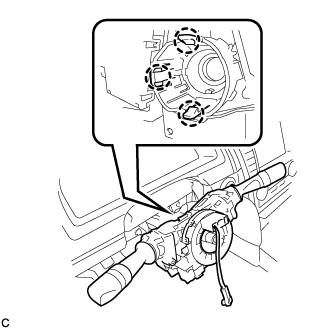 |
Disengage the 3 claws to remove the turn signal switch assembly with spiral cable sub-assembly from the steering post assembly.
| 15. SEPARATE STEERING INTERMEDIATE SHAFT ASSEMBLY |
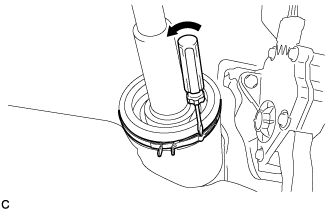 |
Using a screwdriver, loosen the clamp as shown in the illustration.
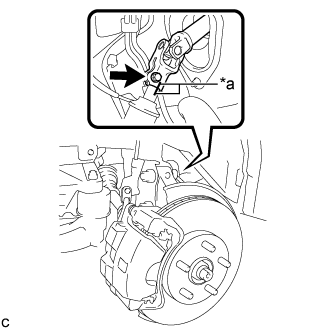 |
Put matchmarks on the steering intermediate shaft assembly and the steering link assembly.
| *a | Matchmark |
Remove the bolt and separate the steering intermediate shaft assembly from the steering link assembly.
| 16. REMOVE NO. 2 AIR DUCT SUB-ASSEMBLY (for LHD) |
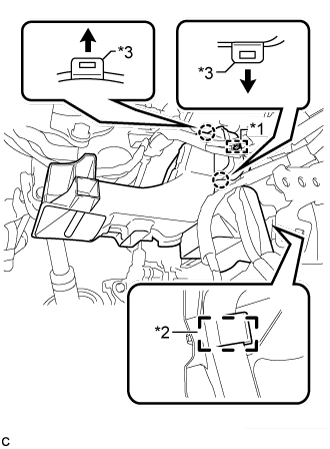 |
Using a screwdriver, Disengage the 2 claws and guide.
| *1 | Guide |
| *2 | Clamp |
| *3 | Claw |
Disengage the clamp to remove the No. 2 air duct sub-assembly.
| 17. REMOVE NO. 2 AIR DUCT SUB-ASSEMBLY (for RHD) |
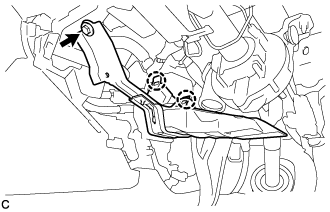 |
Remove the bolt.
Disengage the 2 claws to remove the No. 2 air duct sub-assembly.
| 18. REMOVE STEERING POST ASSEMBLY |
Disconnect the connectors and disengage the wire harness clamps from the steering post assembly.
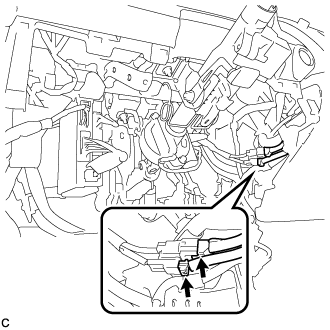 |
Disconnect the 2 connectors.
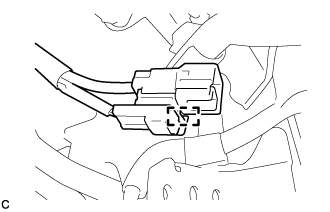 |
Disengage the clamp.
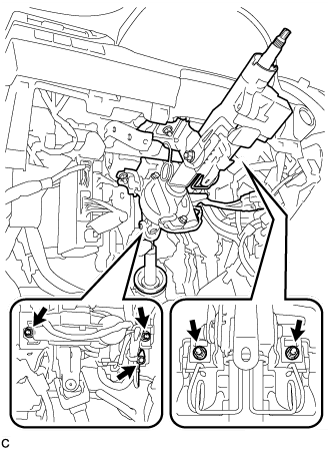 |
Remove the bolt to separate the ground wire.
Remove the 4 nuts and the steering post assembly.
| 19. REMOVE STEERING INTERMEDIATE SHAFT ASSEMBLY |
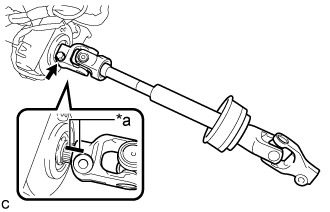 |
Remove the bolt and slide the steering intermediate shaft assembly.
| *a | Matchmark |
Put matchmarks on the steering intermediate shaft assembly and the steering column assembly.
Remove the steering intermediate shaft assembly from the steering column assembly.