 |
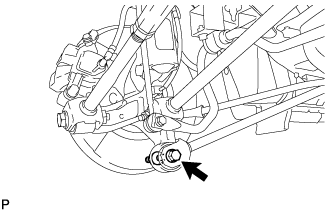
Temporarily tighten the rear strut rod assembly (rear side) with the bolt and nut.
- NOTICE:
- When temporarily tightening the bolt, keep the nut from rotating.
- HINT:
- Insert the bolt from the inside of the vehicle.
REAR STRUT ROD > INSTALLATION |
| 1. TEMPORARILY TIGHTEN REAR STRUT ROD ASSEMBLY |
|
Temporarily tighten the rear strut rod assembly (rear side) with the bolt and nut.
Support the rear axle carrier sub-assembly with a jack and a wooden block.
Connect the rear strut rod assembly (front side) with the bolt and nut.
| 2. STABILIZE SUSPENSION |
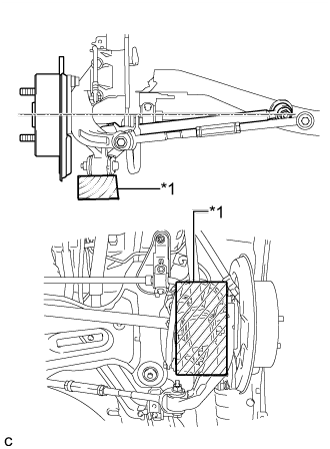 |
Jack up the rear axle carrier sub-assembly, placing a wooden block under it to avoid damage. Apply load to the suspension so that the installed bolt of the rear No. 1 suspension arm assembly (inner side) is horizontally aligned with the center of the rear axle hub.
| *1 | Wooden Block |
| 3. FULLY TIGHTEN REAR STRUT ROD ASSEMBLY |
Fully tighten the bolt (rear side).
Fully tighten the bolt (front side).
| 4. CONNECT NO. 3 PARKING BRAKE CABLE ASSEMBLY |
Connect the No. 3 parking brake cable assembly with the bolt.
| 5. INSTALL NO. 2 FLOOR UNDER COVER (for LH Side) |
Install the No. 2 floor under cover with the 6 nuts.
Install the screw and 2 clips.
| 6. INSTALL NO. 1 FLOOR UNDER COVER (for RH Side) |
Install the No. 1 floor under cover with the 5 nuts and 2 clips.
Install the screw.
| 7. INSTALL REAR WHEEL |