 |
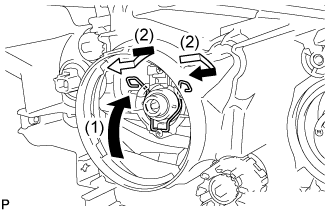
Lock the set spring to install the discharge headlight bulb as shown in the illustration.
HIGH INTENSITY DISCHARGE HEADLIGHT BULB > INSTALLATION |
| 1. INSTALL DISCHARGE HEADLIGHT BULB |
Set the discharge headlight bulb to the headlight unit.
|
Lock the set spring to install the discharge headlight bulb as shown in the illustration.
| 2. INSTALL HEADLIGHT LIGHT CONTROL ECU SUB-ASSEMBLY LH (for LH Side) |
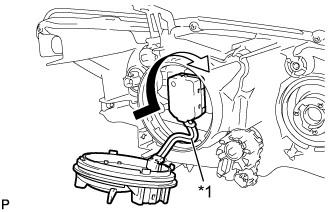 |
Turn the socket of the headlight light control ECU sub-assembly in the direction indicated by the arrow shown in the illustration to connect it.
Check that the red line on the output harness is not twisted and store the harness in the headlight assembly securely so that the output harness is not pinched.
| *1 | Red Line |
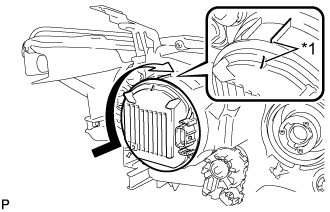 |
Turn the headlight light control ECU sub-assembly in the direction indicated by the arrow shown in the illustration until the lock marks are aligned to install it.
| *1 | Lock Mark |
| 3. INSTALL HEADLIGHT LIGHT CONTROL ECU SUB-ASSEMBLY RH (for RH Side) |
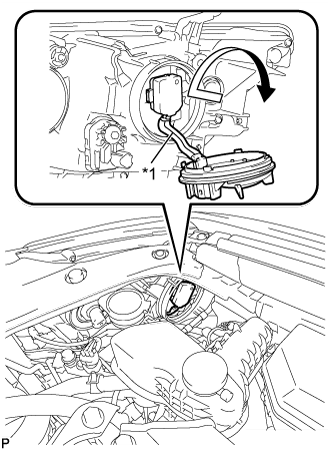 |
Turn the socket of the headlight light control ECU sub-assembly RH in the direction indicated by the arrow shown in the illustration to connect it.
Check that the red line on the output harness is not twisted and store the harness in the headlight assembly securely so that the output harness is not pinched.
| *1 | Red Line |
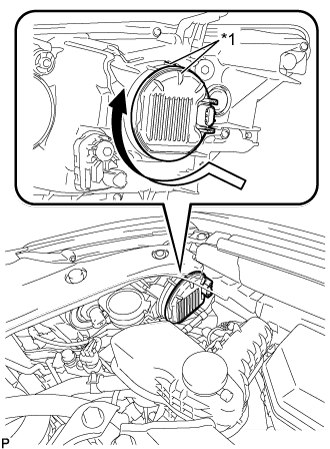 |
Turn the headlight light control ECU sub-assembly RH in the direction indicated by the arrow shown in the illustration until the lock marks are aligned to install it.
| *1 | Lock Mark |
Connect the connector.
| 4. INSTALL HEADLIGHT ASSEMBLY LH (for LH Side) |
| 5. CONNECT CABLE TO NEGATIVE AUXILIARY BATTERY TERMINAL |
| 6. INSTALL LUGGAGE TRIM SERVICE HOLE COVER |
Engage the claw to connect the luggage trim service hole cover.