 |
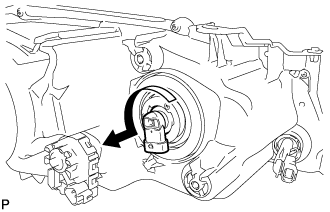
Turn the No. 1 headlight bulb in the direction indicated by the arrow shown in the illustration, and remove it.
- NOTICE:
- Do not touch the bulb glass.
HEADLIGHT ASSEMBLY > DISASSEMBLY |
| 1. REMOVE NO. 1 HEADLIGHT BULB |
|
Turn the No. 1 headlight bulb in the direction indicated by the arrow shown in the illustration, and remove it.
| 2. REMOVE HEADLIGHT LIGHT CONTROL ECU SUB-ASSEMBLY |
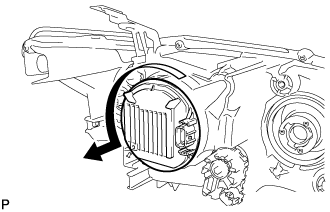 |
Turn the headlight light control ECU sub-assembly in the direction indicated by the arrow shown in the illustration, and disconnect it.
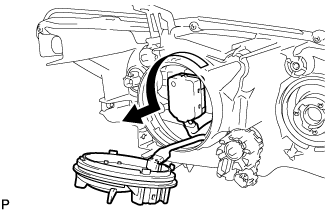 |
Turn the socket of the headlight light control ECU sub-assembly in the direction indicated by the arrow shown in the illustration, and remove it.
| 3. REMOVE DISCHARGE HEADLIGHT BULB |
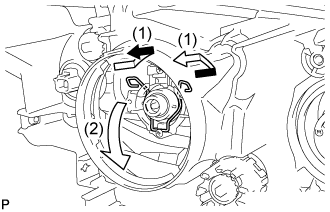 |
Release the set spring as shown in the illustration and remove the discharge headlight bulb.
| 4. REMOVE HEADLIGHT SOCKET COVER |
Remove the headlight socket cover from the headlight unit.
| 5. REMOVE FRONT TURN SIGNAL LIGHT BULB |
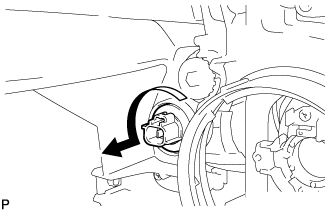 |
Turn the front turn signal light socket with the front turn signal light bulb in the direction indicated by the arrow shown in the illustration, and remove them as a unit.
Remove the front turn signal light bulb from the front turn signal light socket.
| 6. REMOVE CLEARANCE LIGHT BULB |
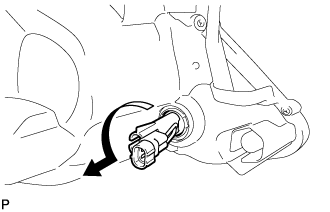 |
Turn the clearance light socket with the clearance light bulb in the direction indicated by the arrow shown in the illustration, and remove them as a unit.
Remove the clearance light bulb from the clearance light socket.
| 7. REMOVE HEADLIGHT LEVELING MOTOR |
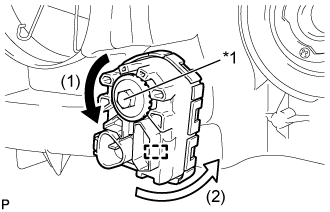 |
Turn the aiming screw of the headlight leveling motor in the direction indicated by the arrow (1) shown in the illustration.
| *1 | Aiming Screw |
Turn the headlight leveling motor in the direction indicated by the arrow (2) shown in the illustration to disengage the pin.
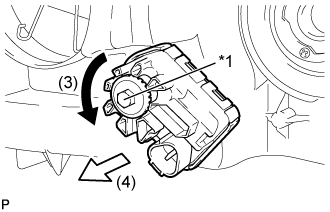 |
Turn the aiming screw of the headlight leveling motor in the direction indicated by the arrow (3) shown in the illustration to disengage the shaft.
| *1 | Aiming Screw |
Pull out the headlight leveling motor in the direction indicated by the arrow (4) shown in the illustration to remove it.
| 8. REMOVE HEADLIGHT LEVELING MOTOR BASE PACKING |
Remove the headlight leveling motor base packing.
| 9. REMOVE GROMMET |
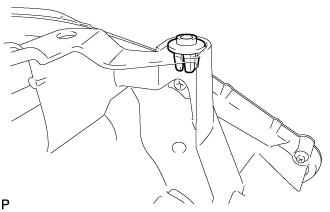 |
Using needle-nosed pliers, remove the grommet.