Home › Steering › STEERING COLUMN › STEERING COLUMN ASSEMBLY

STEERING COLUMN ASSEMBLY > INSPECTION

for Preparation Click here


NOTICE:
When using a vise, do not overtighten it.


1. INSPECT PRELOAD


    C236194E01
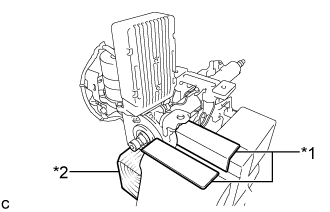
  1. Secure the steering column assembly in a vice using aluminum plates and wooden block as shown in the illustration.
    Text in Illustration 
    *1
    Aluminum Plate
    *2
    Wooden Block

    NOTICE:
    1. Do not overtighten the vice, as the steering column assembly may become deformed.
    2. Support the steering column assembly with a wooden block or similar item to ensure that it does not fall.

    C220801E02
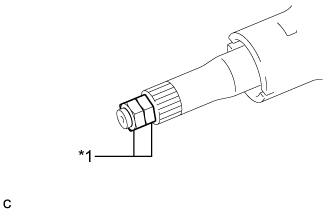
  1. Install the 2 service nuts to the steering main shaft.
    Text in Illustration 
    *1
    Service Nut

    Recommended service nut:
    Thread diameter:
    12.0 mm (0.472 in.)
    Thread pitch:
    1.25 mm (0.0492 in.)

  1. Simultaneously rotate the service nut that was installed first counterclockwise and rotate the service nut that was installed second clockwise to lock them.

    NOTICE:
    Do not apply excess torque to the service nuts by using a tool such as an impact wrench.

    HINT:
    These nuts are installed to turn the steering main shaft. They should be removed after inspecting the steering main shaft rotating torque.


    C239329
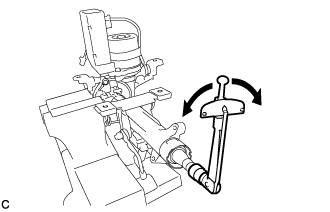
  1. Using a torque wrench, turn the main shaft and measure the preload.

    Preload:
    1.2 to 1.7 N*m (12 to 17 kgf*cm, 10 to 15 in.*lbf)

    If the preload is not as specified, replace the power steering ECU with motor assembly or electric power steering column sub-assembly with a new one.