 |
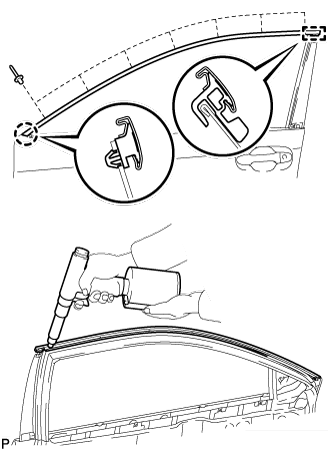
Engage the claw and guide of the front door upper window frame moulding to the door frame.
FRONT DOOR WINDOW FRAME MOULDING > INSTALLATION |
| 1. INSTALL FRONT DOOR UPPER WINDOW FRAME MOULDING |
|
Engage the claw and guide of the front door upper window frame moulding to the door frame.
Using an air riveter or hand riveter with a nose piece, install the front door upper window frame moulding with 7 new rivets.
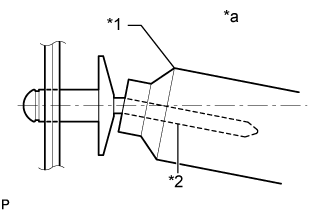 |
| *1 | Riveter |
| *2 | Mandrel |
| *a | Incorrect |
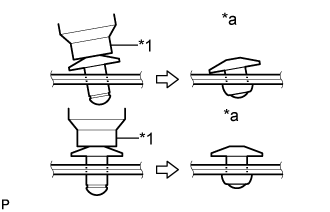 |
| *1 | Riveter |
| *a | Incorrect |
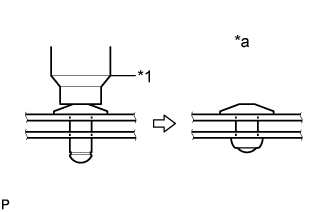 |
| *1 | Riveter |
| *a | Incorrect |
| 2. INSTALL FRONT DOOR REAR WINDOW FRAME MOULDING |
| Item | Temperature |
| Vehicle Body | 40 to 60°C (104 to 140°F) |
| Moulding | 20 to 30°C (68 to 86°F) |
Clean the vehicle body surface.
Using a heat light, heat the vehicle body surface.
Remove the double-sided tape from the vehicle body.
Wipe off any tape adhesive residue with cleaner.
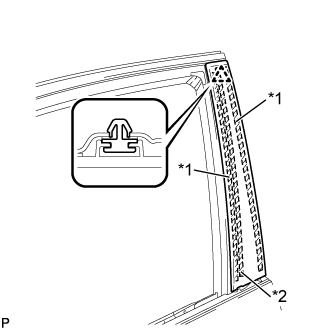 |
Install a new front door rear window frame moulding.
| *1 | Double-sided Tape |
| *2 | Caulking Sponge |
Using a heat light, heat the vehicle body and front door rear window frame moulding.
Remove the release paper from the face of the front door rear window frame moulding.
Install the front door rear window frame moulding with the clip.
| 3. INSTALL FRONT DOOR WEATHERSTRIP |
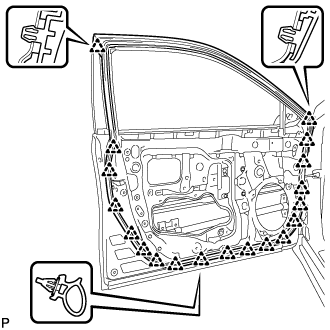 |
Engage the 19 clips and install the front door weatherstrip.
| 4. INSTALL FRONT DOOR CHECK ASSEMBLY |
Apply MP grease to the sliding areas of the front door check assembly.
Apply adhesive to the threads of the bolt (A).
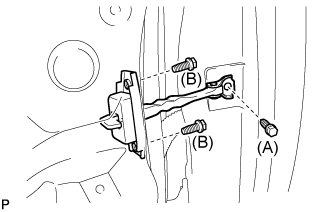 |
Install the front door check assembly with the 3 bolts.
| 5. INSTALL FRONT DOOR GLASS RUN |
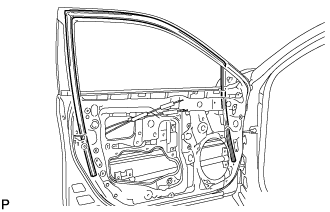 |
Install the front door glass run.
| 6. INSTALL FRONT DOOR BELT MOULDING ASSEMBLY |