 |
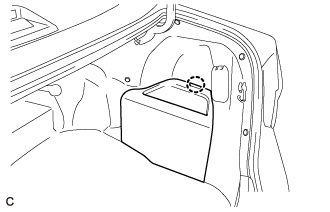
Disengage the claw to remove the luggage trim service hole cover.
FRONT DOOR BELT MOULDING > REMOVAL |
| 1. PRECAUTION |
| 2. REMOVE LUGGAGE TRIM SERVICE HOLE COVER |
|
Disengage the claw to remove the luggage trim service hole cover.
| 3. DISCONNECT CABLE FROM NEGATIVE AUXILIARY BATTERY TERMINAL |
| 4. REMOVE OUTER REAR VIEW MIRROR ASSEMBLY |
| 5. REMOVE FRONT DOOR SERVICE HOLE COVER |
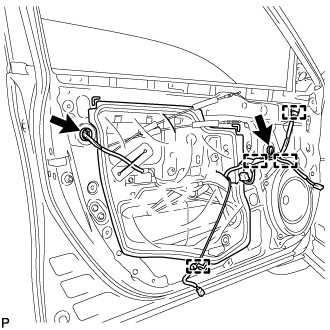 |
Disconnect each connector.
Disengage the 4 clamps.
Remove the front door service hole cover.
| 6. REMOVE FRONT DOOR GLASS SUB-ASSEMBLY |
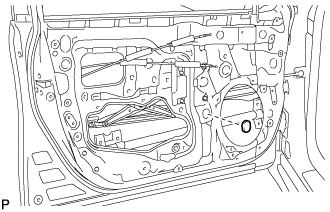 |
Remove the grommet.
Connect the cable to the negative (-) auxiliary battery terminal.
Connect the multiplex network master switch assembly and move the front door glass sub-assembly so that the door glass bolts can be seen.
Disconnect the cable from the negative (-) auxiliary battery terminal.
Disconnect the multiplex network master switch assembly.
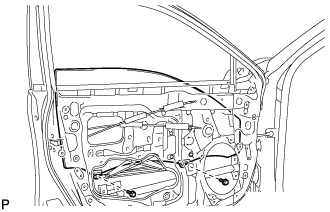 |
Remove the 2 bolts.
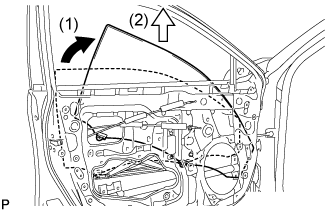 |
Remove the front door glass sub-assembly as indicated by the arrows, in the order shown in the illustration.
| 7. REMOVE FRONT DOOR BELT MOULDING ASSEMBLY |
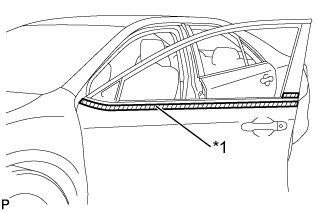 |
Put protective tape around the front door belt moulding assembly.
| *1 | Protective Tape |
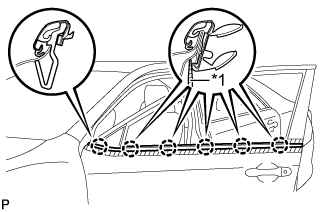 |
Using a screwdriver with the tip wrapped with protective tape, disengage the 6 claws and remove the front door belt moulding assembly.
| *1 | Protective Tape |