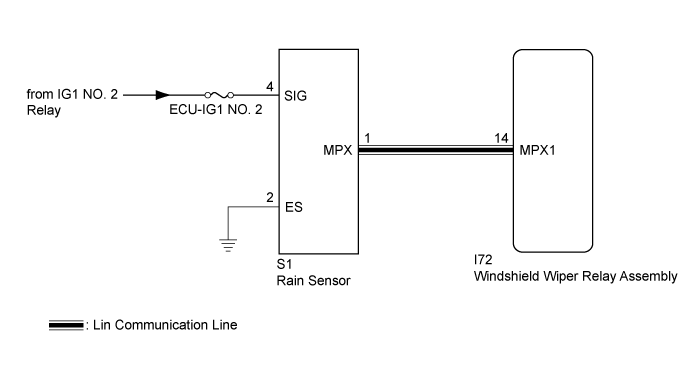
WIPER AND WASHER SYSTEM > Rain Sensor Circuit |
| 1.CHECK HARNESS AND CONNECTOR (WINDSHIELD WIPER RELAY ASSEMBLY - RAIN SENSOR) |
Disconnect the I72 windshield wiper relay assembly connector.
Disconnect the S1 rain sensor connector.
Measure the resistance according to the value(s) in the table below.
| Tester Connection | Condition | Specified Condition |
| I72-14 (MPX1) - S1-1 (MPX) | Always | Below 1 Ω |
| S1-1 (MPX) - Body ground | Always | 10 kΩ or higher |
|
| ||||
| OK | |
 |
| 2.CHECK HARNESS AND CONNECTOR (RAIN SENSOR - AUXILIARY BATTERY AND BODY GROUND) |
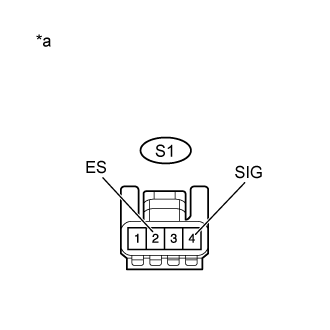 |
Measure the voltage according to the value(s) in the table below.
| Tester Connection | Condition | Specified Condition |
| S1-4 (SIG) - S1-2 (ES) | Power switch on (IG) | 11 to 14 V |
Measure the resistance according to the value(s) in the table below.
| Tester Connection | Condition | Specified Condition |
| S1-2 (ES) - Body ground | Always | Below 1 Ω |
| *a | Component with harness connected (Rain Sensor) |
|
| ||||
| OK | |
|
| 3.INSPECT RAIN SENSOR |
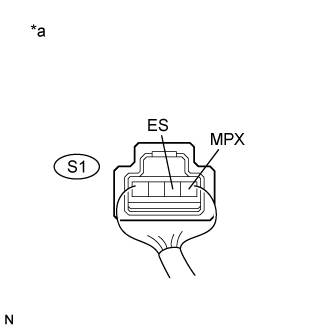 |
Reconnect the S1 rain sensor connector.
Connect an oscilloscope to the rain sensor connector.
Check for pulses.
| Tester Connection | Condition | Specified Condition |
| S1-1 (MPX) - S1-2 (ES) | Power switch on (IG) | Pulse generation |
| *a | Component with harness connected (Rain Sensor) |
|
| ||||
| OK | ||
 | ||
| ||
