Home › Engine / Hybrid System › HYBRID / BATTERY CONTROL › HV RELAY ASSEMBLY

HV RELAY ASSEMBLY > REMOVAL

for Preparation Click here


1. PRECAUTION
(Click here)


2. REMOVE SERVICE PLUG GRIP
(Click here)


3. REMOVE CONNECTOR COVER ASSEMBLY

CAUTION:
  1. Do not touch the high voltage connectors and terminals for 10 minutes after the service plug grip is removed.
  2. Wear insulated gloves.

NOTICE:
Do not start the hybrid system with the service plug grip removed because it may cause a malfunction.


    A258734
  1. Remove the 2 bolts and connector cover assembly.

    NOTICE:
    1. Make sure to pull the connector cover assembly straight up, as a connector is connected to the bottom of the cover.
    2. Do not allow any foreign objects or water to enter the inverter with converter assembly.
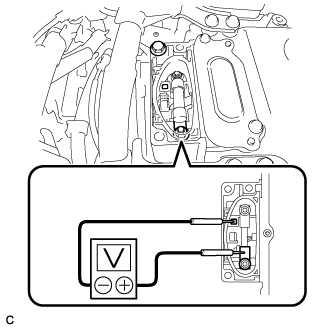


4. CHECK TERMINAL VOLTAGE

CAUTION:
Wear insulated gloves.

NOTICE:
Do not allow any foreign objects or water to enter the inverter with converter assembly.


    A258735
  1. Using a voltmeter, measure the voltage between the terminals of the 2 phase connectors.

    Standard voltage:
    0 V

    HINT:
    Use a measuring range of DC 750 V or more on the voltmeter.


5. INSTALL CONNECTOR COVER ASSEMBLY

CAUTION:
Wear insulated gloves.

NOTICE:
  1. Make sure that the interlock is fully engaged.
  2. Do not allow any foreign objects or water to enter the inverter with converter assembly.
  1. Install the connector cover assembly with the 2 bolts.

    Torque:
    8.0 N*m{ 82 kgf*cm , 71 in.*lbf }


6. REMOVE REAR SEAT CUSHION ASSEMBLY


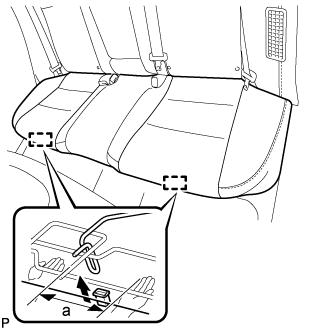
    B298856E01
  1. Disengage the hook of the seat cushion from the vehicle body as shown in the illustration.
    Standard Measurement 
    a
    100 mm (3.94 in.) or less

    NOTICE:
    Follow the instructions below carefully as the cushion frame can be deformed easily.


    1. Choose a hook to disengage first. Place your hands near the hook as shown in the illustration. Then lift the seat cushion to disengage the hook.

    2. Repeat the step above for the other hook.

  1. Remove the rear seat cushion assembly.

    NOTICE:
    Be careful not to damage the vehicle body.


7. REMOVE REAR SEAT CUSHION LOCK HOOK


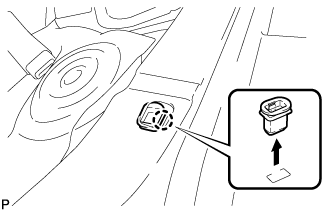
    B279203
  1. Disengage the claw and remove the rear seat cushion lock hook.

    NOTICE:
    Rear seat cushion lock hooks must not be reused.

    HINT:
    Use the same procedure for the LH side and RH side.


8. SEPARATE REAR SEATBACK ASSEMBLY RH
  1. Fold down the rear seatback assembly RH.


9. REMOVE REAR SIDE SEATBACK ASSEMBLY RH
  1. Disconnect the rear seat outer belt from the rear seat shoulder belt guide RH.


    B284999
  1. Remove the bolt.

  1. Disengage the hook and remove the rear side seatback assembly RH.

    NOTICE:
    Be careful not to damage the vehicle body.


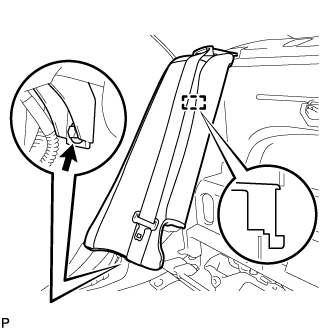
10. REMOVE ROOM PARTITION BOARD LH


    B285001
  1. Using a clip remover, remove the clip.

  1. Disengage the 5 claws and clip, and remove the room partition board LH.


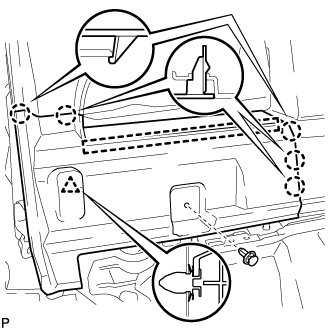
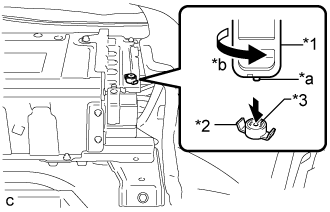
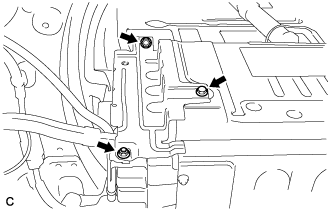
11. REMOVE NO. 4 HYBRID BATTERY SHIELD PANEL

CAUTION:
Wear insulated gloves.


    A259416E01
  1. Using the service plug grip, remove the battery cover lock striker.
    Text in Illustration 
    *1
    Service Plug Grip
    *2
    Battery Cover Lock Striker
    *3
    Button
    *a
    Projection
    *b
    Turn

    HINT:
    Insert the projecting part of the service plug grip, and turn the button of the battery cover lock striker counterclockwise to release the lock.


    A259419
  1. Remove the bolt, 2 nuts and No. 4 hybrid battery shield panel.


12. DISCONNECT NO. 4 FLOOR WIRE

CAUTION:
Wear insulated gloves.

NOTICE:
Insulate the disconnected connectors with insulating tape.


    A259420
  1. Disconnect the 2 connectors shown in the illustration.

  1. Disconnect the shielded wire ground and disconnect the No. 4 floor wire.


13. REMOVE NO. 1 HYBRID BATTERY SHIELD SUB-ASSEMBLY

CAUTION:
Wear insulated gloves.


    A259421
  1. Disconnect the connector and wire harness clamp.


    A259429
  1. Remove the bolt, 3 nuts and No. 1 hybrid battery shield sub-assembly.


14. REMOVE HYBRID BATTERY JUNCTION BLOCK ASSEMBLY

CAUTION:
Wear insulated gloves.

NOTICE:
Insulate the disconnected terminals with insulating tape.


    A259431
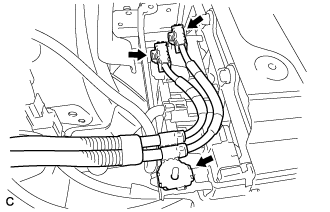
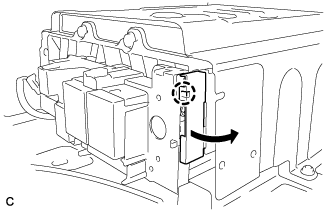
  1. Disengage the claw and disconnect the terminal cover.


    A259432
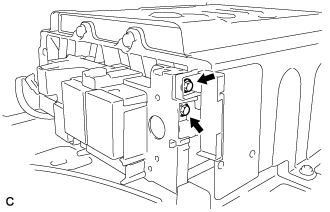
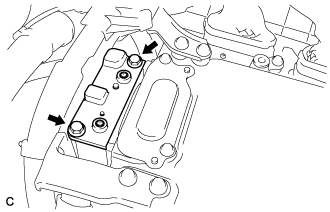
  1. Using an insulated tool, remove the 2 bolts.


    A259430
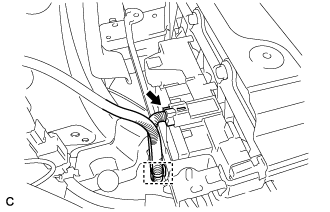
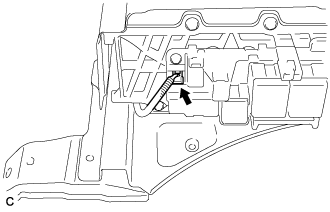
  1. Disconnect the connector shown in the illustration.


    A259433
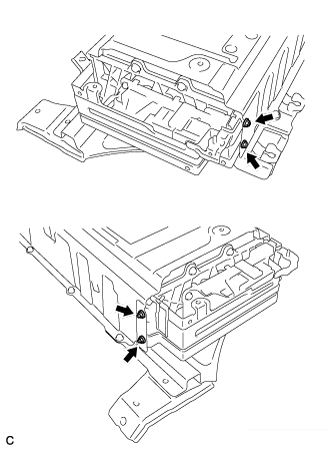
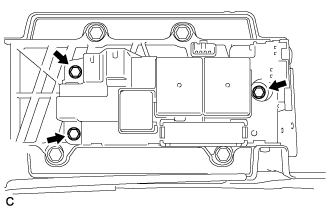
  1. Remove the 3 bolts and hybrid battery junction block assembly.