 |
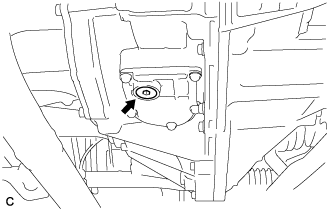
Using a hexagon wrench (10 mm), remove the drain plug indicated in the illustration and drain the coolant.
- CAUTION:
- Use caution when handling coolant immediately after driving or in summer because it may be hot.
SUB RADIATOR > REMOVAL |
| 1. DRAIN COOLANT (for Inverter) |
Remove the reserve tank cap.
|
Using a hexagon wrench (10 mm), remove the drain plug indicated in the illustration and drain the coolant.
Install the plug with a new gasket.
| 2. REMOVE FRONT BUMPER ASSEMBLY |
| 3. REMOVE FRONT BUMPER ENERGY ABSORBER |
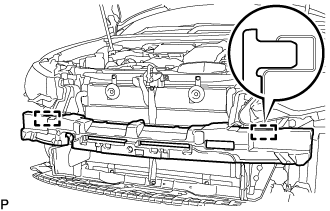 |
Disengage the 2 guides to remove the front bumper energy absorber.
| 4. REMOVE FRONT BUMPER REINFORCEMENT SUB-ASSEMBLY |
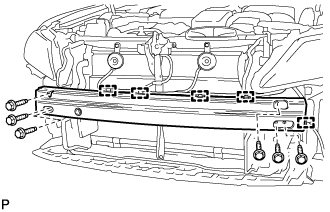 |
Disengage the 5 clamps.
Remove the 6 bolts and front bumper reinforcement sub-assembly.
| 5. REMOVE INLET AIR CLEANER ASSEMBLY |
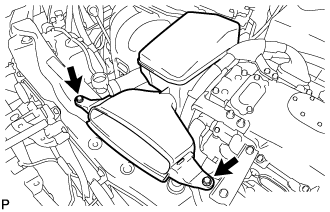 |
Remove the 2 bolts and inlet air cleaner assembly.
| 6. REMOVE NO. 5 INVERTER BRACKET |
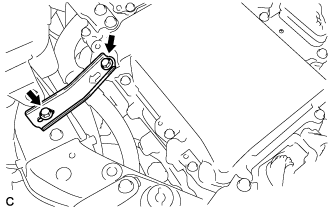 |
Remove the 2 bolts and No. 5 inverter bracket.
| 7. REMOVE RADIATOR RESERVE TANK ASSEMBLY |
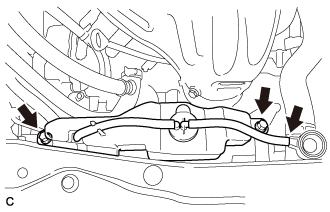 |
Disconnect the radiator reserve tank hose.
Remove the 2 bolts and radiator reserve tank assembly.
| 8. REMOVE HOOD LOCK ASSEMBLY (for LHD) |
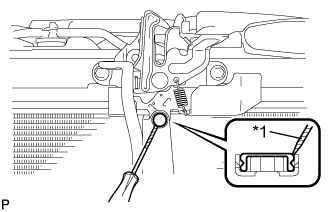 |
Using a screwdriver, remove the hood lock nut cap.
| *1 | Protective Tape |
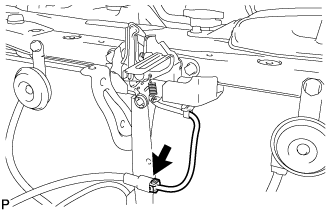 |
Disconnect the connector.
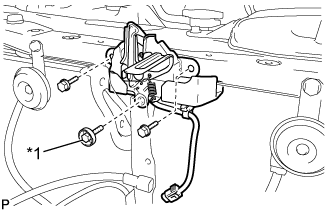 |
Remove the 2 bolts and hood lock bolt.
| *1 | Hood Lock Bolt |
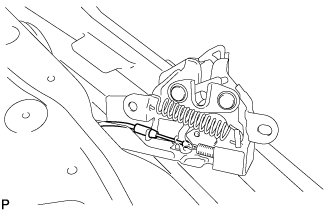 |
Disconnect the hood lock control cable assembly and remove the hood lock assembly.
| 9. REMOVE HOOD LOCK ASSEMBLY (for RHD) |
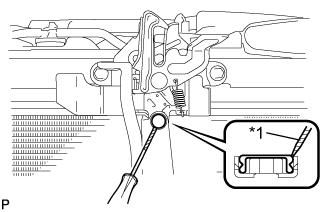 |
Using a screwdriver, remove the hood lock nut cap.
| *1 | Protective Tape |
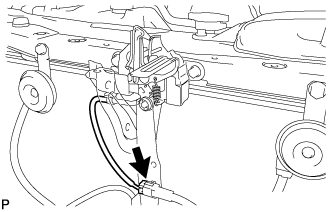 |
Disconnect the connector.
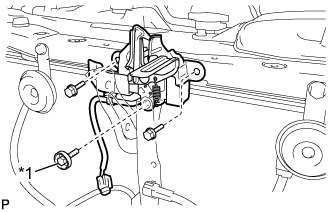 |
Remove the 2 bolts and hood lock bolt.
| *1 | Hood Lock Bolt |
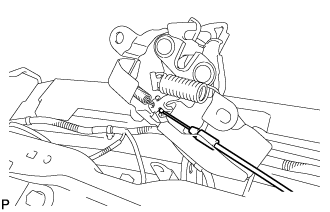 |
Disconnect the hood lock control cable assembly and remove the hood lock assembly.
| 10. REMOVE UPPER RADIATOR SUPPORT |
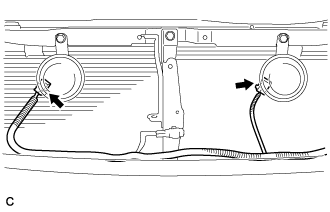 |
Disconnect the 2 connectors.
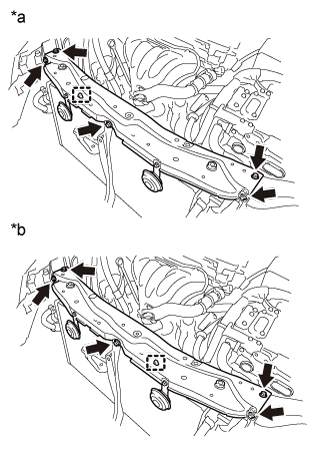 |
Disconnect the hood lock control cable clamp and remove the 5 bolts and upper radiator support.
| *a | for RHD: |
| *b | for LHD: |
Remove the 2 radiator support cushions.
| 11. REMOVE RADIATOR SIDE DEFLECTOR RH |
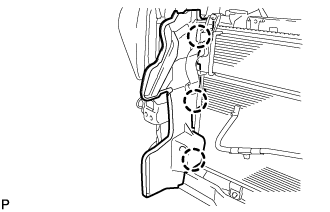 |
Disengage the 3 claws and remove the radiator side deflector RH.
| 12. REMOVE RADIATOR ASSEMBLY |
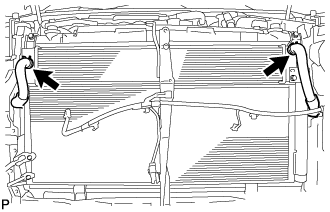 |
Disconnect the 2 water hoses.
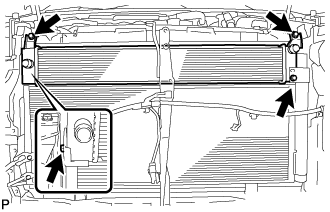 |
Remove the 4 bolts and radiator assembly.