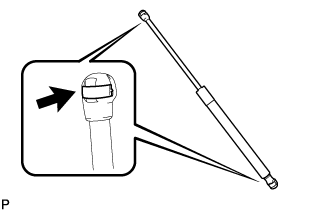
When reusing the hood support assembly:
Install the 2 stop rings to the hood support assembly.
 |
HOOD > REASSEMBLY |
| 1. INSTALL HOOD SUPPORT ASSEMBLY LH |
When reusing the hood support assembly:
|
Install the 2 stop rings to the hood support assembly.
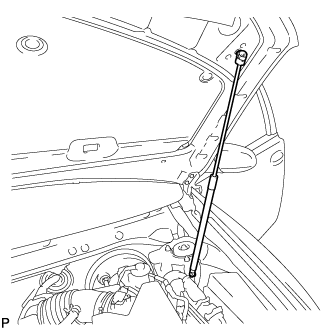 |
Install the hood support assembly.
Check that the hood support assembly is engaged in the ball joint and it cannot be pulled out.
| 2. INSTALL HOOD SUPPORT ASSEMBLY RH |
| 3. CONNECT WASHER HOSE ASSEMBLY |
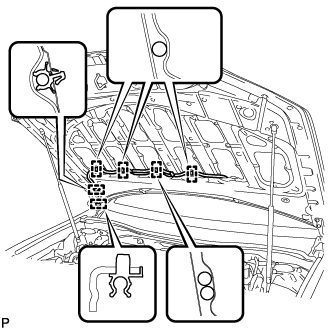 |
Engage the 6 clamps to connect the washer hose assembly.
| 4. INSTALL WASHER NOZZLE SUB-ASSEMBLY |
Connect a new washer nozzle sub-assembly to the washer hose.
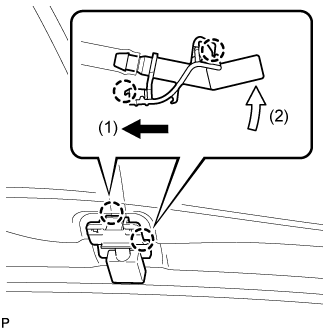 |
Engage the 2 claws to install the washer nozzle sub-assembly as shown in the illustration.
| 5. INSPECT WASHER NOZZLE SUB-ASSEMBLY |
With the power switch on (READY), check the position that the washer fluid hits the windshield.
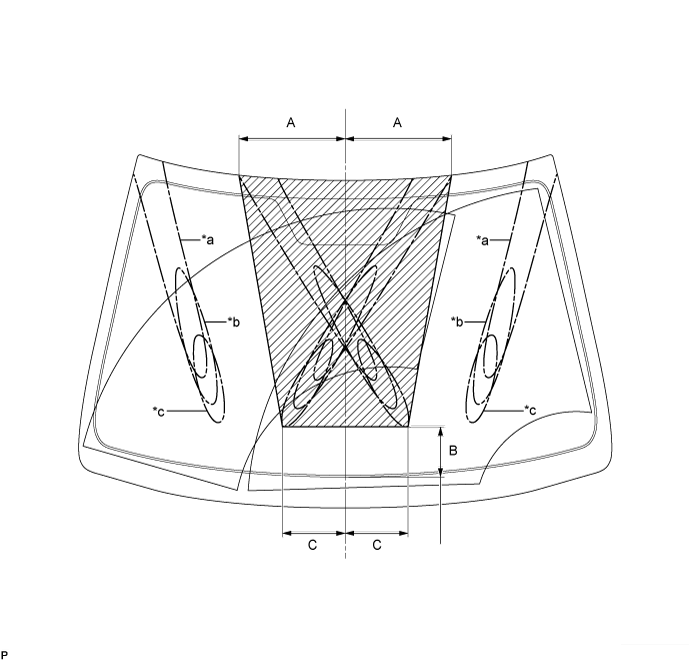
| Area | Measurement | Area | Measurement |
| A | 300.0 mm (11.8 in.) | B | 145.0 mm (5.71 in.) |
| C | 170.0 mm (6.69 in.) | - | - |
| *a | Upper Limit | *b | Standard |
| *c | Lower Limit | - | - |
| 6. ADJUST WASHER NOZZLE SUB-ASSEMBLY |
Select a washer nozzle so that the contact area is within the standard. Replace the washer nozzle with the selected one.
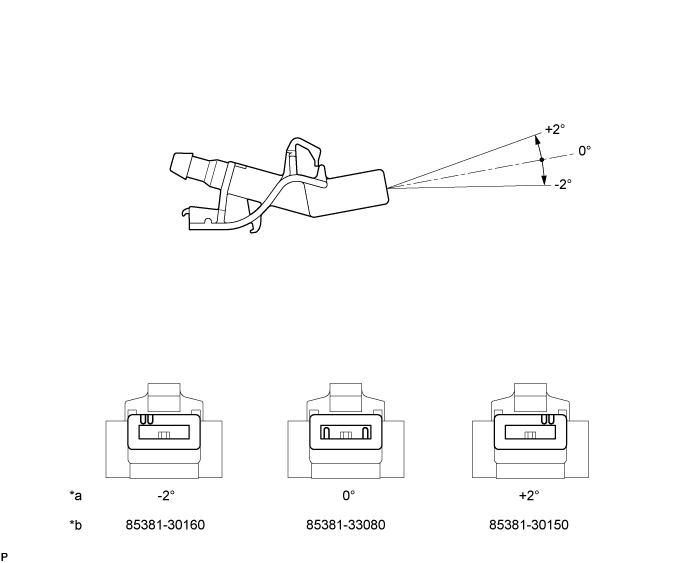
| *a | Washer Fluid Spray Angle | *b | Part Number |
| 7. INSTALL HOOD INSULATOR |
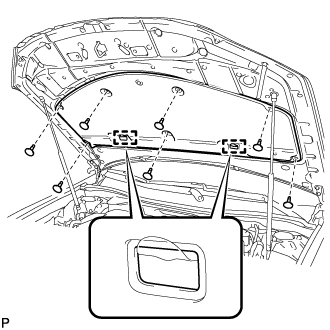 |
Engage the 2 guides.
Install the hood insulator with 7 new clips.
| 8. INSTALL HOOD TO RADIATOR SUPPORT SEAL |
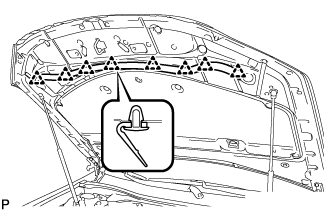 |
Engage the 8 clips to install the hood to radiator support seal.
| 9. INSTALL FRONT HOOD MOULDING ASSEMBLY |
Install the front hood moulding assembly with the 7 nuts.
| 10. INSTALL HOOD CENTER CUSHION |
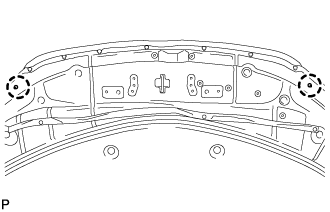 |
Engage the 2 claws to install 2 new hood center cushions.