Home › Vehicle Exterior › DOOR / HATCH › FUEL LID LOCK CONTROL CABLE ASSEMBLY (for LHD)

FUEL LID LOCK CONTROL CABLE ASSEMBLY (for LHD) > INSTALLATION

for Preparation Click here


1. INSTALL FUEL LID LOCK CONTROL CABLE SUB-ASSEMBLY


  1. Install the fuel lid lock control cable sub-assembly to the luggage door lock control cable sub-assembly with the clamp and the 3 pieces of tape as shown in the illustration.
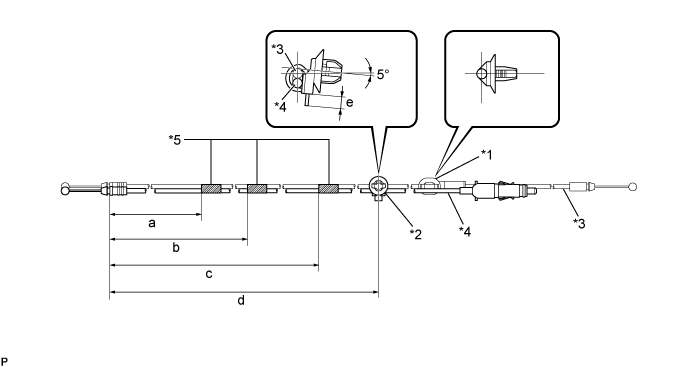

    B280632E01


    Text in Illustration 
    *1
    Clamp (A)
    *2
    Clamp
    *3
    Luggage Door Lock Control Cable Sub-assembly
    *4
    Fuel Lid Lock Control Cable Sub-assembly
    *5
    Tape
    -
    -

    Standard Clearance 
    Area
    Measurement
    Area
    Measurement
    a
    295 to 305 mm (11.6 to 12.0 in.)
    b
    880 to 900 mm (2.29 to 2.95 ft.)
    c
    2090 to 2110 mm (6.86 to 6.92 ft.)
    d
    2970 to 2990 mm (8.86 to 9.81 ft.)
    e
    5.0 mm (0.197 in.) or less
    -
    -

    NOTICE:
    1. Wrap tape around the designated position 1 to 3 times.
    2. Make sure that the fuel lid lock control cable sub-assembly and luggage door lock control cable sub-assembly are not kinked.
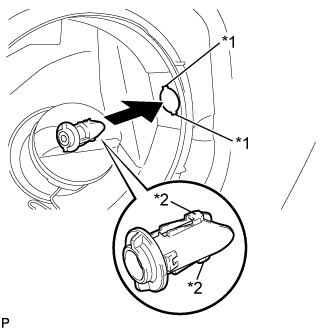
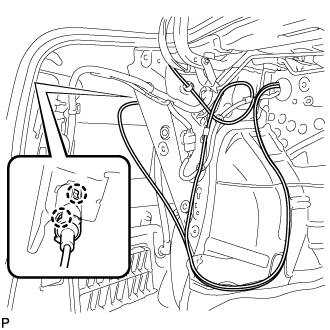
  1. Engage the 10 clamps and install the fuel lid lock control cable sub-assembly and luggage door lock control cable sub-assembly.


    B291310E01
  1. Align the cutouts and guides <C>, and then insert the fuel filler opening lid lock retainer.
    Text in Illustration 
    *1
    Cutout
    *2
    Guide <C>


    B291312E01
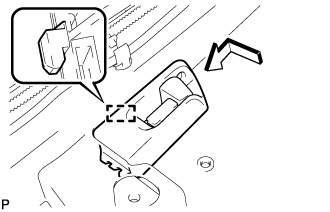
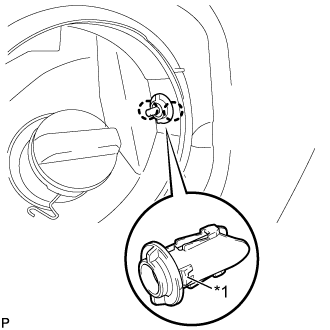
  1. Engage the 2 claws to install the fuel filler opening lid lock retainer.
    Text in Illustration 
    *1
    Claw


    B280601
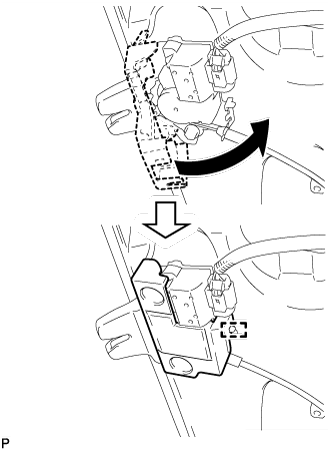
  1. Engage the 2 claws to install the fuel lid lock control cable sub-assembly.

  1. Engage the clamp and connect the luggage door lock control cable sub-assembly.

  1. Connect the luggage door lock control cable sub-assembly.


    B283879
  1. Engage the guide as shown in the illustration.

  1. Return the floor carpet to the original position.

  1. Engage the 2 clamps and install the 2 scuff plate clips.

  1. Engage the 3 clamps to connect the wire harness.


2. INSTALL FUEL LID LOCK OPEN LEVER SUB-ASSEMBLY


    B280598E01
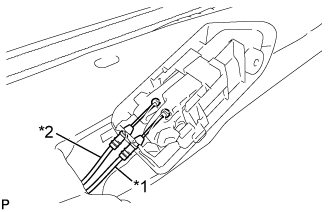
  1. Connect the fuel lid lock control cable sub-assembly and luggage door lock control cable sub-assembly to the fuel lid lock open lever sub-assembly.
    Text in Illustration 
    *1
    Luggage Door Lock Control Cable Sub-assembly
    *2
    Fuel Lid Lock Control Cable Sub-assembly


    E227151
  1. Engage the guide and install the fuel lid lock open lever sub-assembly as shown in the illustration.

  1. Install the screw.


3. INSTALL LUGGAGE COMPARTMENT INNER TRIM COVER LH
  1. Install the 3 clips.

  1. Engage the fastener and install the luggage compartment inner trim cover LH.


4. INSTALL NO. 1 LUGGAGE COMPARTMENT TRIM HOOK


    B288531E01
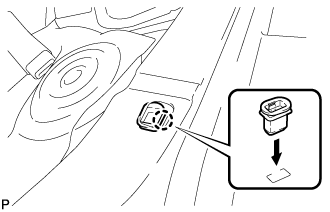
  1. Engage the pin to install the No. 1 luggage compartment trim hook.
    Text in Illustration 
    *1
    Pin


5. INSTALL LUGGAGE COMPARTMENT FRONT TRIM COVER
  1. Engage the 2 claws.

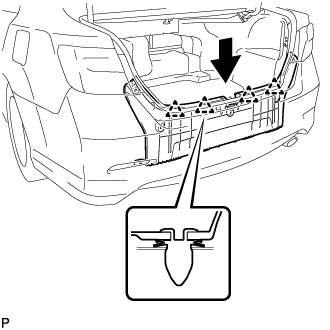
  1. Engage the 8 fasteners and install the luggage compartment front trim cover.


6. INSTALL REAR FLOOR FINISH PLATE


    B287056
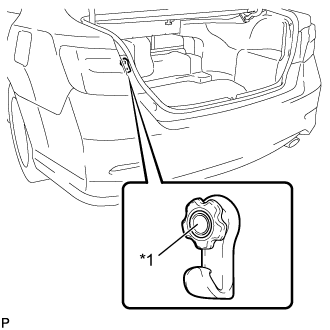
  1. Engage the 4 clips and install the rear floor finish plate.

  1. Install the 5 clips.


7. INSTALL BAGGAGE HOLDER NET
  1. Install the baggage holder net.


8. INSTALL LUGGAGE COMPARTMENT FLOOR MAT
  1. Install the luggage compartment floor mat.


9. INSTALL LUGGAGE COMPARTMENT DOOR COVER


    B281699
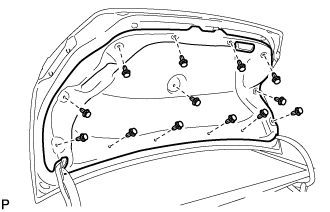
  1. Install the luggage compartment door cover with the 13 clips.


10. INSTALL REAR SIDE SEATBACK ASSEMBLY LH
  1. Place the rear side seatback assembly LH in the cabin.

    NOTICE:
    Be careful not to damage the vehicle body.

  1. Engage the hook to install the rear side seatback assembly LH with the bolt.

    Torque:
    18 N*m{ 184 kgf*cm , 13 ft.*lbf }

  1. Connect the rear seat outer belt to the rear seat shoulder belt guide LH.


11. INSTALL REAR SEAT CUSHION LOCK HOOK


    B280246
  1. Engage the claw to install a new rear seat cushion lock hook.

    NOTICE:
    Rear seat cushion lock hooks must not be reused.

    HINT:
    Use the same procedure as for the LH side.


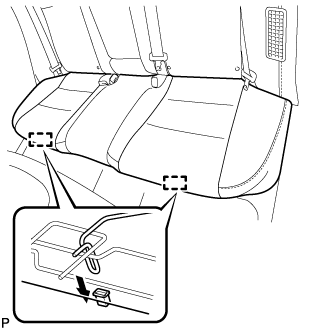
12. INSTALL REAR SEAT CUSHION ASSEMBLY
  1. Place the rear seat cushion assembly in the cabin.

    NOTICE:
    Be careful not to damage the vehicle body.


    B298857
  1. Engage the 2 hooks of the rear seat cushion assembly to the vehicle body as shown in the illustration.

  1. Confirm that the rear seat cushion assembly is firmly installed.

    NOTICE:
    When installing the rear seat cushion assembly, make sure that the seat belt buckles are not under the rear seat cushion assembly.


13. INSTALL CENTER PILLAR LOWER GARNISH LH
  1. Engage the 2 claws and 3 clips to install the center pillar lower garnish LH.


14. CONNECT FRONT SEAT OUTER BELT ASSEMBLY LH
  1. Install the floor anchor of the front seat outer belt assembly with the bolt.

    Torque:
    42 N*m{ 428 kgf*cm , 31 ft.*lbf }

  1. Check if the ELR locks.

    NOTICE:
    The check should be performed with the front seat outer belt assembly installed.


    1. With the belt assembly installed, check that the belt locks when it is pulled out quickly.


15. INSTALL LAP BELT OUTER ANCHOR COVER
  1. Engage the 3 claws to install the lap belt outer anchor cover.


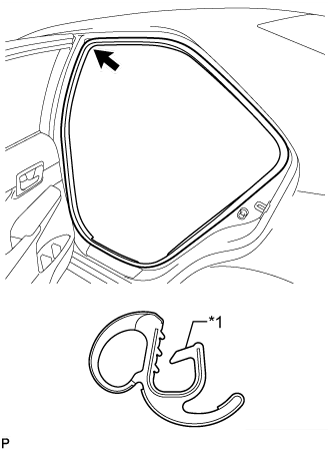
16. INSTALL REAR DOOR OPENING TRIM WEATHERSTRIP LH


    B278982E01
  1. Align the alignment mark (Red) on the weatherstrip with the protruding portion on the body indicated by the arrow in the illustration, and install the rear door opening trim weatherstrip LH.
    Text in Illustration 
    *1
    Alignment Mark (Red)

    NOTICE:
    After installation, check that the corners fit correctly.


17. INSTALL REAR DOOR SCUFF PLATE LH
  1. Engage the 6 claws to install the rear door scuff plate LH.

    HINT:
    Engage the claws from the rear side of the scuff plate.


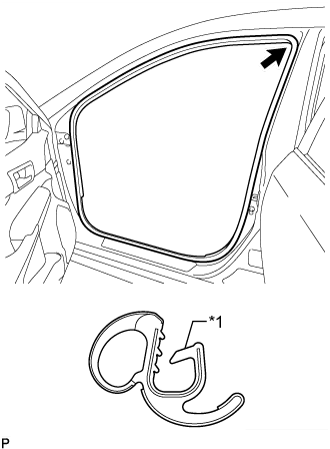
18. INSTALL FRONT DOOR OPENING TRIM WEATHERSTRIP LH


    B278980E01
  1. Align the alignment mark (Yellow) on the weatherstrip with the protruding portion on the body indicated by the arrow in the illustration, and install the front door opening trim weatherstrip LH.
    Text in Illustration 
    *1
    Alignment Mark (Yellow)

    NOTICE:
    After installation, check that the corners fit correctly.


19. INSTALL FRONT DOOR SCUFF PLATE LH
  1. Engage the 10 claws to install the front door scuff plate LH.


20. INSTALL FRONT SEAT ASSEMBLY LH
(Click here)