 |
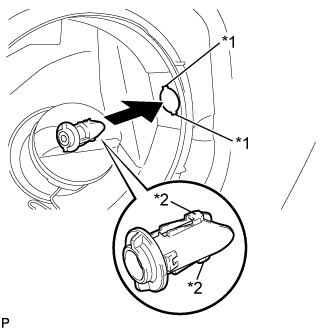
Align the cutouts and guides <C>, and then insert the fuel filler opening lid lock retainer.
| *1 | Cutout |
| *2 | Guide <C> |
FUEL LID LOCK CONTROL CABLE ASSEMBLY (for RHD) > INSTALLATION |
| 1. INSTALL FUEL LID LOCK CONTROL CABLE SUB-ASSEMBLY |
Engage the 7 clamps and install the fuel lid lock control cable sub-assembly and luggage door lock control cable sub-assembly.
|
Align the cutouts and guides <C>, and then insert the fuel filler opening lid lock retainer.
| *1 | Cutout |
| *2 | Guide <C> |
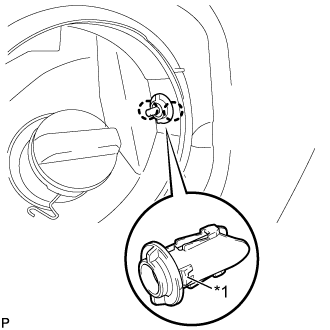 |
Engage the 2 claws and install the fuel filler opening lid lock retainer.
| *1 | Claw |
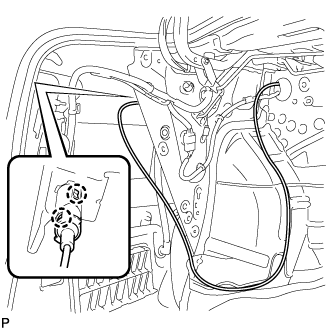 |
Engage the 2 claws and install the fuel lid lock control cable sub-assembly.
Install a new No. 2 noise control plate.
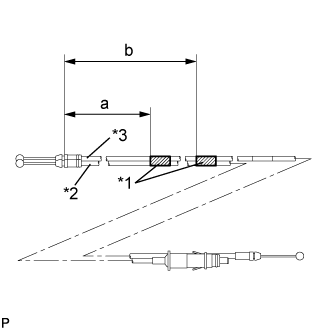 |
Install the fuel lid lock control cable sub-assembly to the luggage door lock control cable sub-assembly with the 2 pieces of tape as shown in the illustration.
| *1 | Tape |
| *2 | Fuel Lid Lock Control Cable Sub-assembly |
| *3 | Luggage Door Lock Control Cable Sub-assembly |
| Area | Measurement |
| a | 295 to 305 mm (11.6 to 12.0 in.) |
| b | 935 to 955 mm (3.06 to 3.13 ft.) |
Return the floor carpet to the original position.
Engage the 2 clamps and install the 2 scuff plate clips.
Engage the 3 clamps and connect the wire harness.
| 2. INSTALL FUEL LID LOCK OPEN LEVER SUB-ASSEMBLY |
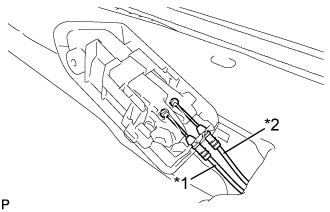 |
Connect the fuel lid lock control cable sub-assembly and luggage door lock control cable sub-assembly to the fuel lid lock open lever sub-assembly.
| *1 | Luggage Door Lock Control Cable Sub-assembly |
| *2 | Fuel Lid Lock Control Cable Sub-assembly |
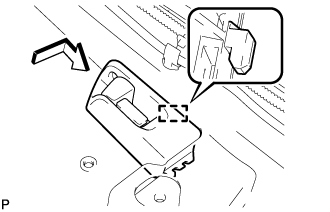 |
Engage the guide and install the fuel lid lock open lever sub-assembly as shown in the illustration.
Install the screw.
| 3. INSTALL LUGGAGE COMPARTMENT INNER TRIM COVER LH |
Install the 3 clips.
Engage the fastener and install the luggage compartment inner trim cover LH.
| 4. INSTALL NO. 1 LUGGAGE COMPARTMENT TRIM HOOK |
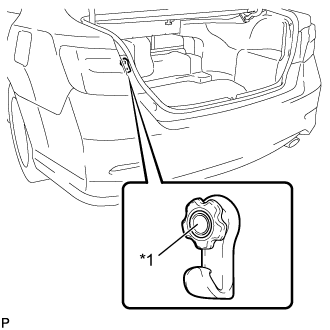 |
Engage the pin to install the No. 1 luggage compartment trim hook.
| *1 | Pin |
| 5. INSTALL LUGGAGE COMPARTMENT FRONT TRIM COVER |
Engage the 2 claws.
Engage the 8 fasteners and install the luggage compartment front trim cover.
| 6. INSTALL REAR FLOOR FINISH PLATE |
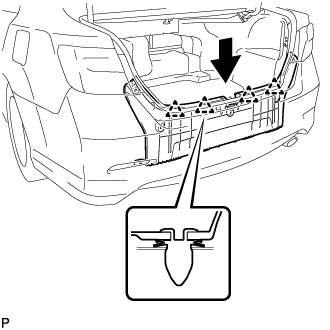 |
Engage the 4 clips and install the rear floor finish plate.
Install the 5 clips.
| 7. INSTALL BAGGAGE HOLDER NET |
Install the baggage holder net.
| 8. INSTALL LUGGAGE COMPARTMENT FLOOR MAT |
Install the luggage compartment floor mat.
| 9. INSTALL REAR SIDE SEATBACK ASSEMBLY LH |
Place the rear side seatback assembly LH in the cabin.
Engage the hook to install the rear side seatback assembly LH with the bolt.
Connect the rear seat outer belt to the rear seat shoulder belt guide LH.
| 10. INSTALL REAR SEAT CUSHION LOCK HOOK |
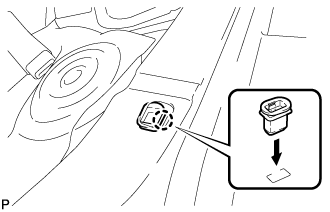 |
Engage the claw to install a new rear seat cushion lock hook.
| 11. INSTALL REAR SEAT CUSHION ASSEMBLY |
Place the rear seat cushion assembly in the cabin.
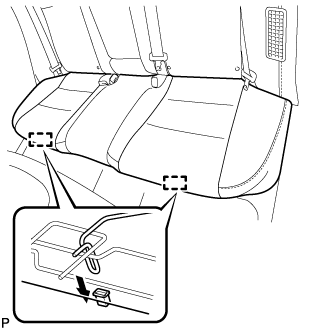 |
Engage the 2 hooks of the rear seat cushion assembly to the vehicle body as shown in the illustration.
Confirm that the rear seat cushion assembly is firmly installed.
| 12. INSTALL REAR DOOR SCUFF PLATE LH |
Engage the 6 claws to install the rear door scuff plate LH.
| 13. INSTALL CENTER PILLAR LOWER GARNISH RH |
| 14. CONNECT FRONT SEAT OUTER BELT ASSEMBLY RH |
| 15. INSTALL LAP BELT OUTER ANCHOR COVER |
| 16. INSTALL REAR DOOR OPENING TRIM WEATHERSTRIP RH |
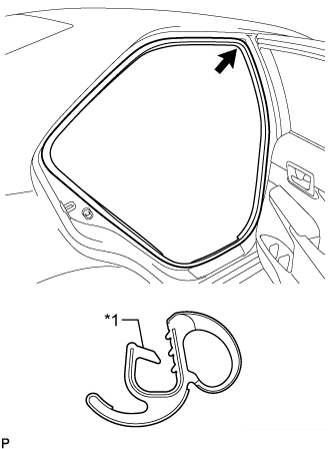 |
Align the alignment mark (Blue) on the weatherstrip with the protruding portion on the body indicated by the arrow in the illustration, and install the rear door opening trim weatherstrip RH.
| *1 | Alignment Mark (Blue) |
| 17. INSTALL REAR DOOR SCUFF PLATE RH |
| 18. INSTALL FRONT DOOR OPENING TRIM WEATHERSTRIP RH |
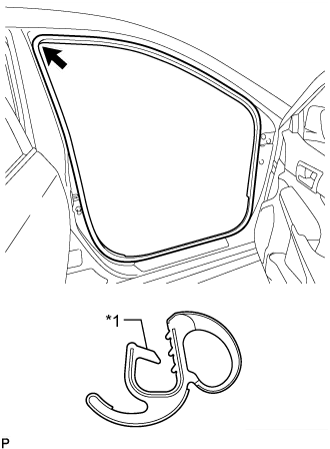 |
Align the alignment mark (White) on the weatherstrip with the protruding portion on the body indicated by the arrow in the illustration, and install the front door opening trim weatherstrip RH.
| *1 | Alignment Mark (White) |
| 19. INSTALL FRONT DOOR SCUFF PLATE RH |
| 20. INSTALL FRONT SEAT ASSEMBLY RH |