 |
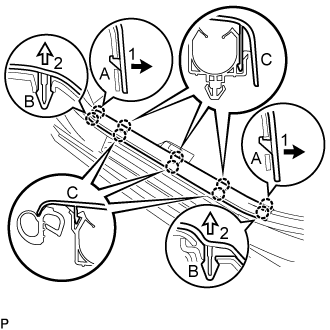
Disengage the 2 claws (A) in the direction indicated by the arrows (1) shown in the illustration.
FRONT DOOR COURTESY SWITCH > REMOVAL |
| 1. REMOVE FRONT DOOR SCUFF PLATE |
|
Disengage the 2 claws (A) in the direction indicated by the arrows (1) shown in the illustration.
Disengage the 2 claws (B) in the direction indicated by the arrows (2) shown in the illustration.
Disengage the 6 claws (C) to remove the front door scuff plate LH.
| 2. DISCONNECT FRONT DOOR OPENING TRIM WEATHERSTRIP |
Disconnect the front door opening trim weatherstrip.
| 3. REMOVE REAR DOOR SCUFF PLATE |
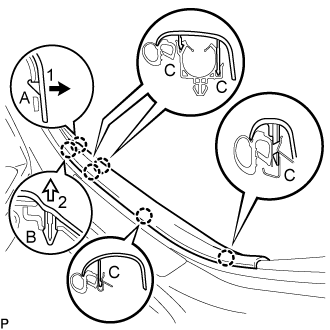 |
Disengage the claw (A) in the direction indicated by the arrow (1) shown in the illustration.
Disengage the claw (B) in the direction indicated by the arrow (2) shown in the illustration.
Disengage the 4 claws (C) to remove the rear door scuff plate LH.
| 4. DISCONNECT REAR DOOR OPENING TRIM WEATHERSTRIP |
Disconnect the rear door opening trim weatherstrip.
| 5. REMOVE CENTER PILLAR LOWER GARNISH |
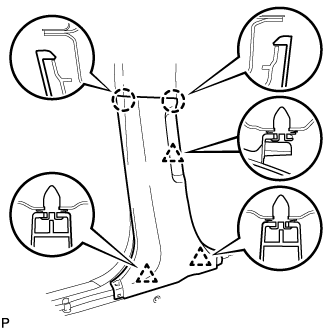 |
Disengage the 2 claws and 3 clips, and remove the center pillar lower garnish LH.
| 6. REMOVE FRONT DOOR COURTESY LIGHT SWITCH ASSEMBLY |
Disconnect the connector.
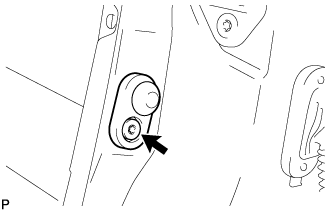 |
Using a T30 "TORX" socket wrench, remove the screw and front door courtesy light switch assembly.