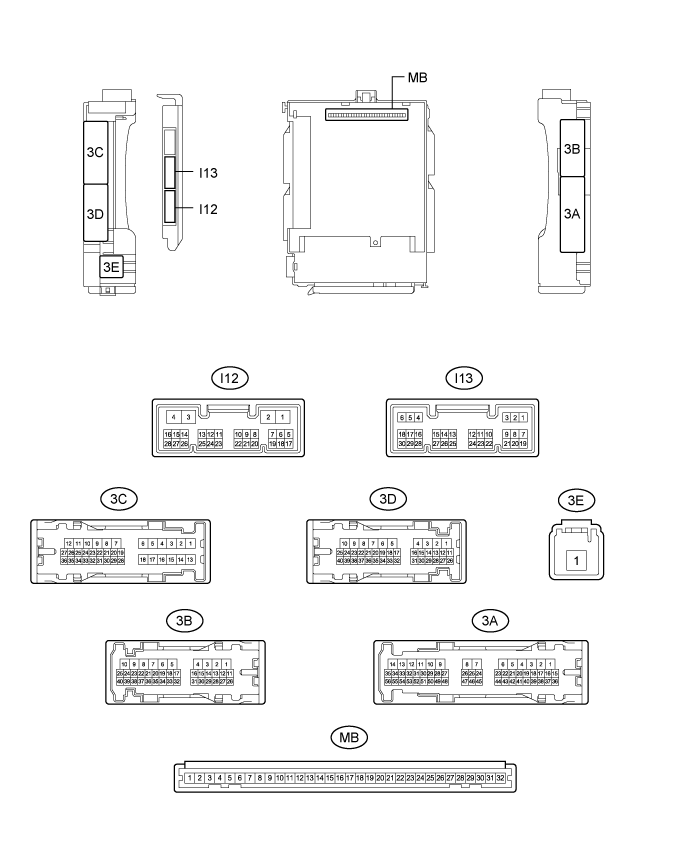
AUTOMATIC HIGH BEAM SYSTEM > TERMINALS OF ECU |
| CHECK INSTRUMENT PANEL JUNCTION BLOCK ASSEMBLY AND MAIN BODY ECU (MULTIPLEX NETWORK BODY ECU) |
Measure the voltage and check for pulses according to the value(s) in the table below.
| Terminal No. (Symbol) | Wiring Color | Terminal Description | Condition | Specified Condition |
| 3D-39 - Body ground | W - Body ground | High beam headlight drive output | Dimmer switch in high or high flash position | Below 1 V |
| Dimmer switch in low position | 11 to 14 V | |||
| I13-5 (HU) - Body ground | LG - Body ground | Dimmer switch high position signal input | Dimmer switch in high position | Below 1 V |
| Dimmer switch not in high position | Pulse generation | |||
| I13-20 (CLTB) - I13-22 (CLTE) | B - P | Automatic light control sensor power supply output | Ignition switch off | Below 1 V |
| Ignition switch ON, light control switch in AUTO position | 11 to 14 V | |||
| I13-21 (CLTS) - Body ground | G - Body ground | Automatic light control sensor signal input | Ignition switch off | Below 1 V |
| Automatic light control system operating | Pulse generation (See waveform 1) | |||
| I13-28 (A) - Body ground | G - Body ground | Light control switch AUTO position signal input | Light control switch in AUTO position | Below 1 V |
| Light control switch not in AUTO position | Pulse generation |
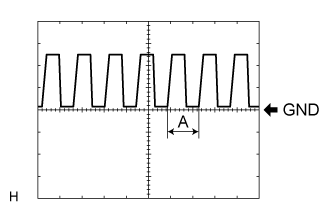 |
Waveform 1
| Item | Content |
| Tool setting | 5 V/DIV., 5 ms./DIV. |
| CHECK INNER REAR VIEW MIRROR ASSEMBLY |

Disconnect the S2 inner rear view mirror assembly connector.
Measure the resistance on the wire harness side connector according to the value(s) in the table below.
| Terminal No. (Symbol) | Wiring Color | Terminal Description | Condition | Specified Condition |
| S2-1 (E) - Body ground | W-B - Body ground | Inner rear view mirror assembly ground | Always | Below 1 Ω |
Measure the voltage on the wire harness side connector according to the value(s) in the table below.
| Terminal No. (Symbol) | Wiring Color | Terminal Description | Condition | Specified Condition |
| S2-4 (IG) - Body ground | GR - Body ground | Inner rear view mirror assembly power supply | Ignition switch off | Below 1 V |
| Ignition switch ON | 11 to 14 V |
Reconnect the S2 inner rear view mirror assembly connector.
Check for pulses according to the value(s) in the table below.
| Terminal No. (Symbol) | Wiring Color | Terminal Description | Condition | Specified Condition |
| S2-2 (CANL) - S2-3 (CANH) | W - R | CAN communication system | CAN communication is being performed | Pulse generation |