 |
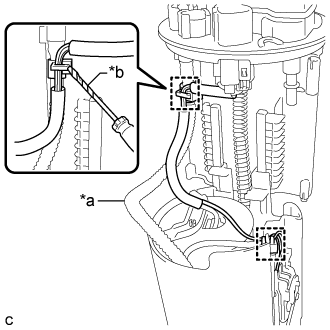
Using a screwdriver with its tip wrapped with protective tape, disengage the wire harness clamp as shown in the illustration.
| *a | Tube |
| *b | Protective Tape |
- NOTICE:
- Do not damage the tube and wire harness.
FUEL PUMP (for TMMK Made) > DISASSEMBLY |
| 1. REMOVE FUEL SENDER GAUGE ASSEMBLY |
|
Using a screwdriver with its tip wrapped with protective tape, disengage the wire harness clamp as shown in the illustration.
| *a | Tube |
| *b | Protective Tape |
Disengage the wire harness clamp.
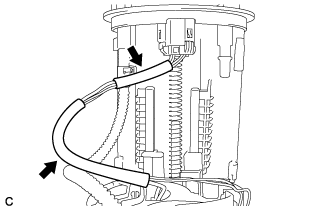 |
Remove the 2 wire harness protectors from the wire harness.
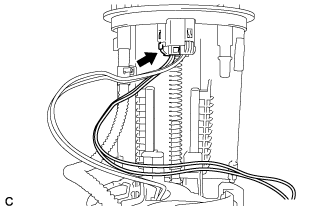 |
Disconnect the fuel sender gauge assembly connector.
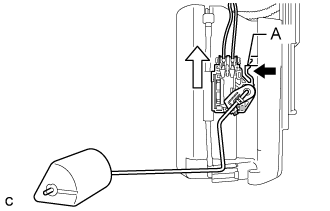 |
Push the claw (A) of the fuel sender gauge assembly, and then pull up the fuel sender gauge assembly to remove it.
| 2. REMOVE FUEL PUMP WITH FILTER ASSEMBLY |
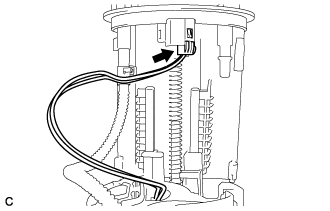 |
Disconnect the fuel pump harness connector.
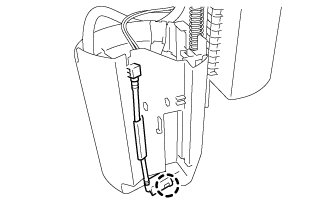 |
Disengage the claw and disconnect the fuel pump filter hose from the fuel sub-tank.
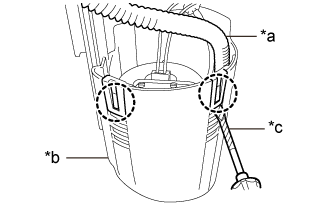 |
Using a screwdriver with its tip wrapped with protective tape, disengage the 2 claws and remove the fuel filter and fuel pump with filter assembly from the fuel sub-tank.
| *a | Tube |
| *b | Fuel Sub-tank |
| *c | Protective Tape |
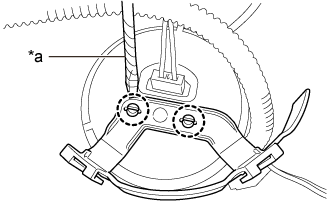 |
Using a screwdriver with its tip wrapped with protective tape, disengage the 2 claws and remove the No. 1 fuel suction support.
| *a | Protective Tape |
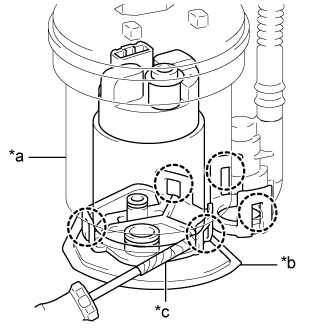 |
Using a screwdriver with its tip wrapped with protective tape, disengage the 5 claws and remove the fuel pump with filter assembly from the fuel filter.
| *a | Fuel Filter |
| *b | Suction Filter |
| *c | Protective Tape |
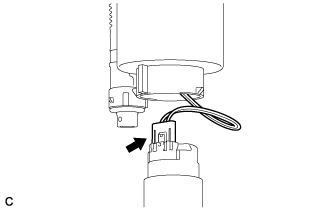 |
Disconnect the fuel pump harness connector to remove the fuel pump harness from the fuel pump with filter assembly.
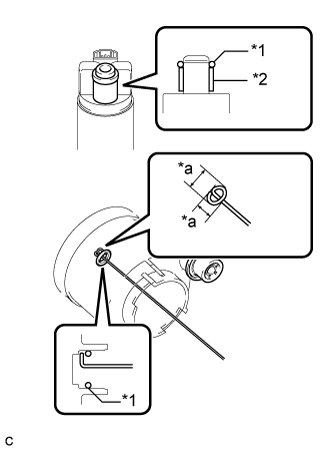 |
Remove the O-ring and fuel pump spacer from the fuel pump with filter assembly.
| *1 | O-ring |
| *2 | Fuel Pump Spacer |
| *a | 5.0 mm (0.197 in.) |