 |
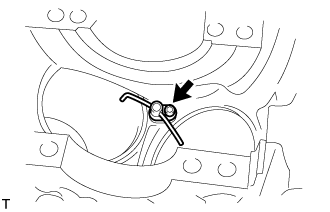
Using a 5 mm hexagon wrench, install the No. 1 oil nozzle sub-assemblies with the 3 bolts.
- Torque:
- 9.0 N*m{ 92 kgf*cm , 80 in.*lbf }
CYLINDER BLOCK > REASSEMBLY |
| 1. INSTALL NO. 1 OIL NOZZLE SUB-ASSEMBLY |
|
Using a 5 mm hexagon wrench, install the No. 1 oil nozzle sub-assemblies with the 3 bolts.
| 2. INSTALL PISTON |
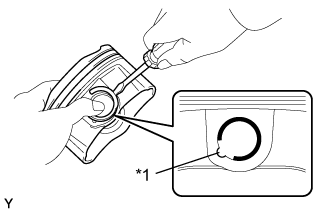 |
Using a screwdriver, install a new piston pin hole snap ring at one end of the piston pin hole.
| *1 | Service Hole |
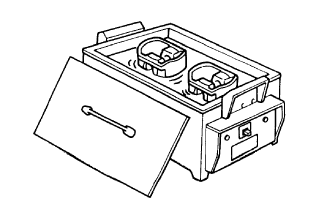 |
Gradually heat the piston to approximately 80°C (176°F).
Coat the piston pin with engine oil.
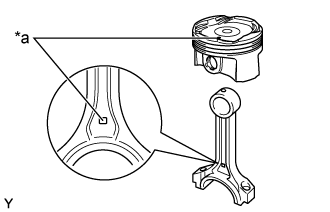 |
Align the front marks of the piston and connecting rod, and push in the piston pin with your thumb.
| *a | Front Mark |
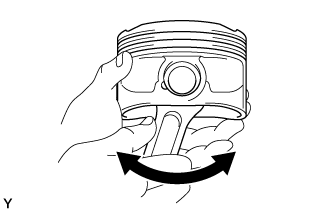 |
Check the fitting condition between the piston and piston pin by trying to move the piston back and forth on the piston pin.
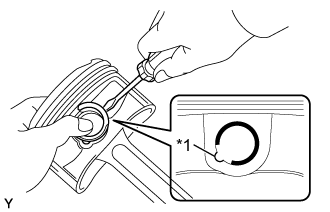 |
Using a screwdriver, install a new piston pin hole snap ring at the other end of the piston pin hole.
| *1 | Service Hole |
| 3. INSTALL PISTON RING SET |
Install the oil ring expander and 2 side rails by hand.
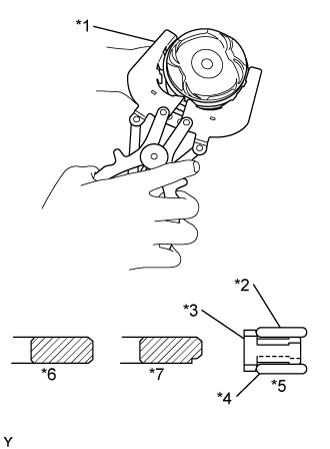 |
Using a piston ring expander, install the compression ring as shown in the illustration.
| *1 | Piston Ring Expander |
| *2 | Upper Side Rail |
| *3 | Oil Ring Expander |
| *4 | Lower Side Rail |
| *5 | Oil Ring |
| *6 | No. 1 Ring |
| *7 | No. 2 Ring |
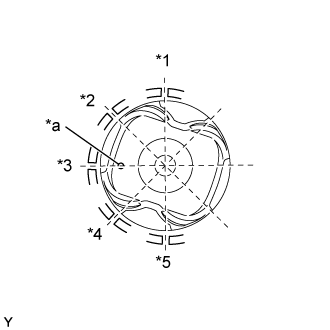 |
Position the piston rings so that the ring ends are as shown in the illustration.
| *1 | Lower Side Rail |
| *2 | No. 2 Ring |
| *3 | Oil Ring Expander |
| *4 | No. 1 Ring |
| *5 | Upper Side Rail |
| *a | Front Mark |
| 4. INSTALL CRANKSHAFT BEARING |
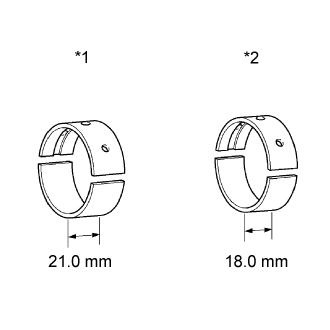 |
Clean the main journal and both surfaces of the bearings.
| *1 | No. 1 and No. 4 Journal Bearing |
| *2 | No. 2 and No. 3 Journal Bearing |
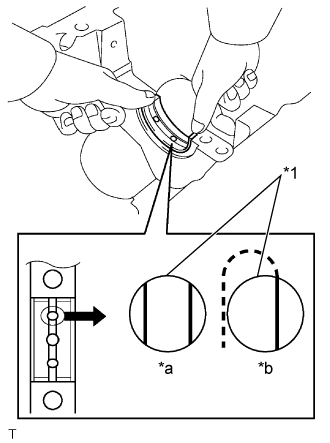 |
Install the upper crankshaft bearing.
Install the upper crankshaft bearings to the cylinder block as shown in the illustration.
| *1 | Upper Bearing |
| *a | CORRECT |
| *b | INCORRECT |
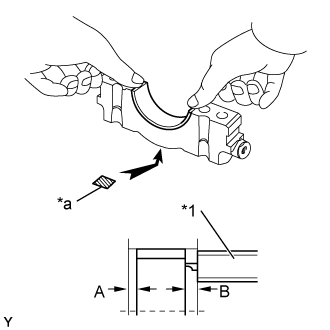 |
Install the lower crankshaft bearing.
| *1 | Vernier Caliper |
| *a | Mark 1, 2, 3, 4 or 5 |
Install the lower crankshaft bearings to the crankshaft bearing caps.
Using a vernier caliper, measure the distance between the crankshaft bearing cap edge and the lower crankshaft bearing edge.
| 5. INSTALL CRANKSHAFT THRUST WASHER SET |
Apply engine oil to the crankshaft thrust washer.
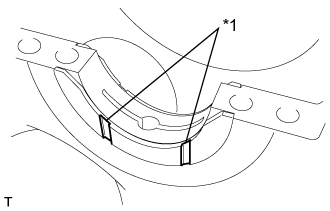 |
Install the 2 upper crankshaft thrust washers under the No. 2 journal position of the cylinder block sub-assembly with the oil grooves facing outward.
| *1 | Oil Grooves |
| 6. INSTALL CRANKSHAFT |
Apply engine oil to the upper bearing, then place the crankshaft on the cylinder block.
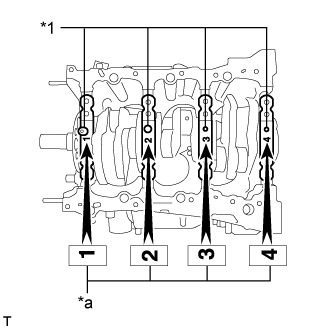 |
Confirm the projections and numbers on the main bearing caps and install the crankshaft bearing caps on the cylinder block.
| *1 | Projection |
| *a | Number Mark |
Apply a light coat of engine oil to the threads and under the heads of the crankshaft bearing cap bolts.
Temporarily install the 8 crankshaft bearing cap bolts to the inside positions.
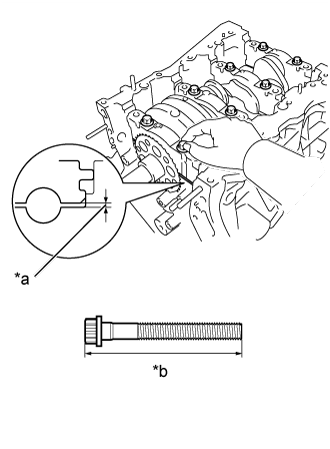 |
Insert the crankshaft bearing cap with your hand until the clearance between the crankshaft bearing cap and the cylinder block is less than 6 mm (0.236 in.) by marking the 2 internal crankshaft bearing cap bolts as a guide.
| *a | Less than 6 mm |
| *b | Bolt Length 100 to 102 mm |
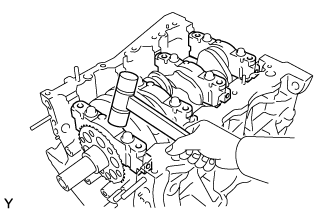 |
Using a plastic hammer, lightly tap the crankshaft bearing cap to ensure a proper fit.
Apply a light coat of engine oil to the threads and under the heads of the 8 crankshaft bearing cap bolts.
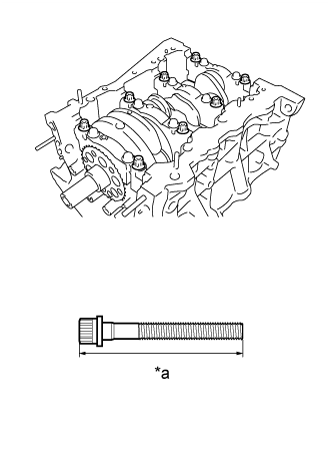 |
Install the 8 crankshaft bearing cap bolts to the outside positions.
| *a | Bolt Length |
Install the crankshaft bearing cap bolts.
Step 1
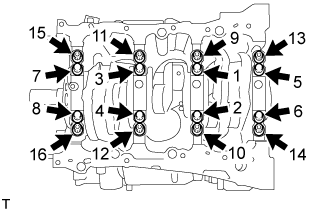 |
Install and uniformly tighten the 16 crankshaft bearing cap bolts in several steps and in the sequence shown in the illustration.
Step 2
| *a | Paint Mark |
| *b | Turn 90° |
 | Engine Front |
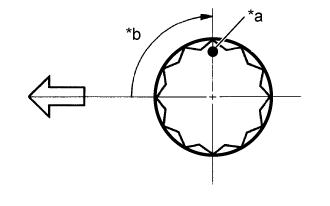 |
Mark the front of the bearing cap bolts with paint.
Retighten the bearing cap bolts 90° in the sequence shown in the illustration.
Check that the painted mark is now at a 90° angle to the front of the engine.
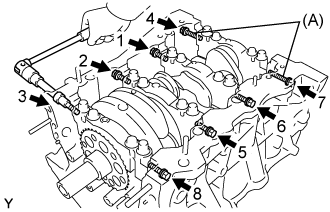 |
Install 8 new seal washers and uniformly tighten the 8 crankshaft bearing cap bolts in several steps and in the sequence shown in the illustration.
| Item | Length |
| Bolt A | 45 mm (1.77 in.) |
| Except bolt A | 30 mm (1.18 in.) |
Check that the crankshaft turns smoothly.
Check the crankshaft thrust clearance .
| 7. INSTALL CONNECTING ROD BEARING |
Install the connecting rod bearing to the connecting rod and connecting rod cap.
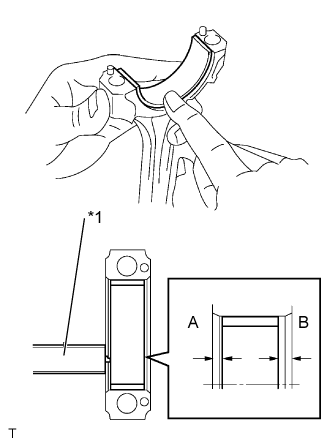 |
Using a vernier caliper, measure the distance between the connecting rod and bearing cap edges and the connecting rod bearing edge.
| *1 | Vernier Caliper |
| 8. INSTALL PISTON SUB-ASSEMBLY WITH CONNECTING ROD |
Apply engine oil to the cylinder walls, the pistons, and the surfaces of the connecting rod bearings.
|
Position the piston rings so that the ring ends are as shown in the illustration.
| *1 | Lower Side Rail |
| *2 | No. 2 Ring |
| *3 | Oil Ring Expander |
| *4 | No. 1 Ring |
| *5 | Upper Side Rail |
| *a | Front Mark |
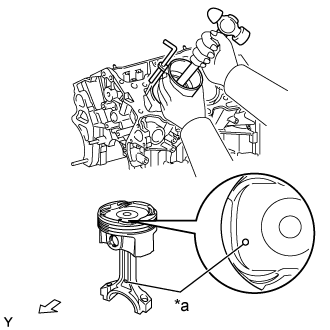 |
Using a piston ring compressor, push the correctly numbered piston and connecting rod assembly into the cylinder with the front mark of the piston facing forward.
| *a | Front Mark |
| Engine Front |
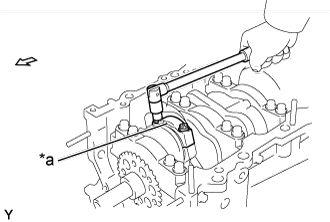 |
Check that the front mark of the connecting rod cap is facing forward.
| *a | Front Mark |
| Engine Front |
Apply a light coat of engine oil to the threads and under the heads of the connecting rod cap bolts.
Install the connecting rod cap bolts.
Step 1
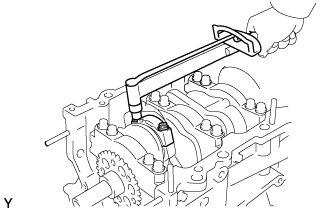 |
Install and alternately tighten the bolts of the connecting rod cap in several steps.
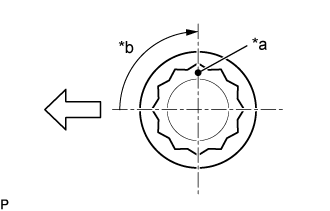 |
Step 2
| *a | Paint Mark |
| *b | Turn 90° |
| Engine Front |
Mark the front side of each connecting rod cap bolt with paint.
Retighten the cap bolts 90° as shown in the illustration.
Check that the painted mark is now at a 90° angle to the front.
Confirm that the crankshaft turns smoothly.
Check the connecting rod thrust clearance .