 |
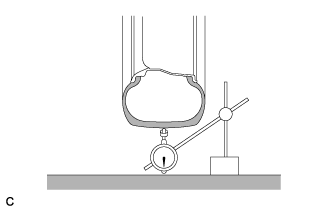
Using a dial indicator, check the runout of the tires.
- Maximum Tire Runout:
- 1.4 mm (0.0551 in.)
REAR WHEEL ALIGNMENT (for TMMK Made) > ADJUSTMENT |
| 1. INSPECT TIRES |
Check the tires for wear and proper inflation pressure.
| Tire Size | Front kPa (kgf/cm2, psi) | Rear kPa (kgf/cm2, psi) |
| P215/55R17 93V | 210 (2.1, 30) | |
|
Using a dial indicator, check the runout of the tires.
| 2. MEASURE VEHICLE HEIGHT |
 |
Bounce the vehicle up and down at the corners to stabilize the suspension.
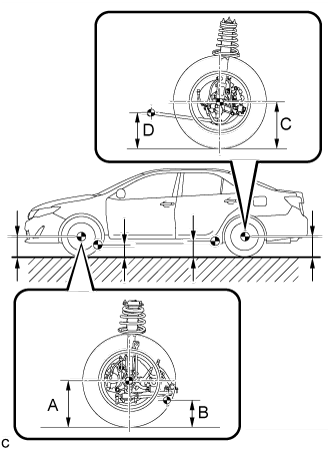
Measure the vehicle height.
| Front A - B | Rear C - D |
| 125 mm (4.92 in.) | 55 mm (2.17 in.) |
| 3. INSPECT CAMBER |
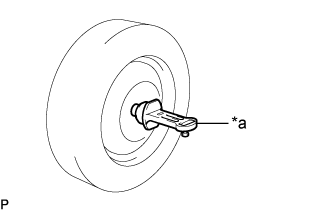 |
Install a camber-caster-kingpin gauge.
| *a | Camber-caster-kingpin Gauge |
Inspect the camber.
| Camber Inclination | Right-left Difference |
| -1°15' +/- 45' (-1.25° +/- 0.75°) | 45' (0.75°) or less |
| 4. INSPECT TOE-IN |
Bounce the vehicle up and down at the corners to stabilize the suspension.
Release the parking brake and move the shift lever to N.
Push the vehicle straight ahead approximately 5 m (16.4 ft.). (Step A)
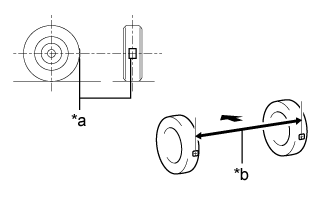 |
Put tread center marks on the rearmost points of the rear wheels and measure the distance between the marks (dimension B).
| *a | Tread Center Mark |
| *b | Dimension B |
 | Front of the Vehicle |
Slowly push the vehicle straight ahead to cause the rear wheels to rotate 180°. Use the rear tire valve as a reference point.
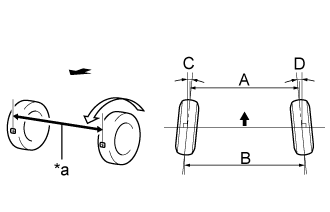 |
Measure the distance between the tread center marks on the front of the rear wheels (dimension A).
| *a | Dimension A |
| Front of the Vehicle |
| Specified Condition |
| C + D: 0°13' +/- 0°10' (0.21° +/- 0.17°) |
| B - A: 2.5 +/- 2.0 mm (0.0984 +/- 0.0787 in.) |
| 5. ADJUST TOE-IN |
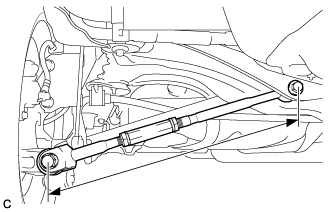 |
Measure the lengths of the right and left rear No. 2 suspension arms.
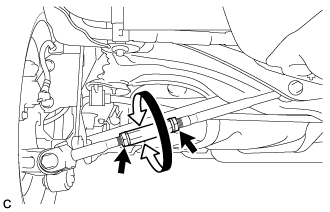 |
Loosen the 2 lock nuts.
If the length difference between the left and right rear No. 2 suspension arm assemblies is not within the specified range, adjust it by following the procedures below.
If the toe-in measurement is greater than the specified range (too much toe-out), extend the shorter rear No. 2 suspension arm by rotating the adjusting tube so that the length difference is within the specified range.
If the toe-in measurement is less than the specified range (too much toe-in), shorten the longer rear No. 2 suspension arm by rotating the adjusting tube so that the length difference is within the specified range.
Measure the toe-in.
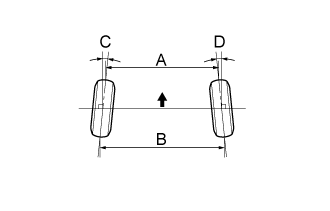 |
Turn the right and left adjusting tubes by an equal amount to adjust toe-in.
| Specified Condition |
| C + D: 0°13' +/- 0°10' (0.21° +/- 0.17°) |
| B - A: 2.5 +/- 2.0 mm (0.0984 +/- 0.0787 in.) |
| Front of the Vehicle |
Tighten the lock nuts while securing the adjusting tube in the order indicated below: