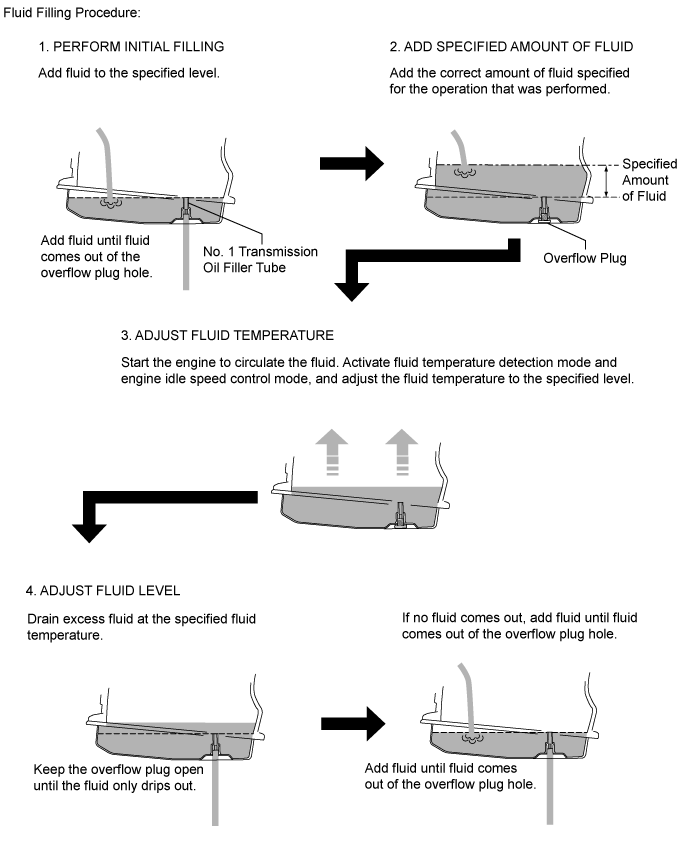
AUTOMATIC TRANSAXLE FLUID > ADJUSTMENT |
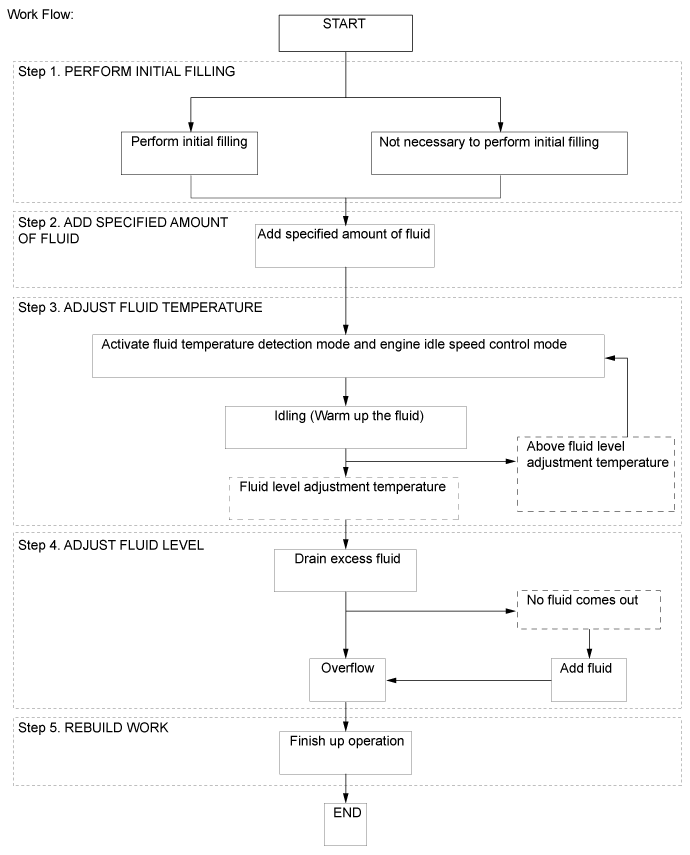
| 1. PREPARATION WORK |
Lift the vehicle.
Remove the front wheel opening extension pad LH .
Remove the engine under cover LH .
Remove the front fender apron seal LH .
| 2. PERFORM INITIAL FILLING |
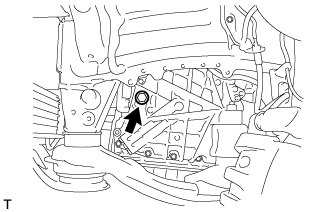 |
Remove the refill plug and gasket from the rear transaxle cover sub-assembly.
| Operations that do not require initial filling |
|
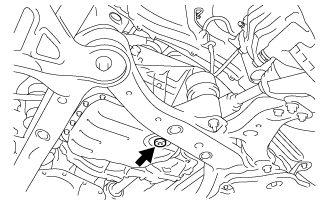 |
Using a 6 mm hexagon socket wrench, remove the overflow plug and gasket from the automatic transaxle oil pan sub-assembly.
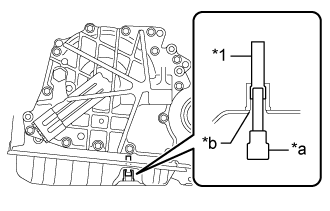 |
Using a 6 mm hexagon socket wrench, check that the No. 1 transmission oil filler tube is tightened to the specified torque.
| *1 | No. 1 Transmission Oil Filler Tube |
| *a | 6 mm Hexagon Socket Wrench |
| *b | Overflow Plug Hole |
Perform initial filling.
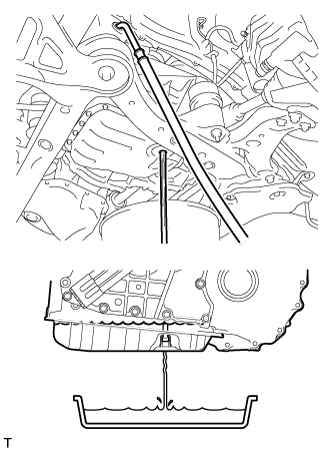 |
Fill the automatic transaxle assembly through the refill hole until automatic transaxle fluid begins to come out of the overflow plug hole.
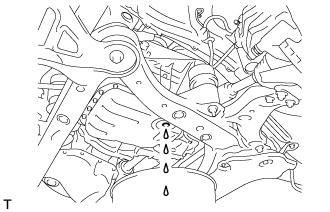 |
Wait until the automatic transaxle fluid flow slows and only drips come out.
|
Using a 6 mm hexagon socket wrench, temporarily install the gasket and overflow plug to the automatic transaxle oil pan sub-assembly.
| 3. ADD SPECIFIED AMOUNT OF FLUID |
Fill the automatic transaxle assembly with the correct amount of automatic transaxle fluid as listed in the table below.
| Related Procedure | Fill Volume |
| Automatic transaxle assembly replacement (with a new torque converter assembly) | 5.1 liters (5.4 US qts, 4.5 Imp. qts) |
| Automatic transaxle assembly replacement (when reusing the torque converter assembly) | 3.5 liters (3.7 US qts, 3.1 Imp. qts) |
| Removal and installation of the torque converter assembly | 3.4 liters (3.6 US qts, 3.0 Imp. qts) |
| Removal and installation of the transmission valve body assembly | 3.7 liters (3.9 US qts, 3.3 Imp. qts) |
| Removal and installation of the automatic transaxle oil pan sub-assembly | 3.2 liters (3.4 US qts, 2.8 Imp. qts) |
| Removal and installation of a front drive shaft assembly | 3.2 liters (3.4 US qts, 2.8 Imp. qts) |
| Disconnection of an oil cooler hose | 0.5 liters (0.5 US qts, 0.4 Imp. qts) |
| Repair of an automatic transaxle fluid leak due to a loose case plug, or a faulty plug gasket or O-ring | 0.5 liters (0.5 US qts, 0.4 Imp. qts) |
|
Temporarily install the gasket and refill plug to avoid automatic transaxle fluid spillage.
Lower the vehicle.
| 4. ADJUST FLUID TEMPERATURE (when Using the GTS) |
Connect the GTS to the DLC3 with the engine switch off.
Turn the engine switch on (IG) and turn the GTS on.
Enter the following menus: Powertrain / Engine and ECT / Active Test / Connect the TC and TE1
Select the Data List item: A/T Oil Temperature 1
Select the Active Test item: Connect the TC and TE1 / ON
Check the ATF temperature.
Depress and hold the brake pedal.
Start the engine.
Slowly move the shift lever from P to D, then back to P (keep the shift lever in each position for approximately 3 seconds).
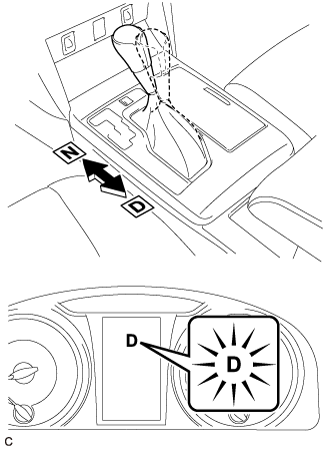 |
While observing the D shift indicator on the combination meter, move the shift lever back and forth between N and D at an interval of less than 1.5 seconds for 6 seconds or more.
Check that the D shift indicator comes on for 2 seconds.
Move the shift lever from N to P.
Release the brake pedal.
Select the Active Test item: Connect the TC and TE1 / OFF
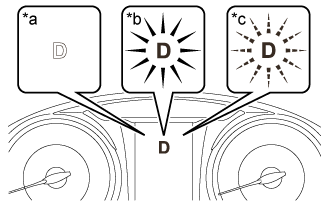 |
Warm up the engine with the engine idling until the automatic transaxle fluid temperature reaches the automatic transaxle fluid level adjustment temperature (35 to 45°C (95 to 113°F)).
| *a | Off |
| *b | On |
| *c | Blinking |
| Below Automatic Transaxle Fluid Level Adjustment Temperature | Automatic Transaxle Fluid Level Adjustment Temperature | Above Automatic Transaxle Fluid Level Adjustment Temperature |
| 35°C or less (95°F or less) | 35 to 45°C (95 to 113°F) | 45°C or more (113°F or more) |
| D Shift Indicator Off | D Shift Indicator On | D Shift Indicator Blinking |
| 5. ADJUST FLUID TEMPERATURE (when Not Using the GTS) |
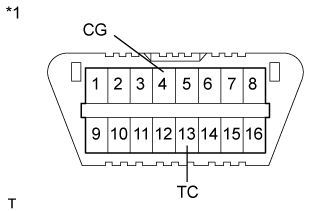 |
Using SST, connect terminals 13 (TC) and 4 (CG) of the DLC3 with the engine switch off.
| *1 | DLC3 |
Depress and hold the brake pedal.
Start the engine.
Slowly move the shift lever from P to D, then back to P (keep the shift lever in each position for approximately 3 seconds).
|
While observing the D shift indicator on the combination meter, move the shift lever back and forth between N and D at an interval of less than 1.5 seconds for 6 seconds or more.
Check that the D shift indicator comes on for 2 seconds.
Move the shift lever from N to P.
Release the brake pedal.
Remove SST from terminals 13 (TC) and 4 (CG).
|
Allow the engine to idle until the D shift indicator comes on again.
| *a | Off |
| *b | On |
| *c | Blinking |
| Below Automatic Transaxle Fluid Level Adjustment Temperature | Automatic Transaxle Fluid Level Adjustment Temperature | Above Automatic Transaxle Fluid Level Adjustment Temperature |
| 35°C or less (95°F or less) | 35 to 45°C (95 to 113°F) | 45°C or more (113°F or more) |
| D Shift Indicator Off | D Shift Indicator On | D Shift Indicator Blinking |
| 6. ADJUST FLUID LEVEL |
Lift the vehicle.
|
Using a 6 mm hexagon socket wrench, remove the overflow plug and gasket from the automatic transaxle oil pan sub-assembly.
Check the amount of automatic transaxle fluid that comes out of the overflow plug hole.
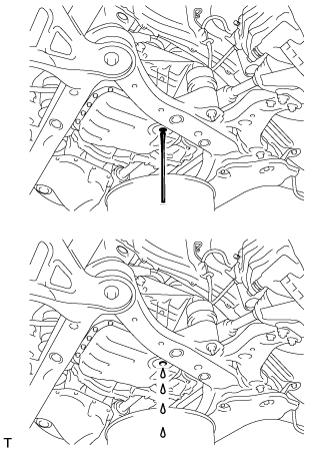 |
If the amount of fluid that comes out of the overflow plug hole is large, wait until the fluid flow slows and only drips come out. [*1]
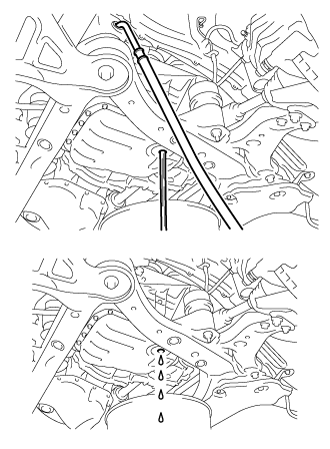 |
If no automatic transaxle fluid comes out of the overflow plug hole, remove the refill plug and gasket. Then add automatic transaxle fluid through the refill hole until automatic transaxle fluid comes out of the over flow plug hole. Wait until the automatic transaxle fluid flow slows and only drips come out. [*2]
|
Using a 6 mm hexagon socket wrench, install the overflow plug and a new gasket to the automatic transaxle oil pan sub-assembly.
|
Install the refill plug and a new gasket to the rear transaxle cover sub-assembly.
Lower the vehicle.
Turn the engine switch off.
Disconnect the GTS from the DLC3 (when using the GTS).
| 7. REBUILD WORK |
Lift the vehicle.
Clean each part.
Check for automatic transaxle fluid leaks.
Install the front fender apron seal LH .
Install the engine under cover LH .
Install the front wheel opening extension pad LH .
Lower the vehicle.