 |
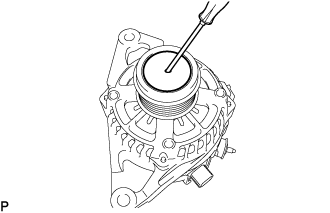
Using a screwdriver, remove the generator pulley cap from the generator pulley with clutch.
- NOTICE:
- Do not reuse the generator pulley cap.
GENERATOR (for 100 A, 130 A Type) > DISASSEMBLY |
| 1. REMOVE GENERATOR PULLEY CAP |
|
Using a screwdriver, remove the generator pulley cap from the generator pulley with clutch.
| 2. REMOVE GENERATOR PULLEY WITH CLUTCH |
Secure the generator assembly in a vise between aluminum plates.
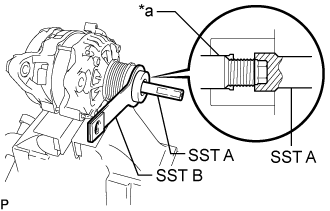 |
Install SST (A) and (B) to the generator pulley with clutch as shown in the illustration.
| *a | Rotor Shaft |
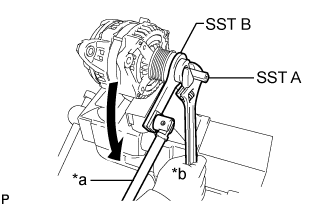 |
Loosen the generator pulley with clutch by turning SST (B) as shown in the illustration.
| *a | Turn |
| *b | Hold |
Remove SST (A) and (B) from the generator pulley with clutch.
Remove the generator pulley with clutch from the rotor shaft.
Remove the generator assembly from the vise.
| 3. REMOVE GENERATOR REAR END COVER |
Place the generator assembly on the generator pulley with clutch.
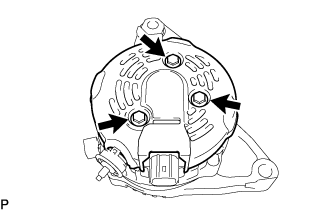 |
Remove the 3 bolts and generator rear end cover from the generator coil assembly.
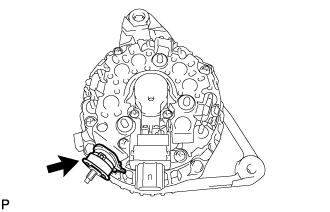 |
Remove the generator terminal insulator from the generator coil assembly.
| 4. REMOVE GENERATOR BRUSH HOLDER ASSEMBLY |
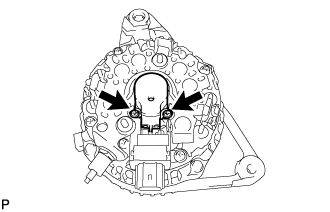 |
Remove the 2 screws and generator brush holder assembly from the generator coil assembly.
| 5. REMOVE GENERATOR COIL ASSEMBLY |
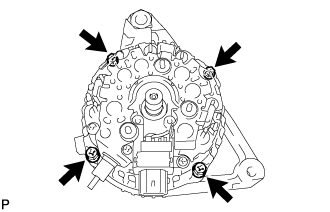 |
Remove the 4 bolts.
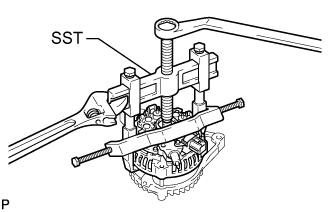 |
Using SST, remove the generator coil assembly.
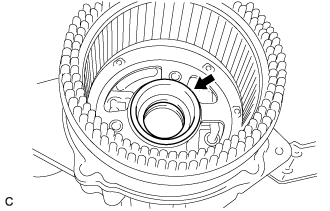 |
Remove the bearing cover packing.
| 6. REMOVE GENERATOR ROTOR ASSEMBLY |
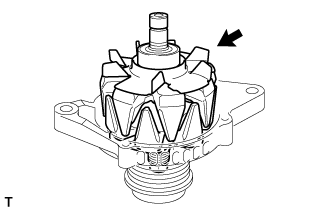 |
Remove the generator rotor assembly from the generator drive end frame.
| 7. INSPECT GENERATOR DRIVE END FRAME BEARING |
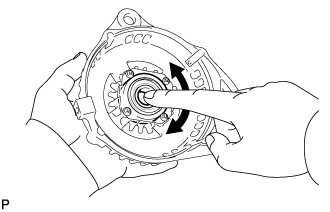 |
Check that the generator drive end frame bearing is not rough or worn and that it rotates smoothly.
If the generator drive end frame bearing is rough or worn, or does not rotate smoothly, replace the generator drive end frame bearing.
| 8. REMOVE GENERATOR DRIVE END FRAME BEARING |
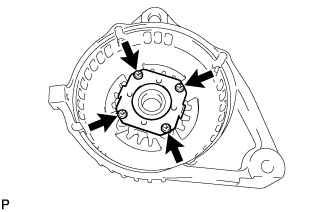 |
Remove the 4 screws and retainer plate from the generator drive end frame.
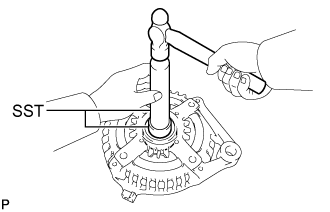 |
Using SST and a hammer, tap out the generator drive end frame bearing.