 |
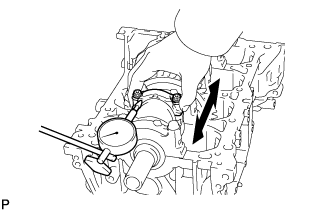
Using a dial indicator, measure the thrust clearance while moving the connecting rod back and forth.
- Standard thrust clearance:
- 0.160 to 0.512 mm (0.00630 to 0.0202 in.)
- Maximum thrust clearance:
- 0.512 mm (0.0202 in.)
CYLINDER BLOCK > DISASSEMBLY |
| 1. INSPECT CONNECTING ROD THRUST CLEARANCE |
|
Using a dial indicator, measure the thrust clearance while moving the connecting rod back and forth.
| 2. INSPECT CONNECTING ROD OIL CLEARANCE |
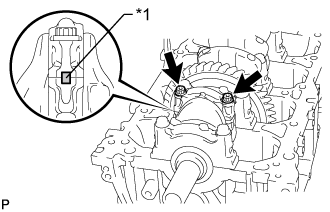 |
Check the alignment marks on the connecting rod and cap to ensure correct reassembly.
| *1 | Alignment Mark |
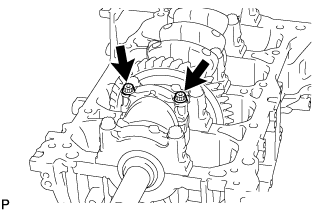 |
Remove the 2 bolts and connecting rod cap.
Clean the crank pin and bearing.
Check the crank pin and bearing for pitting and scratches.
If the crank pin or bearing is damaged, replace the bearings. If necessary, replace the crankshaft.
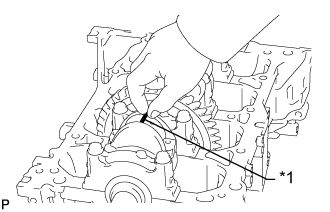 |
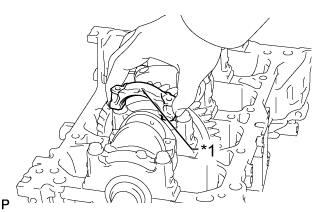
Lay a strip of Plastigage on the crank pin.
| *1 | Plastigage |
 |
Check that the front mark of the connecting rod cap is facing in the correct direction.
| *1 | Front Mark |
|
Apply a light coat of engine oil to the threads and under the heads of the connecting rod bolts.
Install and alternately tighten the bolts of the connecting rod cap in several steps.
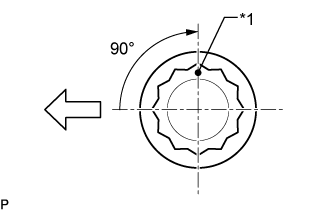 |
Mark the front of each connecting rod bolt with paint.
| *1 | Paint Mark |
 | Engine Front |
Tighten the bolts 90° as shown in the illustration.
Remove the 2 bolts and connecting rod cap.
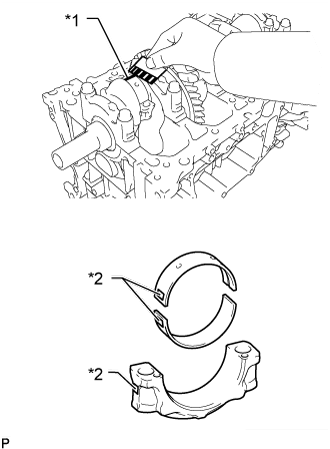 |
Measure the Plastigage at its widest point.
| *1 | Plastigage |
| *2 | Number Mark |
| Item | Specified Condition |
| Mark 1 | 54.500 to 54.508 mm (2.1457 to 2.1460 in.) |
| Mark 2 | 54.509 to 54.516 mm (2.1460 to 2.1463 in.) |
| Mark 3 | 54.517 to 54.524 mm (2.1463 to 2.1466 in.) |
| Item | Specified Condition |
| Mark 1 | 1.483 to 1.487 mm (0.0584 to 0.0585 in.) |
| Mark 2 | 1.488 to 1.491 mm (0.0586 to 0.0587 in.) |
| Mark 3 | 1.492 to 1.495 mm (0.0587 to 0.0589 in.) |
| Item | Specified Condition |
| Mark 1 | 1.486 to 1.490 mm (0.0585 to 0.0587 in.) |
| Mark 2 | 1.491 to 1.494 mm (0.0587 to 0.0588 in.) |
| Mark 3 | 1.495 to 1.498 mm (0.0589 to 0.0590 in.) |
Perform the inspection above for each cylinder.
| 3. REMOVE PISTON WITH CONNECTING ROD |
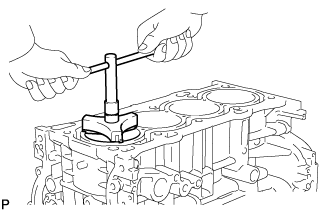 |
Using a ridge reamer, remove all the carbon from the top of the cylinder.
Remove the 8 bolts, 4 connecting rod caps and 4 lower bearings.
Push the piston, connecting rod assembly and upper bearing through the top of the cylinder block.
| 4. REMOVE CONNECTING ROD BEARING |
Remove the connecting rod bearings from the connecting rods and connecting rod caps.
| 5. INSPECT CRANKSHAFT THRUST CLEARANCE |
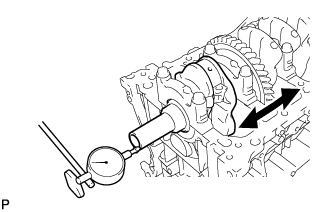 |
Using a dial indicator, measure the thrust clearance while prying the crankshaft back and forth with a screwdriver.
| 6. REMOVE CRANKSHAFT |
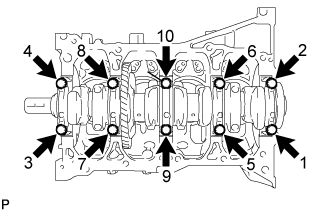 |
Using several steps, uniformly loosen and remove the 10 bearing cap bolts in the sequence shown in the illustration.
Remove the 5 bearing caps from the cylinder block.
Remove the crankshaft from the cylinder block.
Check each crankshaft journal and bearing for pitting and scratches.
If the journal or bearing is damaged, replace the bearings. If necessary, replace the crankshaft.
| 7. REMOVE CRANKSHAFT THRUST WASHER |
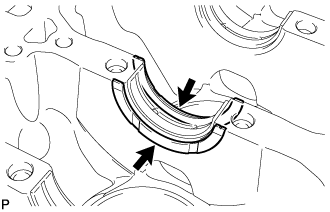 |
Remove the thrust washers from the cylinder block.
| 8. REMOVE CRANKSHAFT BEARING |
Remove the crankshaft bearings from the cylinder block and bearing caps.
| 9. REMOVE CRANKSHAFT PULLEY KEY |
Using a screwdriver, remove the 2 pulley keys from the crankshaft.
| 10. REMOVE PISTON RING SET |
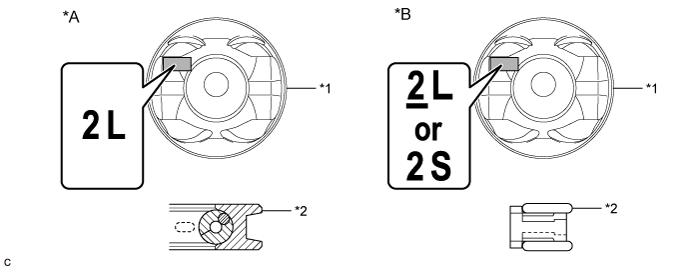
| *A | Type A | *B | Type B |
| *1 | Piston | *2 | Oil Ring |
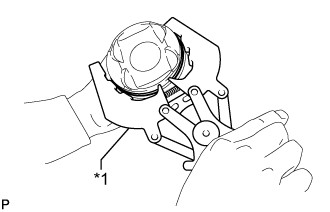 |
Using a piston ring expander, remove the No. 1 compression ring and No. 2 compression ring.
| *1 | Piston Ring Expander |
Type A:
Remove the oil ring and expander by hand.
Type B:
Remove the oil ring expander, upper oil ring side rail and lower oil ring side rail by hand.
| 11. REMOVE PISTON PIN HOLE SNAP RING |
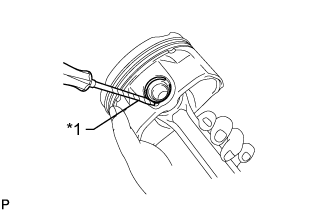 |
Using a screwdriver, pry out the 2 snap rings.
| *1 | Protective Tape |
| 12. REMOVE PISTON |
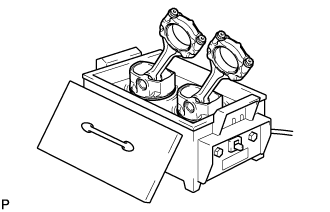 |
Gradually heat each piston up to 80 to 90°C (176 to 194°F).
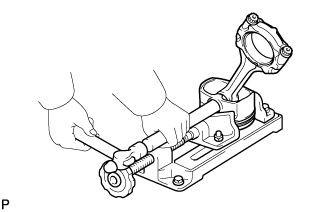 |
Using a plastic-faced hammer and brass bar, lightly tap out the piston pin. Then remove the connecting rod.
| 13. REMOVE NO. 1 OIL NOZZLE SUB-ASSEMBLY |
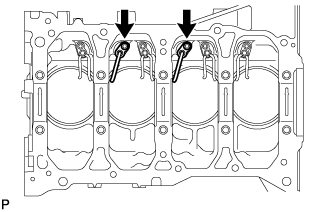 |
Using a 5 mm hexagon wrench, remove the 2 bolts and 2 oil nozzles.
| 14. REMOVE NO. 2 OIL NOZZLE SUB-ASSEMBLY |
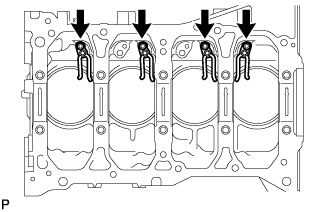 |
Using a 5 mm hexagon wrench, remove the 4 bolts and 4 oil nozzles.
| 15. REMOVE STUD BOLT |