 |
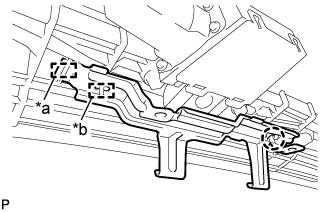
Disengage the claw.
| *a | Guide |
| *b | Pin |
SLIDING ROOF HOUSING (for TMMK Made) > DISASSEMBLY |
| 1. REMOVE SLIDING ROOF DRIVE GEAR SUB-ASSEMBLY |
|
Disengage the claw.
| *a | Guide |
| *b | Pin |
Disengage the guide and pin, and remove the map light bracket.
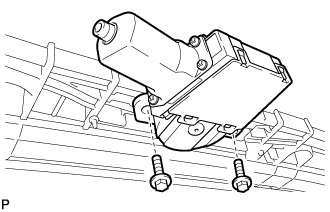 |
Remove the 2 bolts and sliding roof drive gear sub-assembly.
| 2. REMOVE SUNSHADE TRIM SUB-ASSEMBLY |
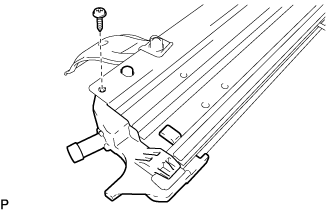 |
Remove the screw and sliding roof piece sub-assembly LH.
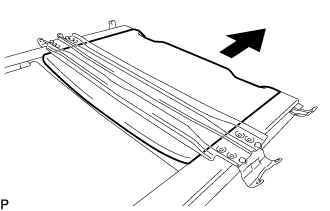 |
Slide and remove the sunshade trim sub-assembly.
| 3. REMOVE REAR SLIDING ROOF PANEL |
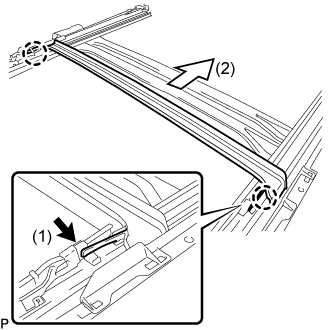 |
Disengage the 2 claws in the direction indicated by the arrow (1) in the illustration.
Slide the rear sliding roof panel in the direction indicated by the arrow (2) in the illustration to remove it.
| 4. REMOVE SLIDING ROOF DRIVE CABLE SUB-ASSEMBLY |
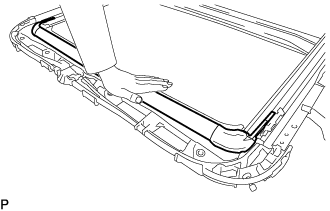 |
Hold down the roof wind deflector panel sub-assembly.
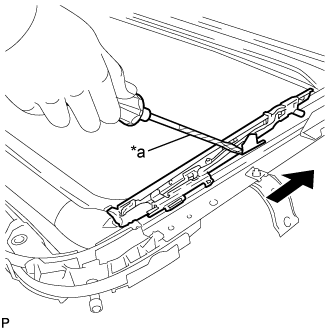 |
Using a screwdriver, slide the sliding roof drive cable sub-assembly in the direction indicated by the arrow in the illustration to remove it.
| *a | Protective Tape |
| 5. REMOVE ROOF WIND DEFLECTOR PANEL SUB-ASSEMBLY |
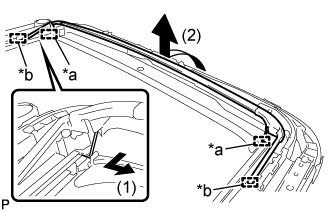 |
Pull the spring in the direction indicated by the arrow (1) in the illustration to disengage the 2 springs.
| *a | Spring |
| *b | Guide |
Pull the roof wind deflector panel sub-assembly in the direction indicated by the arrow (2) in the illustration to disengage the 2 guides and remove it.