Tighten the 8 bolts of the brackets.
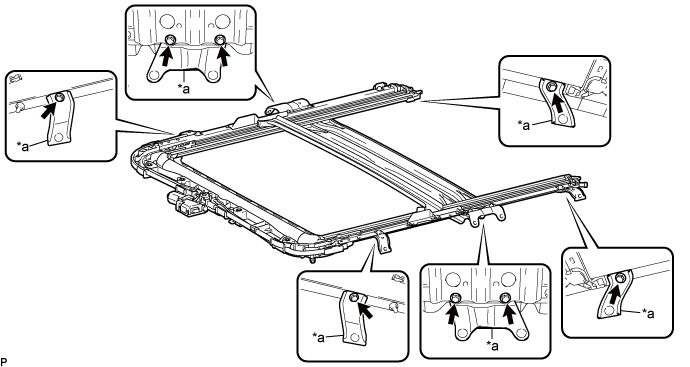
| *a | Bracket | - | - |
- Torque:
- 8.0 N*m{ 82 kgf*cm , 71 in.*lbf }
SLIDING ROOF HOUSING (for TMMK Made) > INSTALLATION |
| 1. INSTALL SLIDING ROOF HOUSING SUB-ASSEMBLY |
Tighten the 8 bolts of the brackets.
| *a | Bracket | - | - |
Loosen the 8 bolts of the brackets a half turn.
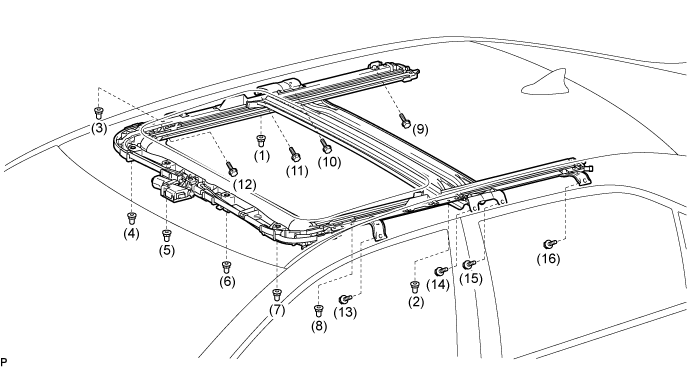
Temporarily install the sliding roof housing sub-assembly with the 8 nuts and 8 bolts.
Tighten the 8 nuts and 8 bolts in the order shown in the illustration to install the sliding roof housing sub-assembly.
Tighten the 8 bolts of the brackets in the order shown in the illustration.
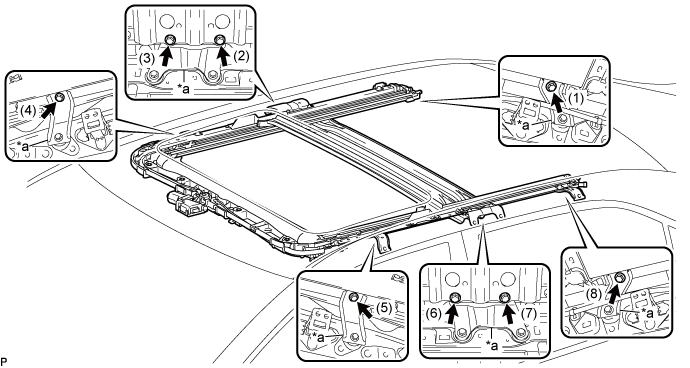
| *a | Bracket | - | - |
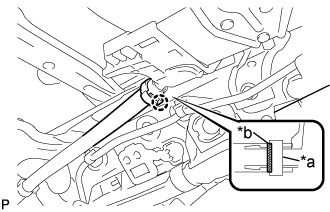 |
for Clamp Type:
| *a | Clamp |
| *b | Marking |
Insert the sliding roof drain hose.
Engage the claw to connect the sliding roof drain hose.
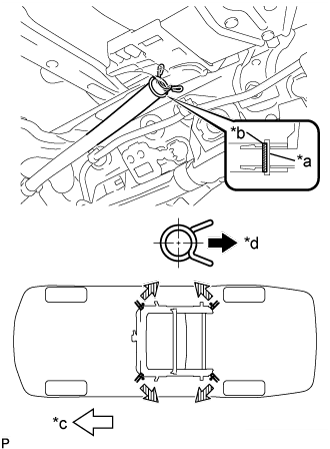 |
for Clip Type:
| *a | Marking |
| *b | Clip |
| *c | Front Side |
| *d | Outside |
Expand the clip to insert the sliding roof drain hose.
Release the clip to connect the sliding roof drain hose.
| 2. INSTALL REAR NO. 2 SIDE RAIL SPACER LH |
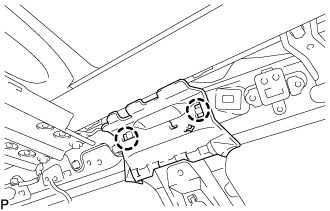 |
Engage the 2 claws to install the rear No. 2 side rail spacer LH.
| 3. INSTALL REAR NO. 2 SIDE RAIL SPACER RH |
| 4. INSTALL SLIDING ROOF WEATHERSTRIP |
Install the sliding roof weatherstrip as follows:
Position the joint of the weatherstrip at the rear center.
Align the alignment mark (yellow) on the weatherstrip with the middle marks at the corners of the sliding roof panel sub-assembly and install the weatherstrip.
Install the lip of the weatherstrip firmly.
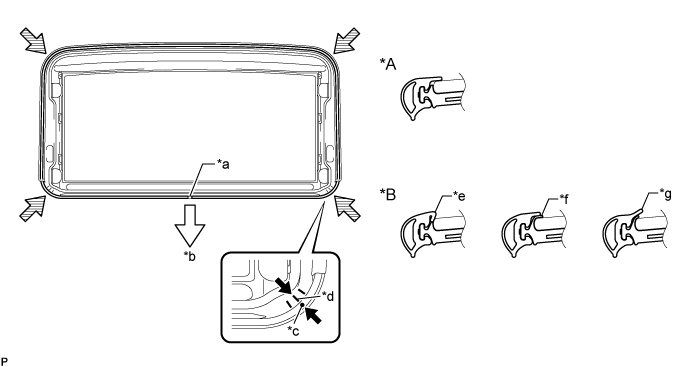
| *A | Normal | *B | Abnormal |
| *a | Joint | *b | Rear Side |
| *c | Alignment Mark (Yellow) | *d | Middle Mark |
| *e | Pinched | *f | Exposed |
| *g | Gap (raised, wavy, etc.) | - | - |
| 5. INSTALL SLIDING ROOF GLASS SUB-ASSEMBLY |
Using a T25 "TORX" socket wrench, temporarily install the sliding roof glass sub-assembly with the 4 screws.
Perform a level check.
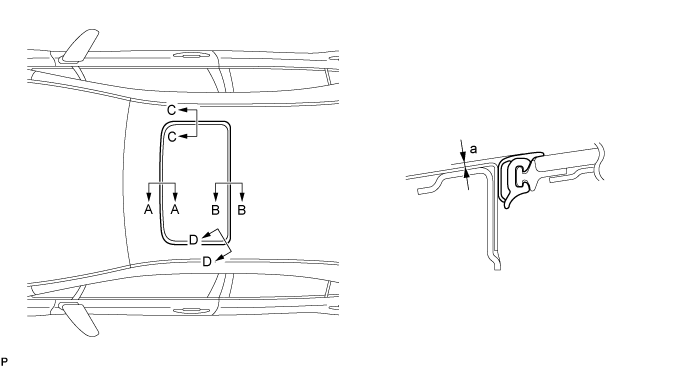
Check the difference in level for "a" between the roof panel and the upper surface of the weatherstrip when the sliding roof glass is fully closed.
| Area | Measurement |
| A - A | 0 + 1.0 mm (0 + 0.0394 in.) 0 - 2.0 mm (0 - 0.0787 in.) |
| B - B | 0 + 2.0 mm (0 + 0.0787 in.) 0 - 1.0 mm (0 - 0.0394 in.) |
| C - C | 0 + 1.5 mm (0 + 0.0591 in.) 0 - 1.5 mm (0 - 0.0591 in.) |
| D - D | 0 + 1.5 mm (0 + 0.0591 in.) 0 - 1.0 mm (0 - 0.0394 in.) |
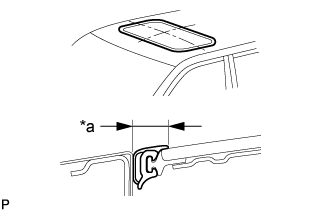 |
Perform a gap check.
Check the gap between the roof panel and roof glass.
| *a | Even |
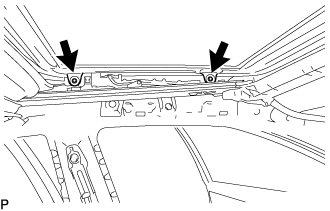 |
After adjusting the sliding roof glass, using a T25 "TORX" socket wrench, install the sliding roof glass sub-assembly with the 4 screws.
| 6. CHECK FOR WATER LEAK |
After adjusting the sliding roof glass sub-assembly, check for water leakage into the vehicle interior.
If there are any leaks, readjust the sliding roof glass sub-assembly.
| 7. INSTALL SLIDING ROOF SIDE GARNISH LH |
Engage the 2 claws to install a new sliding roof side garnish LH.
| 8. INSTALL SLIDING ROOF SIDE GARNISH RH |
| 9. INSTALL CURTAIN SHIELD AIRBAG ASSEMBLY LH |
| 10. INSTALL CURTAIN SHIELD AIRBAG ASSEMBLY RH |
| 11. RESET SLIDING ROOF DRIVE GEAR SUB-ASSEMBLY |
| 12. CHECK SLIDING ROOF SYSTEM |
| 13. INSPECT FOR WATER LEAK |
After adjusting the sliding roof glass sub-assembly, inspect for water leaks.
If there are any leaks, readjust the sliding roof glass sub-assembly.