Home › Vehicle Interior › HEATING / AIR CONDITIONING › FRONT EVAPORATOR TEMPERATURE SENSOR (for TMC, TMMR Made)

FRONT EVAPORATOR TEMPERATURE SENSOR (for TMC, TMMR Made) > INSTALLATION

for Preparation Click here


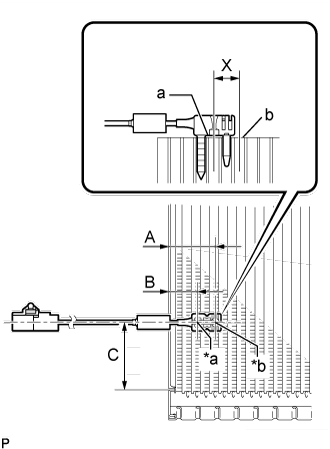
1. INSTALL NO. 1 COOLER THERMISTOR


    E168014E09
  1. Install the No. 1 cooler thermistor as shown in the illustration.
    Text in Illustration 
    *a
    Fixed Part
    *b
    Sensor Part
    Part
    Length
    A
    34.3 mm
    1.35 in.
    B
    20.9 mm
    0.823 in.
    C
    50 mm
    1.97 in.

    NOTICE:
    1. Be sure to insert the No. 1 cooler thermistor only once because reinserting it into the same position will not allow it to be firmly secured.
    2. When reusing the No. 1 cooler evaporator sub-assembly, insert the No. 1 cooler thermistor one row next to the one that has been used previously (X in the illustration).
    3. After inserting the No. 1 cooler thermistor, do not apply excessive force to the wire.
    4. Directly insert the No. 1 cooler thermistor until the edge of the plastic case "a" comes into contact with the No. 1 cooler evaporator sub-assembly "b".
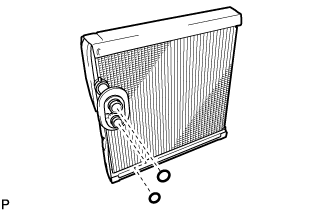
2. INSTALL NO. 1 COOLER EVAPORATOR SUB-ASSEMBLY


    E167988
  1. Sufficiently apply compressor oil to 2 new O-rings and the fitting surfaces. Install the 2 O-rings to the No. 1 cooler evaporator sub-assembly.

    Compressor Oil:
    ND-OIL 8 or equivalent

  1. Install the No. 1 cooler evaporator sub-assembly to the blower assembly.

    NOTICE:
    Keep the O-rings and O-ring fitting surfaces free from dirt or any foreign objects.


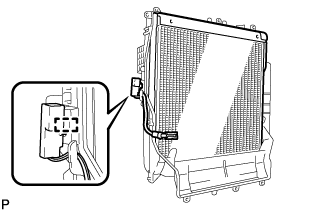
    E179587
  1. Engage the clamp to install the No. 1 cooler evaporator sub-assembly with the No. 1 cooler thermistor.

    HINT:
    Completely cover the tube with the grommet.


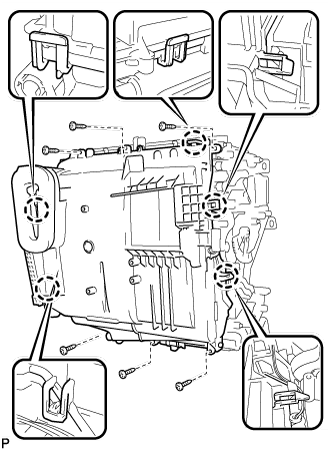
    E179586
  1. Engage the 5 claws.

  1. Install the plate cover with the 6 screws.


3. INSTALL AIR CONDITIONING RADIATOR ASSEMBLY


    E315356
  1. Engage the 2 claws.

  1. Install the air conditioning radiator assembly with the 2 screws.


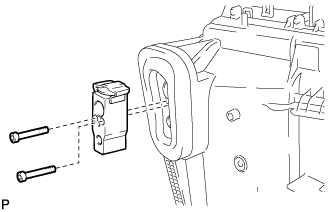
4. INSTALL COOLER EXPANSION VALVE


    E228074
  1. Using a 4 mm hexagon socket wrench, install the cooler expansion valve with the 2 hexagon bolts.

    Torque:
    3.5 N*m{ 36 kgf*cm , 31 in.*lbf }


5. CONNECT AIR CONDITIONING HARNESS ASSEMBLY
  1. Engage the 3 guides and connect the 3 connectors.

  1. Connect the air conditioner harness assembly to the air conditioning unit assembly.


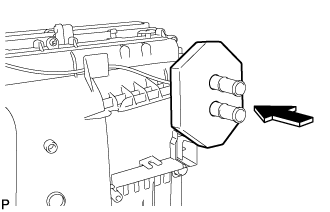
    E228073
  1. Install the heater packing as shown in the illustration.


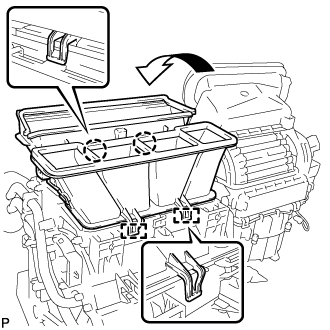
6. INSTALL NO. 6 HEATER TO REGISTER DUCT ASSEMBLY


    E227194
  1. Engage the 2 claws and 2 guides to install the No. 6 heater to register duct assembly as shown in the illustration.


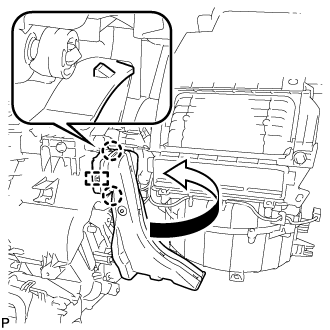
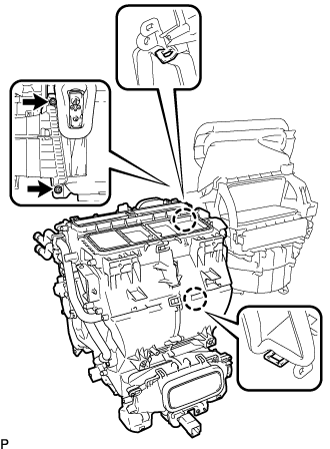
7. INSTALL NO. 1 AIR DUCT SUB-ASSEMBLY


    E227192
  1. Engage the guide and 2 claws to install the No. 1 air duct sub-assembly as shown in the illustration.


8. INSTALL AIR CONDITIONING UNIT ASSEMBLY
(Click here)