 |
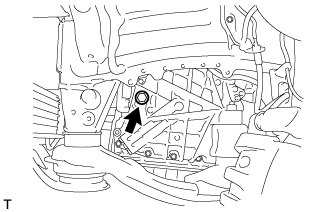
Remove the refill plug and gasket from the rear transaxle cover sub-assembly.
FRONT DRIVE SHAFT ASSEMBLY (for 6AR-FSE) > REMOVAL |
| 1. REMOVE FRONT WHEELS |
| 2. REMOVE FRONT WHEEL OPENING EXTENSION PAD LH |
| 3. REMOVE ENGINE UNDER COVER LH |
| 4. REMOVE FRONT WHEEL OPENING EXTENSION PAD RH |
| 5. REMOVE ENGINE UNDER COVER RH |
| 6. REMOVE FRONT FENDER APRON SEAL LH |
| 7. REMOVE FRONT FENDER APRON SEAL RH |
| 8. DRAIN AUTOMATIC TRANSAXLE FLUID |
|
Remove the refill plug and gasket from the rear transaxle cover sub-assembly.
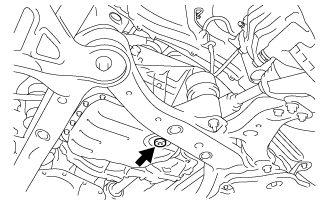 |
Using a 6 mm hexagon socket wrench, remove the overflow plug and gasket from the automatic transaxle oil pan sub-assembly.
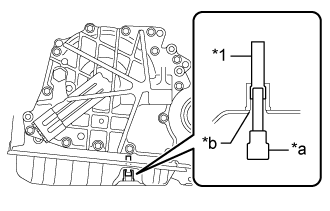 |
Using a 6 mm hexagon socket wrench, remove the No. 1 transmission oil filler tube from the automatic transaxle oil pan sub-assembly.
| *1 | No. 1 Transmission Oil Filler Tube |
| *a | 6 mm Hexagon Socket Wrench |
| *b | Overflow Plug Hole |
Drain automatic transaxle fluid from the automatic transaxle assembly.
|
Using a 6 mm hexagon socket wrench, install the No. 1 transmission oil filler tube to the automatic transaxle oil pan sub-assembly.
| *1 | No. 1 Transmission Oil Filler Tube |
| *a | 6 mm Hexagon Socket Wrench |
| *b | Overflow Plug Hole |
|
Using a 6 mm hexagon socket wrench, temporarily install the gasket and overflow plug to the automatic transaxle oil pan sub-assembly.
|
Temporarily install the gasket and refill plug to the automatic transaxle assembly.
| 9. REMOVE FRONT AXLE SHAFT NUT |
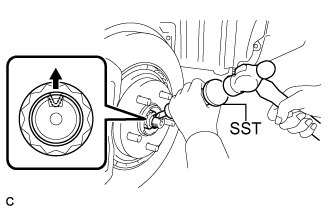 |
Using SST and a hammer, release the staked part of the front axle shaft nut.
While applying the brakes, remove the front axle shaft nut.
| 10. SEPARATE FRONT STABILIZER LINK ASSEMBLY |
for Steel Type:
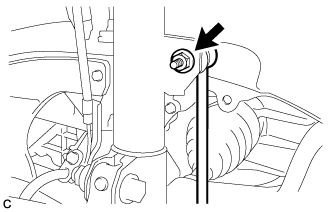 |
Remove the nut and separate the front stabilizer link assembly from the front shock absorber assembly.
If the ball joint turns together with the nut, use a hexagon wrench to hold the stud bolt.
for Aluminum Type:
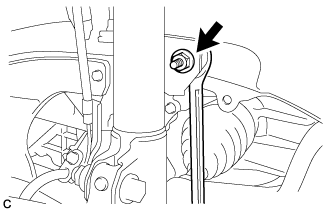 |
Remove the nut and separate the front stabilizer link assembly from the front shock absorber assembly.
If the ball joint turns together with the nut, use a wrench to hold the stud bolt.
| 11. SEPARATE FRONT SPEED SENSOR |
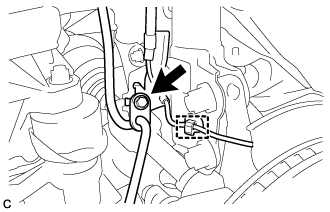 |
Remove the bolt, disengage the clamp and separate the front speed sensor and front flexible hose.
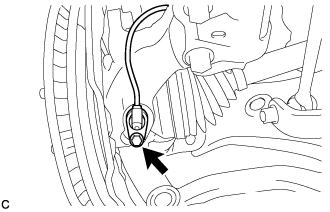 |
Remove the bolt and front speed sensor from the steering knuckle.
| 12. SEPARATE TIE ROD ASSEMBLY |
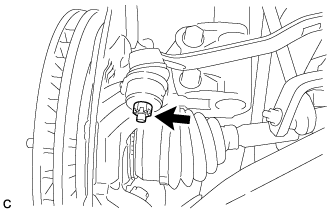 |
Remove the cotter pin and nut.
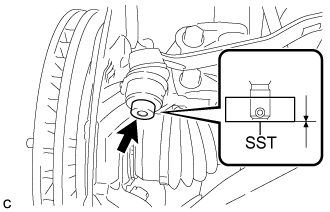 |
Install SST to the tie rod assembly LH.
Secure SST using a string.
Using SST, separate the tie rod assembly LH from the steering knuckle.
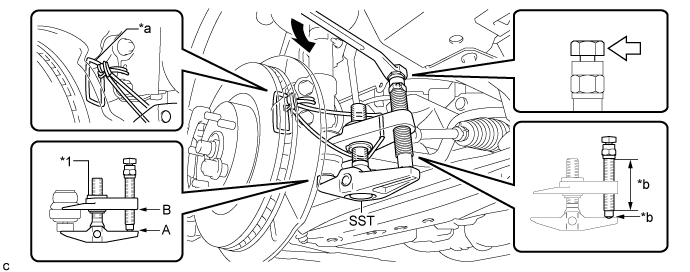
| *1 | Center Nut | - | - |
| *a | String | *b | Grease Application Area |
 | Place the wrench here. | - | - |
| 13. SEPARATE FRONT LOWER NO. 1 SUSPENSION ARM SUB-ASSEMBLY |
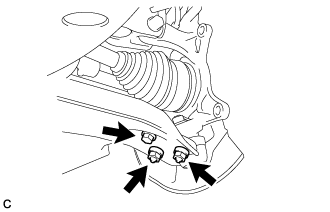 |
Remove the bolt and 2 nuts, and separate the front lower No. 1 suspension arm sub-assembly from the front lower ball joint assembly.
| 14. SEPARATE FRONT DRIVE SHAFT ASSEMBLY |
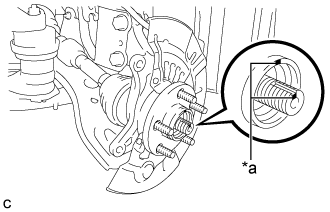 |
Put matchmarks on the front drive shaft assembly and the front axle hub sub-assembly.
| *a | Matchmark |
Using a plastic hammer, separate the front drive shaft assembly from the front axle assembly.
If it is difficult to separate, tap the end of the front drive shaft assembly using a brass bar and a hammer.
| 15. REMOVE FRONT DRIVE SHAFT ASSEMBLY LH |
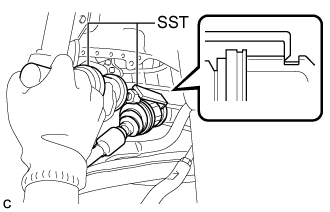 |
Using SST, remove the front drive shaft assembly LH.
| 16. REMOVE FRONT DRIVE SHAFT ASSEMBLY RH |
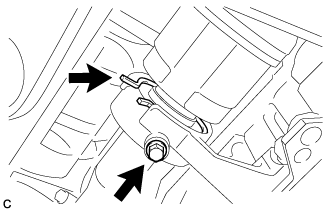 |
Separate the bearing bracket hole snap ring from the drive shaft bearing bracket.
Remove the bolt and front drive shaft assembly RH from the drive shaft bearing bracket.
Remove the bearing bracket hole snap ring from the front drive shaft assembly RH.
| 17. REMOVE FRONT DRIVE SHAFT HOLE SNAP RING LH |
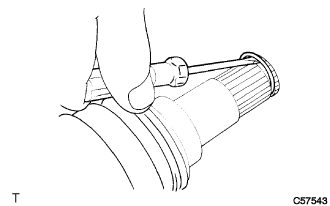 |
Using a screwdriver, remove the front drive shaft hole snap ring LH.