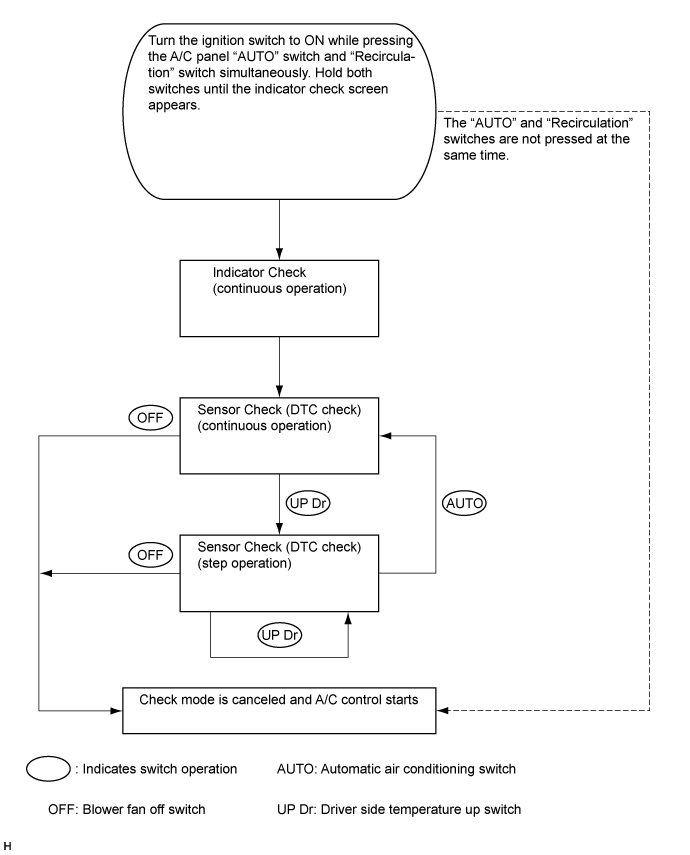
By operating each of the air conditioning control switches as shown in the diagram below, it is possible to enter diagnostic check mode.
AIR CONDITIONING SYSTEM > DIAGNOSIS SYSTEM |
| DESCRIPTION |
Air conditioning system data and the Diagnostic Trouble Codes (DTCs) can be read through the Data Link Connector 3 (DLC3) of the vehicle. When the system seems to be malfunctioning, use the intelligent tester to check for malfunctions and perform troubleshooting.
| CHECK DLC3 |
Check the DLC3 (Click here).
| LIST OF OPERATION METHODS |
By operating each of the air conditioning control switches as shown in the diagram below, it is possible to enter diagnostic check mode.
| INDICATOR CHECK |
Turn the ignition switch off.
Turn the ignition switch to ACC and wait at least 5 seconds.
Turn the ignition switch to ON while pressing A/C panel "AUTO" switch and "Recirculation" switch simultaneously. Hold both switches until the indicator check screen appears.
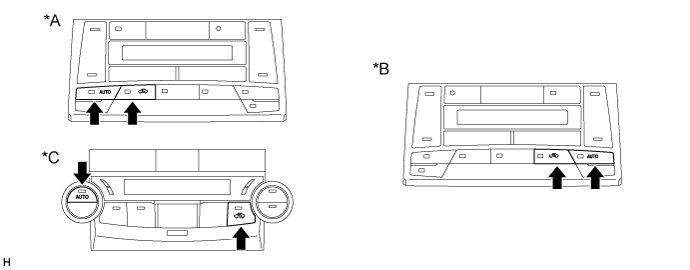
| *A | for LHD (for TMC, TMMR Made) | *B | for RHD |
| *C | for LHD (for TMMK Made) | - | - |
The indicator check is automatically performed when panel diagnosis is activated. Check that the indicators light up and go off 4 times at 1 second intervals continuously.
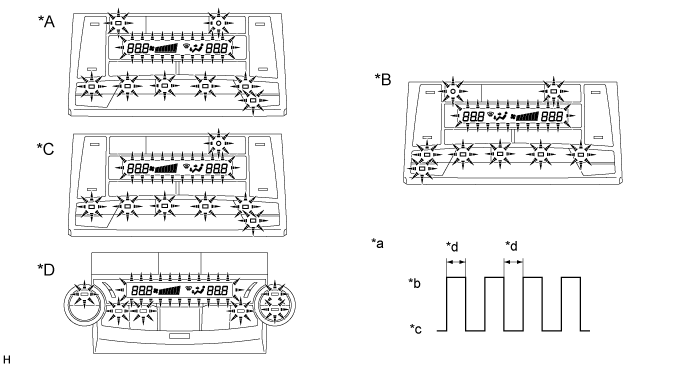
| *A | for LHD (for TMC, TMMR Made) (w/ Ion Generator Sub-assembly) | *B | for RHD |
| *C | for LHD (for TMC, TMMR Made) (w/o Ion Generator Sub-assembly) | *D | for LHD (for TMMK Made) |
| *a | Indicator Blinking Pattern | *b | ON |
| *c | OFF | *d | 1 sec. |
| SENSOR CHECK (DTC CHECK) |
Start the engine and warm it up.
Perform the indicator check.
Read the DTC displayed on A/C panel display.
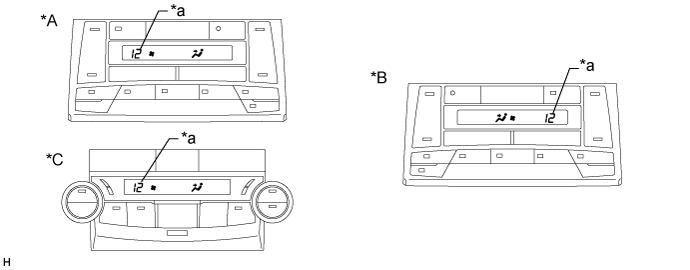
| *A | for LHD (for TMC, TMMR Made) | *B | for RHD |
| *C | for LHD (for TMMK Made) | - | - |
| *a | Diagnostic Trouble Code (DTC) | - | - |
If the steps are difficult to read because they change automatically, press the "driver side TEMP UP" switch to display the steps one at a time so that they can be read easily. The items are displayed step by step each time the "driver side TEMP UP" switch is pressed. (for TMC, TMMR Made)
If the DTCs are difficult to read because they change automatically, turn the "driver side TEMP UP" switch clockwise to display the DTCs one at a time so that they can be read easily. The DTCs change step by step when the "driver side TEMP UP" switch is turned clockwise. (for TMMK Made)
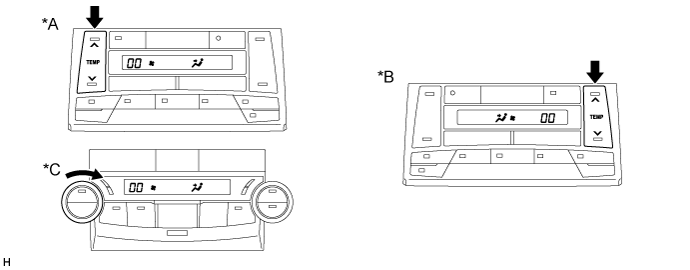
| *A | for LHD (for TMC, TMMR Made) | *B | for RHD |
| *C | for LHD (for TMMK Made) | - | - |
Clear DTCs
During the sensor check, press the "FRONT DEF" switch and "REAR DEF" switch simultaneously.
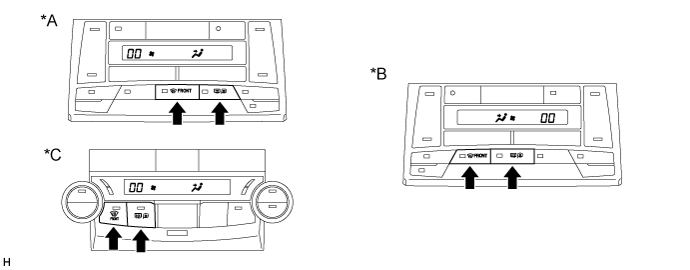
| *A | for LHD (for TMC, TMMR Made) | *B | for RHD |
| *C | for LHD (for TMMK Made) | - | - |