 |
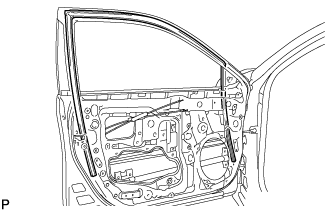
Remove the front door glass run.
FRONT DOOR WINDOW FRAME MOULDING (for TMMK Made) > REMOVAL |
| 1. REMOVE FRONT DOOR BELT MOULDING ASSEMBLY |
| 2. REMOVE FRONT DOOR GLASS RUN |
|
Remove the front door glass run.
| 3. REMOVE FRONT DOOR CHECK ASSEMBLY |
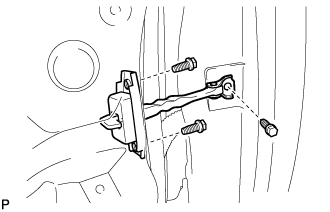 |
Remove the 3 bolts and front door check assembly.
| 4. REMOVE FRONT DOOR WEATHERSTRIP |
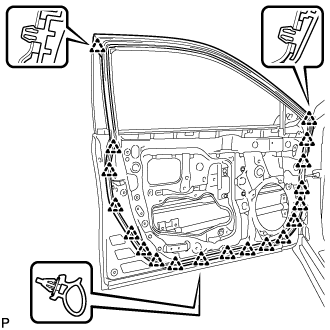 |
Using a clip remover, disengage the 19 clips and remove the front door weatherstrip.
| 5. REMOVE FRONT DOOR REAR WINDOW FRAME MOULDING |
| Item | Temperature |
| Vehicle Body | 40 to 60°C (104 to 140°F) |
| Front Door Rear Window Frame Moulding | 20 to 30°C (68 to 86°F) |
Using a heat light, heat the front door rear window frame moulding.
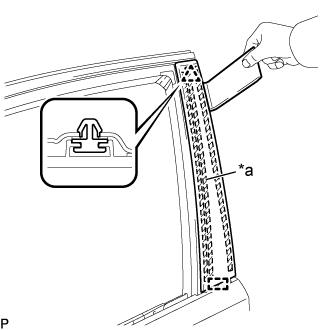 |
Using a moulding remover, disengage the clip and guide, and separate the double-sided tape to remove the front door rear window frame moulding.
| *a | Caulking Sponge |
 | Double-sided Tape |
| 6. REMOVE FRONT DOOR UPPER WINDOW FRAME MOULDING |
Insert a 4.0 mm (0.157 in.) drill bit into a drill.
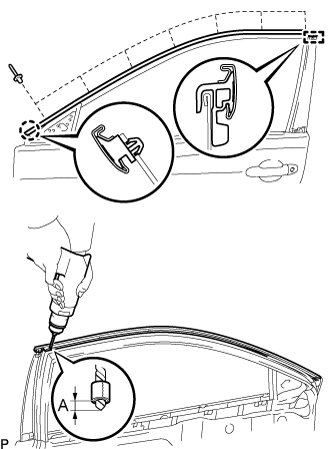 |
Tape the 4.0 mm (0.157 in.) drill bit 5.0 mm (0.197 in.) from the tip as shown in the illustration.
| Area | Measurement |
| A | 5.0 mm (0.197 in.) |
Lightly press the drill against the rivets to drill off the rivet flanges, and remove the 7 rivets.
Using a vacuum cleaner, remove the rivet fragments and shavings from the drilled areas.
Disengage the claw and guide, and remove the front door upper window frame moulding from the door frame.