for Blank Type:
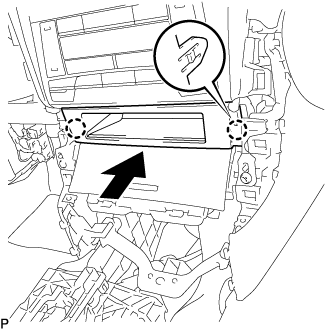
Engage the 2 claws to install the front console upper panel garnish as shown in the illustration.
 |
RADIO RECEIVER (for TMC, TMMR Made) > INSTALLATION |
| 1. INSTALL RADIO RECEIVER ASSEMBLY (for Radio Receiver Type) |
| 2. INSTALL RADIO AND DISPLAY RECEIVER ASSEMBLY (for Radio and Display Type) |
| 3. INSTALL NAVIGATION COMPUTER ASSEMBLY WITH WIRE (w/ Navigation System) |
Connect the 3 connectors to install the navigation computer assembly with wire.
| 4. INSTALL AIR CONDITIONING CONTROL ASSEMBLY |
Engage the 4 clips to install the air conditioning control assembly.
| 5. INSTALL NO. 1 RADIO BRACKET |
w/o Navigation System:
Install the No. 1 radio bracket with the 4 screws.
w/ Navigation System:
Install the No. 1 radio bracket with the 6 screws.
| 6. INSTALL NO. 2 RADIO BRACKET |
w/o Navigation System:
Install the No. 2 radio bracket with the 4 screws.
w/ Navigation System:
Install the No. 2 radio bracket with the 6 screws.
| 7. INSTALL RADIO RECEIVER ASSEMBLY WITH AIR CONDITIONING CONTROL ASSEMBLY |
Connect each connector.
Engage the 6 clips to the vehicle body to temporarily install the radio receiver assembly with air conditioning control assembly.
Install the radio receiver assembly with air conditioning control assembly with the 4 bolts.
| 8. INSTALL FRONT CONSOLE UPPER PANEL GARNISH |
for Blank Type:
|
Engage the 2 claws to install the front console upper panel garnish as shown in the illustration.
for 3 Switch Hole Type:
Connect each connector.
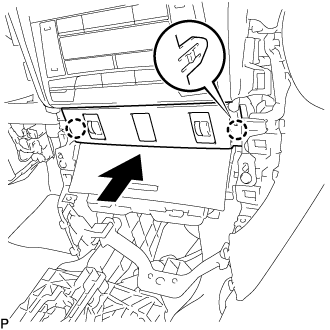 |
Engage the 2 claws to install the front console upper panel garnish as shown in the illustration.
| 9. INSTALL NO. 2 INSTRUMENT PANEL REGISTER ASSEMBLY |
Connect the connector.
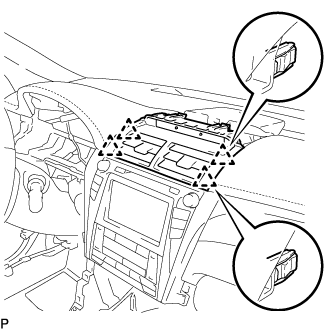 |
Engage the 4 clips to install the No. 2 instrument panel register assembly.
| 10. INSTALL CENTER INSTRUMENT CLUSTER FINISH PANEL SUB-ASSEMBLY |
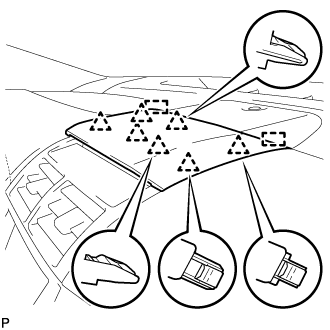 |
Engage the 7 clips and 2 guides to install the center instrument cluster finish panel sub-assembly.
| 11. INSTALL FRONT PANEL GARNISH LH |
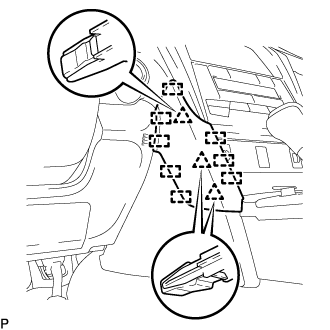 |
Engage the 3 clips and 8 guides to install the front panel garnish LH.
| 12. INSTALL FRONT PANEL GARNISH RH |
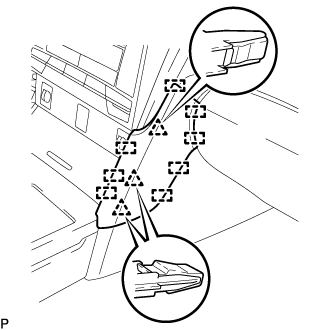 |
Engage the 3 clips and 8 guides to install the front panel garnish RH.