 |
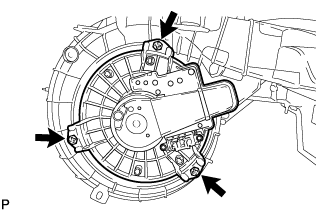
Install the blower motor with fan sub-assembly with the 3 screws.
BLOWER UNIT (for TMMK Made) > REASSEMBLY |
| 1. INSTALL BLOWER MOTOR WITH FAN SUB-ASSEMBLY |
|
Install the blower motor with fan sub-assembly with the 3 screws.
| 2. INSTALL NO. 1 BLOWER DAMPER SERVO SUB-ASSEMBLY |
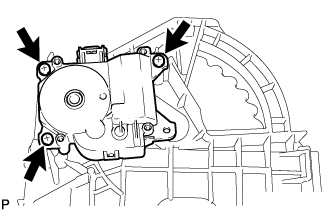 |
Install the No. 1 blower damper servo sub-assembly with the 3 screws.
| 3. INSTALL CLEAN AIR FILTER |
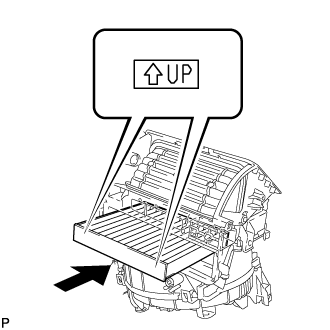 |
Install the clean air filter as shown in the illustration.
| 4. INSTALL AIR FILTER COVER PLATE |
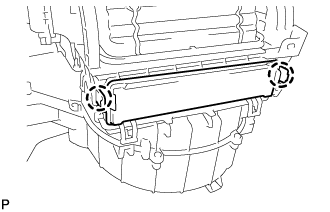 |
Engage the 2 claws to install the air filter cover plate.
| 5. INSTALL AIR DUCT SUB-ASSEMBLY |
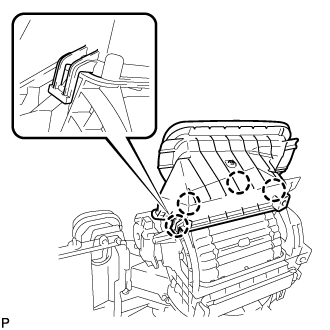 |
Engage the 4 claws to install the air duct sub-assembly.
| 6. INSTALL DRAIN COOLER HOSE |
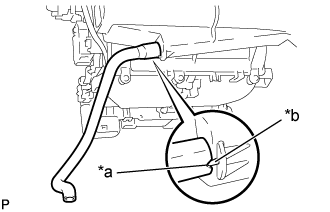 |
Install the drain cooler hose as shown in the illustration.
| *a | Hose Notch |
| *b | Blower Case Assembly Rib |
| 7. INSTALL NO. 1 COOLER EVAPORATOR SUB-ASSEMBLY |
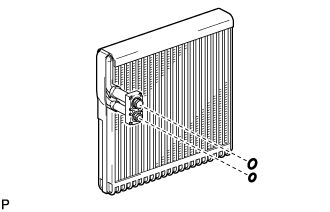 |
Sufficiently apply compressor oil to 2 new O-rings and the fitting surfaces. Install the 2 O-rings to the No. 1 cooler evaporator sub-assembly.
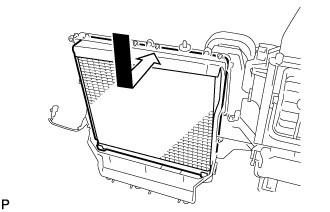 |
Install the No. 1 cooler evaporator sub-assembly to the blower assembly as shown in the illustration.
| 8. INSTALL NO. 1 COOLER THERMISTOR |
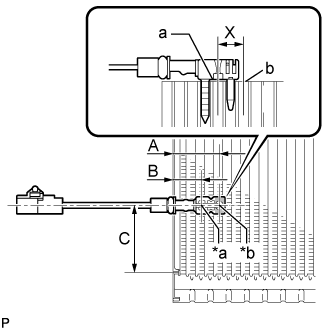 |
Install the No. 1 cooler thermistor as shown in the illustration.
| *a | Fixed Part |
| *b | Sensor Part |
| Part | Length | |
| A | 34.3 mm | 1.35 in. |
| B | 20.9 mm | 0.823 in. |
| C | 50 mm | 1.97 in. |
Engage the 2 clamps.
| 9. INSTALL COOLER EXPANSION VALVE |
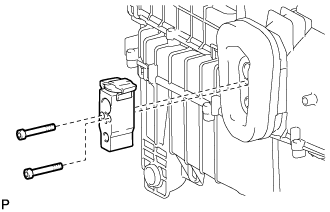 |
Using a 4 mm hexagon socket wrench, install the cooler expansion valve with the 2 hexagon bolts.