 |
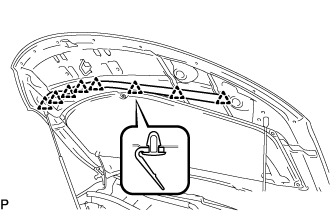
Using a clip remover, disengage the 8 clips and remove the hood to radiator support seal.
HOOD (for TMMK Made) > DISASSEMBLY |
| 1. REMOVE HOOD TO RADIATOR SUPPORT SEAL |
|
Using a clip remover, disengage the 8 clips and remove the hood to radiator support seal.
| 2. REMOVE HOOD INSULATOR |
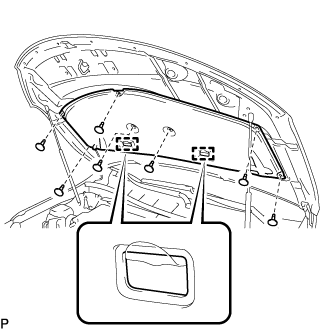 |
Using a clip remover, remove the 7 clips.
Disengage the 2 guides and remove the hood insulator.
| 3. REMOVE WASHER NOZZLE SUB-ASSEMBLY |
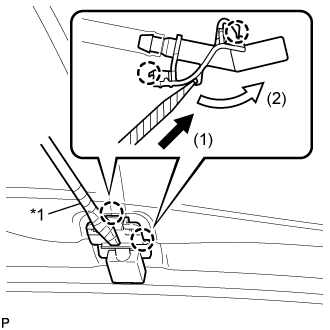 |
Using a screwdriver, disengage the 2 claws and separate the washer nozzle sub-assembly as shown in the illustration.
| *1 | Protective Tape |
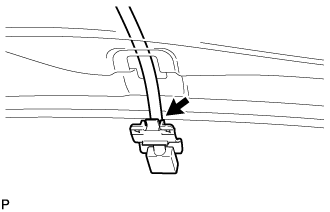 |
Remove the washer nozzle sub-assembly from the washer hose.
| 4. DISCONNECT WASHER HOSE ASSEMBLY |
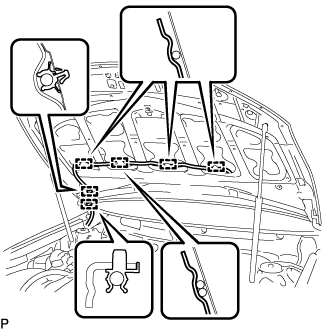 |
Disengage the 6 clamps and disconnect the washer hose assembly.
| 5. REMOVE HOOD SUPPORT ASSEMBLY LH |
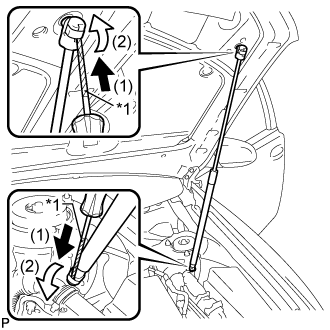 |
Using a screwdriver, remove the 2 stop rings as indicated by the arrows, in the order shown in the illustration.
| *1 | Protective Tape |
Release the ball joint and remove the hood support assembly.
| 6. REMOVE HOOD SUPPORT ASSEMBLY RH |