 |
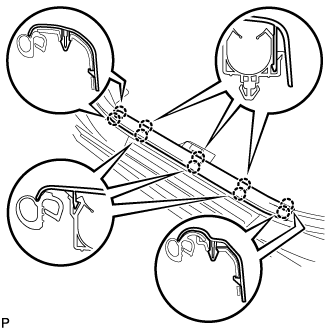
Disengage the 10 claws and remove the front door scuff plate LH.
FUEL LID LOCK CONTROL CABLE ASSEMBLY (for TMC, TMMR Made LHD) > REMOVAL |
| 1. PRECAUTION |
| 2. REMOVE FRONT SEAT ASSEMBLY LH (for Manual Seat) |
| 3. REMOVE FRONT SEAT ASSEMBLY LH (for Power Seat) |
| 4. REMOVE FRONT DOOR SCUFF PLATE LH |
|
Disengage the 10 claws and remove the front door scuff plate LH.
| 5. DISCONNECT FRONT DOOR OPENING TRIM WEATHERSTRIP LH |
Disconnect the front door opening trim weatherstrip.
| 6. REMOVE REAR DOOR SCUFF PLATE LH |
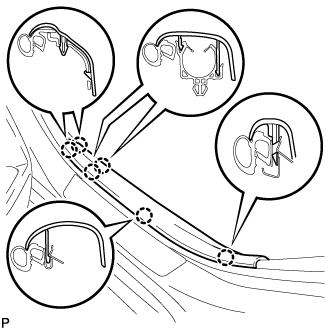 |
Disengage the 6 claws and remove the rear door scuff plate LH.
| 7. REMOVE REAR DOOR OPENING TRIM WEATHERSTRIP LH |
Remove the rear door opening trim weatherstrip LH.
| 8. REMOVE LAP BELT OUTER ANCHOR COVER |
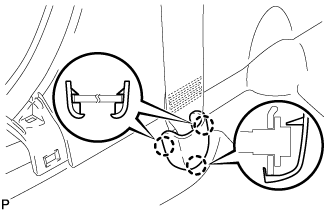 |
Disengage the 3 claws and remove the lap belt outer anchor cover.
| 9. DISCONNECT FRONT SEAT OUTER BELT ASSEMBLY LH |
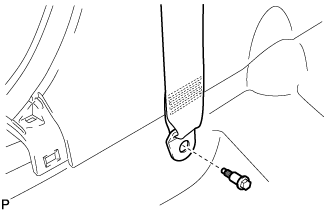 |
Remove the bolt and disconnect the floor anchor of the front seat outer belt assembly.
| 10. REMOVE CENTER PILLAR LOWER GARNISH LH |
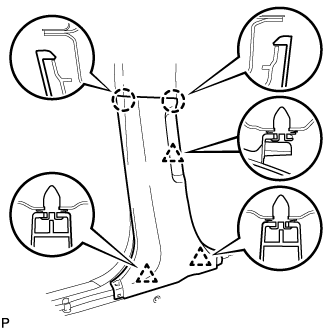 |
Disengage the 2 claws and 3 clips, and remove the center pillar lower garnish LH.
| 11. REMOVE REAR SEAT CUSHION ASSEMBLY (for Fold Down Seat Type) |
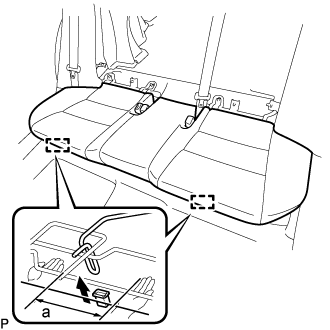 |
Lift up the front edge of the rear seat cushion assembly as shown in the illustration and disengage the 2 rear seat cushion frame hooks on the front side of the rear seat cushion assembly from the 2 rear seat cushion lock hooks.
| a | 100 mm (3.94 in.) or less |
w/ Seat Heater System:
Disconnect the connector.
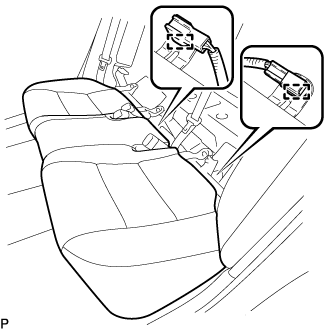 |
Disengage the 2 clamps.
Pass the 2 rear seat inner belt assemblies through the rear seat cushion assembly and remove the rear seat cushion assembly.
| 12. REMOVE REAR SEAT CUSHION LOCK HOOK (for Fold Down Seat Type) |
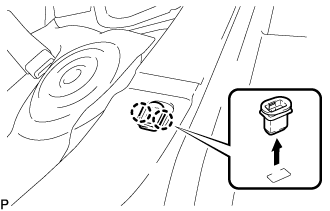 |
Disengage the 2 claws to remove the rear seat cushion lock hook as shown in the illustration.
| 13. REMOVE REAR SIDE SEATBACK ASSEMBLY LH (for Fold Down Seat Type) |
Disconnect the rear seat outer belt assembly from the rear seat shoulder belt guide LH.
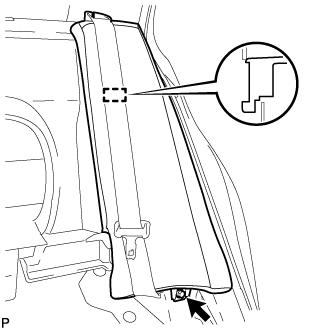 |
Remove the bolt.
Disengage the hook and remove the rear side seatback assembly LH.
| 14. REMOVE REAR SEAT CUSHION ASSEMBLY (for Reclining Seat Type) |
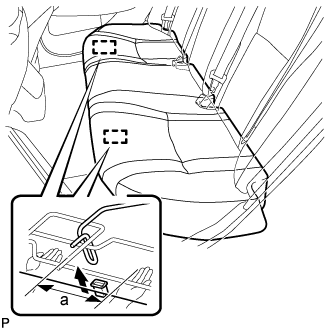 |
Lift up the front edge of the rear seat cushion assembly as shown in the illustration and disengage the 2 rear seat cushion frame hooks on the front side of the rear seat cushion assembly from the 2 rear seat cushion lock hooks.
| a | 100 mm (3.94 in.) or less |
Disconnect the 2 seat heater connectors.
Pass the 2 rear seat inner belt assemblies through the rear seat cushion assembly and remove the rear seat cushion assembly.
| 15. REMOVE REAR SEAT CUSHION LOCK HOOK (for Reclining Seat Type) |
|
Disengage the 2 claws to remove the rear seat cushion lock hook as shown in the illustration.
| 16. REMOVE REAR SEAT HEADREST ASSEMBLY (for Reclining Seat Type) |
| 17. REMOVE REAR SEATBACK COVER (for Reclining Seat Type) |
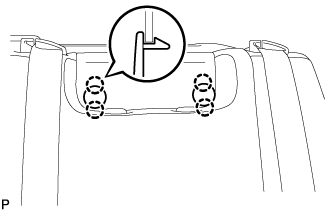 |
Disengage the 4 claws and remove the 2 rear seatback covers.
| 18. REMOVE REAR SEATBACK ASSEMBLY LH (for Reclining Seat Type) |
w/ Rear Seat Side Airbag:
Disconnect each connector and clamp from the child restraint seat anchor bracket sub-assembly LH.
Disengage the 2 rear seat belts from the 2 rear seat shoulder belt guides.
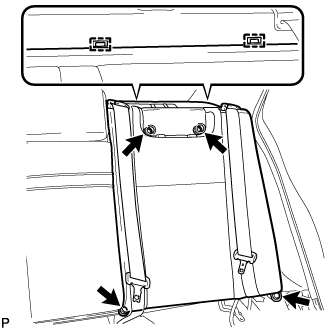 |
Disengage the 2 hooks and disconnect the cover.
Remove the 2 nuts, 2 bolts and rear seatback assembly LH.
| 19. REMOVE REAR SEAT SIDE GARNISH LH (for Reclining Seat Type) |
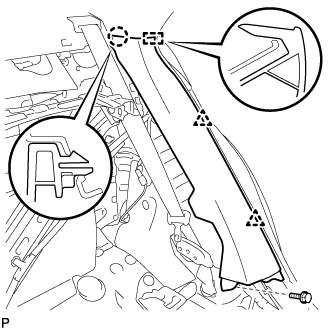 |
Remove the bolt.
Disengage the claw, 2 clips and guide and remove the rear seat side garnish LH.
| 20. REMOVE LUGGAGE COMPARTMENT DOOR COVER |
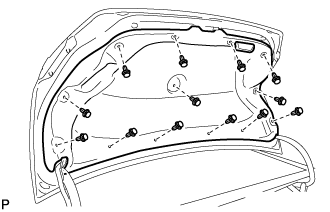 |
Remove the 13 clips and luggage compartment door cover.
| 21. REMOVE LUGGAGE COMPARTMENT DOOR HINGE COVER LH |
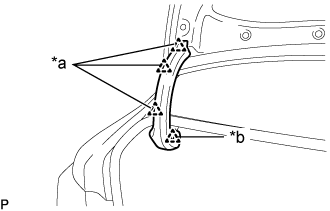 |
Remove the 3 clips (A).
| *a | Clip (A) |
| *b | Clip (B) |
Disengage the clip (B) and remove the luggage compartment door hinge cover LH.
| 22. REMOVE LUGGAGE COMPARTMENT FLOOR MAT |
Remove the luggage compartment floor mat.
| 23. REMOVE BAGGAGE HOLDER NET (w/ Partition Net) |
Remove the baggage holder net.
| 24. REMOVE REAR FLOOR FINISH PLATE |
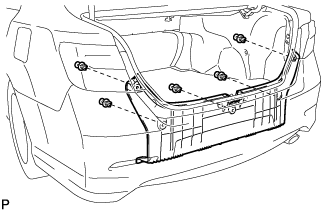 |
Remove the 5 clips.
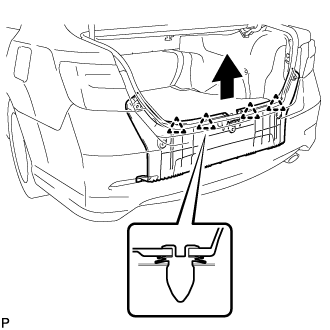 |
Disengage the 4 clips and remove the rear floor finish plate.
| 25. REMOVE NO. 1 LUGGAGE COMPARTMENT TRIM HOOK |
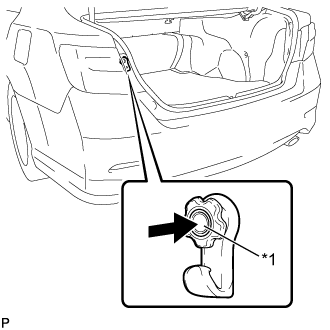 |
Push the pin and remove the No. 1 luggage compartment trim hook.
| *1 | Pin |
| 26. REMOVE LUGGAGE COMPARTMENT INNER TRIM COVER LH |
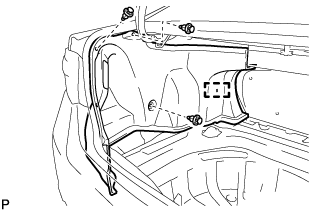 |
Remove the 3 clips.
Disengage the fastener and remove the luggage compartment inner trim cover LH.
| 27. REMOVE FUEL LID LOCK OPEN LEVER SUB-ASSEMBLY |
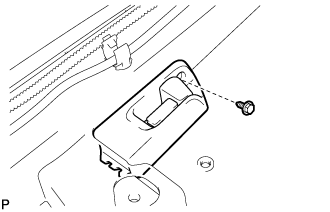 |
Remove the screw.
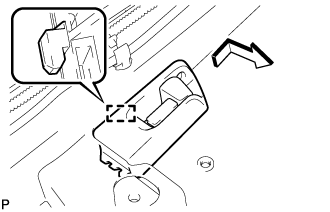 |
Disengage the guide and disconnect the fuel lid lock open lever sub-assembly as shown in the illustration.
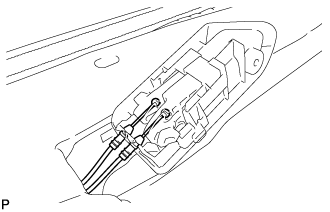 |
Disconnect the fuel lid lock control cable sub-assembly and luggage door lock control cable sub-assembly and remove the fuel lid lock open lever sub-assembly.
| 28. REMOVE FUEL LID LOCK CONTROL CABLE SUB-ASSEMBLY |
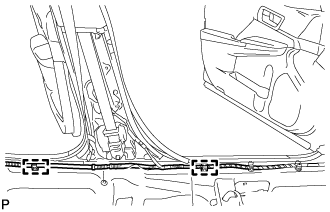 |
Disengage the 2 clamps.
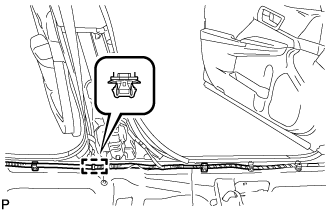 |
Disengage the clamp and disconnect the wire harness.
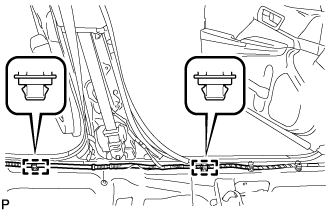 |
Disengage the 2 clamps and remove the 2 scuff plate clips.
Turn back the floor carpet so that the luggage door lock control cable sub-assembly and fuel lid lock control cable sub-assembly can be removed.
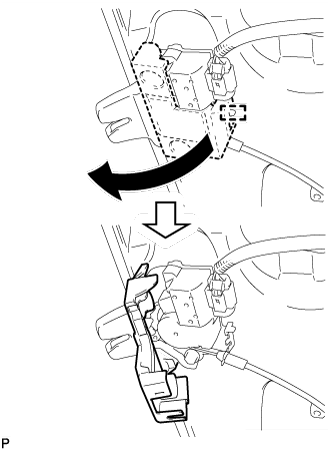 |
Disengage the guide as shown in the illustration.
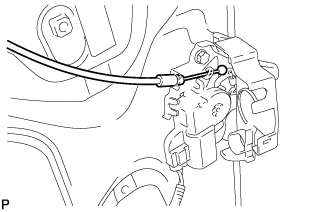 |
Disconnect the luggage door lock control cable sub-assembly.
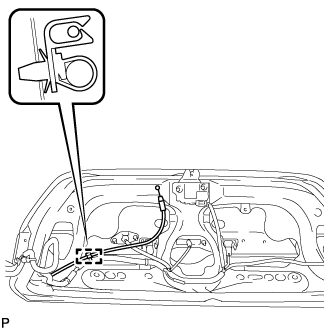 |
Disengage the clamp and disconnect the luggage door lock control cable sub-assembly.
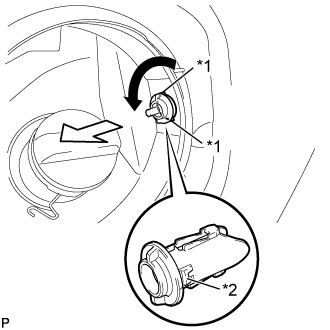 |
Rotate the fuel filler opening lid lock retainer as shown in the illustration to align the cutouts and the guides <A>, and then pull the fuel filler opening lid lock retainer.
| *1 | Cutout |
| *2 | Guide <A> |
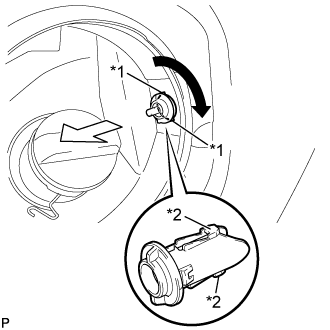 |
Rotate the fuel filler opening lid lock retainer as shown in the illustration to align the cutouts and guides <B>, and then pull the fuel filler opening lid lock retainer.
| *1 | Cutout |
| *2 | Guide <B> |
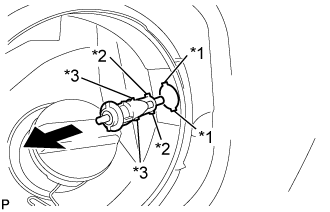 |
Pull out the fuel filler opening lid lock retainer with both guides <B> and <C> aligned with the cutouts.
| *1 | Cutout |
| *2 | Guide <C> |
| *3 | Guide <B> |
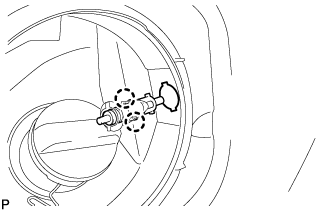 |
Disengage the 2 claws and remove the fuel filler opening lid lock retainer.
Disengage the 10 clamps and remove the fuel lid lock control cable sub-assembly and luggage door lock control cable sub-assembly.
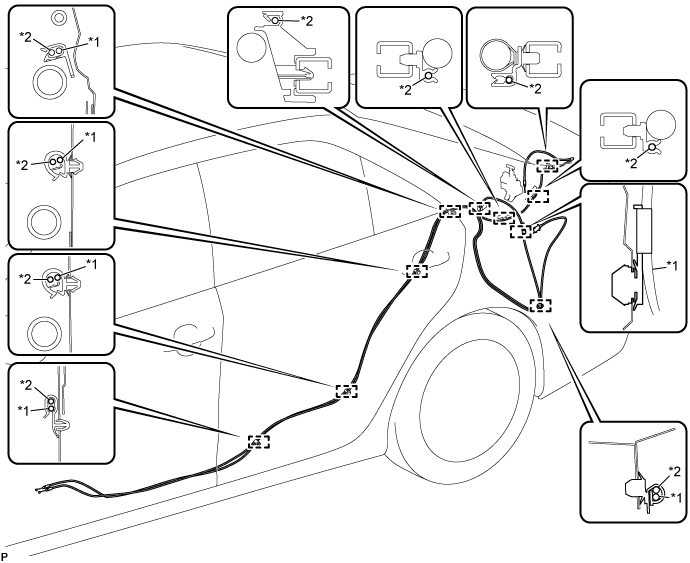
| *1 | Fuel Lid Lock Control Cable Sub-assembly | *2 | Luggage Door Lock Control Cable Sub-assembly |
Using a knife, cut off the clamp as shown in the illustration.
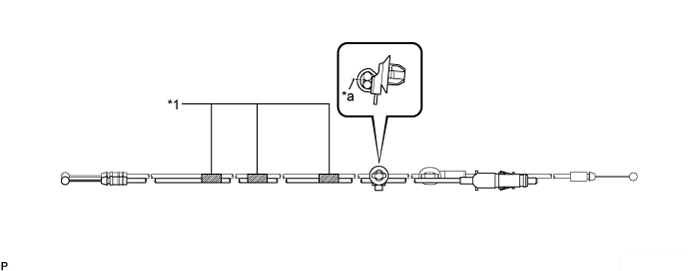
| *1 | Tape | - | - |
| *a | Cut | - | - |
Remove the clamp.
Remove the 3 pieces of tape and fuel lid lock control cable sub-assembly.