LUGGAGE DOOR LOCK CONTROL CABLE ASSEMBLY (for TMMK Made LHD) > REMOVAL |
| 1. PRECAUTION |
| 2. DISCONNECT CABLE FROM NEGATIVE BATTERY TERMINAL |
| 3. REMOVE FRONT SEAT ASSEMBLY LH (for Manual Seat) |
| 4. REMOVE FRONT SEAT ASSEMBLY LH (for Power Seat) |
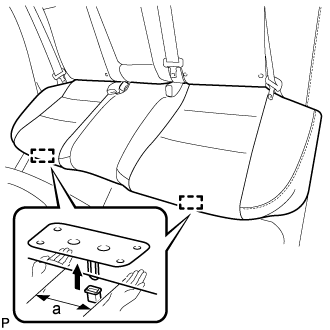
| 5. REMOVE REAR SEAT CUSHION ASSEMBLY |
![]() |
Lift up the front edge of the rear seat cushion assembly as shown in the illustration and disengage the 2 rear seat cushion frame hooks on the front side of the rear seat cushion assembly from the 2 rear seat cushion lock hooks.
| a | 100 mm (3.94 in.) or less |
Pass the 2 rear seat inner belt assemblies through the rear seat cushion assembly and remove the rear seat cushion assembly.
| 6. REMOVE REAR SEAT CUSHION LOCK HOOK |
![]() |
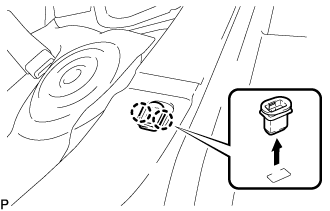
Disengage the 2 claws to remove the rear seat cushion lock hook as shown in the illustration.
| 7. REMOVE REAR SIDE SEATBACK ASSEMBLY LH |
Disconnect the rear seat outer belt assembly from the rear seat shoulder belt guide.
Disconnect the connector.
![]() |
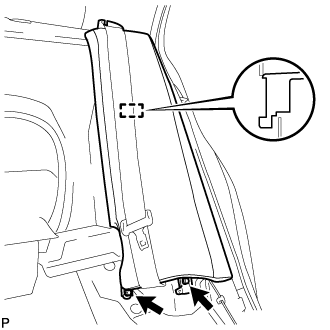
Remove the 2 bolts.
Disengage the hook and remove the rear side seatback assembly LH.
| 8. REMOVE FRONT DOOR SCUFF PLATE LH |
![]() |
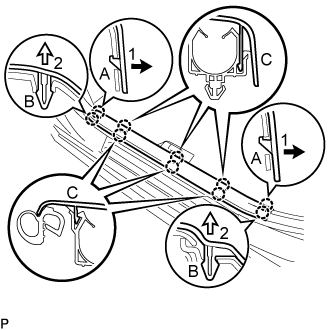
Disengage the 2 claws (A) in the direction indicated by the arrows (1) shown in the illustration.
Disengage the 2 claws (B) in the direction indicated by the arrows (2) shown in the illustration.
Disengage the 6 claws (C) to remove the front door scuff plate LH.
| 9. DISCONNECT FRONT DOOR OPENING TRIM WEATHERSTRIP LH |
Disconnect the front door opening trim weatherstrip.
| 10. REMOVE REAR DOOR SCUFF PLATE LH |
![]() |
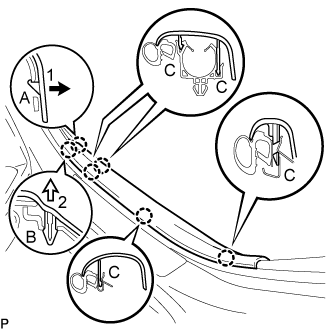
Disengage the claw (A) in the direction indicated by the arrow (1) shown in the illustration.
Disengage the claw (B) in the direction indicated by the arrow (2) shown in the illustration.
Disengage the 4 claws (C) to remove the rear door scuff plate LH.
| 11. DISCONNECT REAR DOOR OPENING TRIM WEATHERSTRIP LH |
Disconnect the rear door opening trim weatherstrip LH.
| 12. REMOVE LAP BELT OUTER ANCHOR COVER |
![]() |
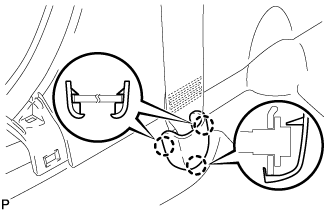
Disengage the 3 claws and remove the lap belt outer anchor cover.
| 13. DISCONNECT FRONT SEAT OUTER BELT ASSEMBLY LH |
![]() |
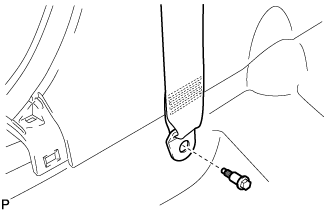
Remove the bolt and disconnect the floor anchor of the front seat outer belt assembly.
| 14. REMOVE CENTER PILLAR LOWER GARNISH LH |
![]() |
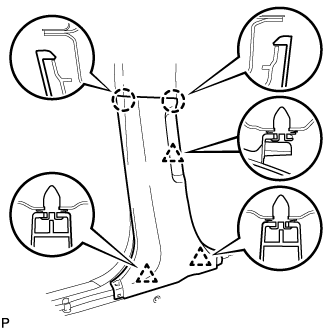
Disengage the 2 claws and 3 clips, and remove the center pillar lower garnish LH.
| 15. REMOVE LUGGAGE COMPARTMENT DOOR COVER |
![]() |
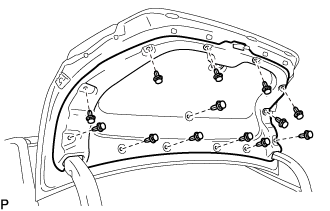
Remove the 13 clips and luggage compartment door cover.
| 16. REMOVE LUGGAGE COMPARTMENT DOOR HINGE COVER LH |
![]() |
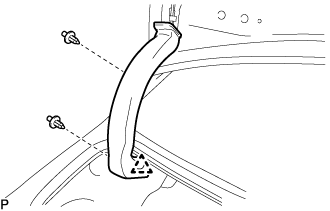
Remove the 2 clips.
Disengage the clip and remove the luggage compartment door hinge cover LH.
| 17. REMOVE SPARE WHEEL COVER ASSEMBLY |
Remove the spare wheel cover assembly.
| 18. REMOVE REAR FLOOR FINISH PLATE |
![]() |
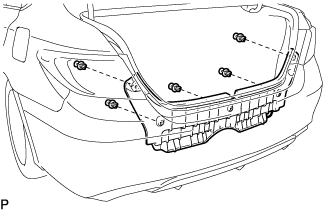
Remove the 5 clips.
![]() |
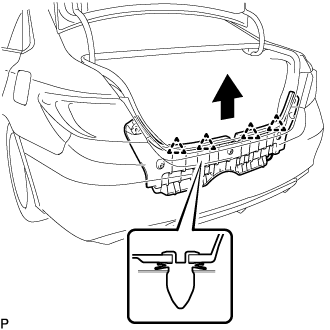
Disengage the 4 clips and remove the rear floor finish plate as shown in the illustration.
| 19. REMOVE NO. 1 LUGGAGE COMPARTMENT TRIM HOOK |
![]() |
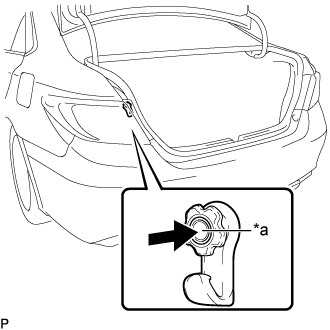
Push in the pin and remove the No. 1 luggage compartment trim hook.
| *a | Pin |
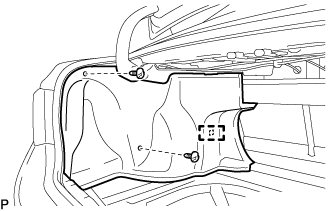
| 20. REMOVE LUGGAGE COMPARTMENT INNER TRIM COVER LH |
![]() |
Remove the 2 clips.
Disengage the fastener and remove the luggage compartment inner trim cover LH.
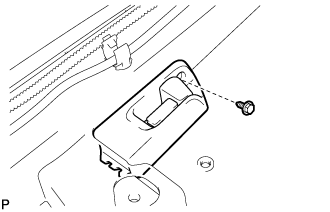
| 21. REMOVE FUEL LID LOCK OPEN LEVER SUB-ASSEMBLY |
![]() |
Remove the screw.
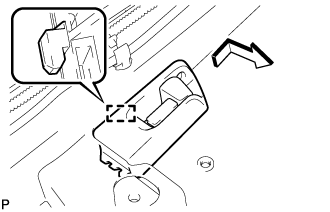
![]() |
Disengage the guide and disconnect the fuel lid lock open lever sub-assembly as shown in the illustration.
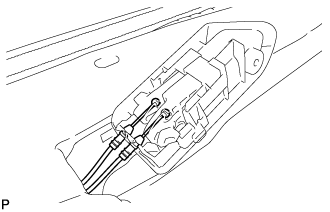
![]() |
Disconnect the fuel lid lock control cable sub-assembly and luggage door lock control cable sub-assembly and remove the fuel lid lock open lever sub-assembly.
| 22. REMOVE LUGGAGE DOOR LOCK CONTROL CABLE SUB-ASSEMBLY |
![]() |
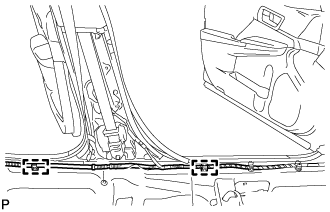
Disengage the 2 clamps.
![]() |
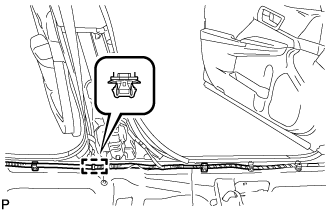
Using a clip remover, disengage the clamp and disconnect the wire harness.
![]() |
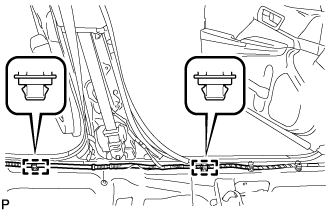
Using a clip remover, disengage the 2 clamps and remove the 2 scuff plate clips.
Turn back the floor carpet so that the luggage door lock control cable sub-assembly and fuel lid lock control cable sub-assembly can be removed.
![]() |
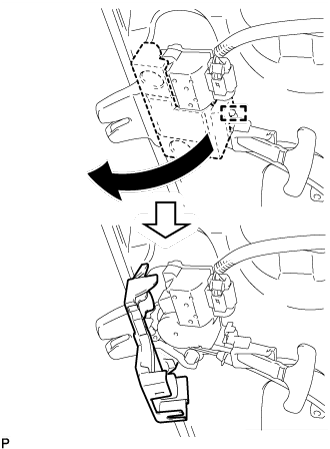
Disengage the guide as shown in the illustration.
![]() |
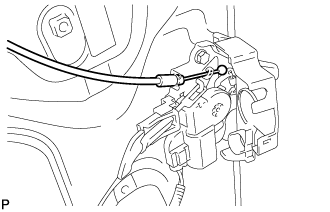
Disconnect the luggage door lock control cable sub-assembly.
![]() |
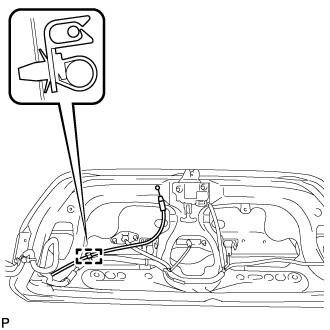
Disengage the clamp and disconnect the luggage door lock control cable sub-assembly.
![]() |
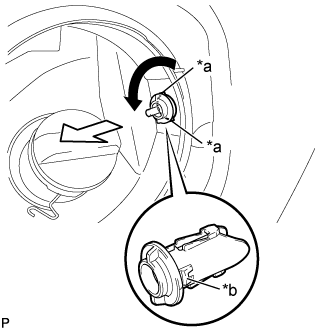
Rotate the fuel filler opening lid lock retainer as shown in the illustration to align the cutouts and the guides (A), and then pull the fuel filler opening lid lock retainer.
| *a | Cutout |
| *b | Guide (A) |
![]() |
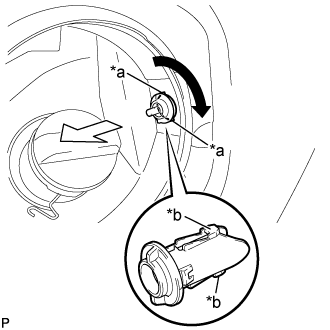
Rotate the fuel filler opening lid lock retainer as shown in the illustration to align the cutouts and guides (B), and then pull the fuel filler opening lid lock retainer.
| *a | Cutout |
| *b | Guide (B) |
![]() |
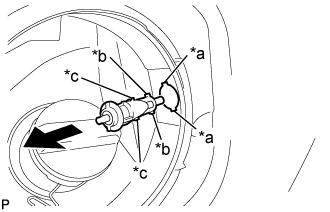
Pull out the fuel filler opening lid lock retainer with both guides (B) and (C) aligned with the cutouts.
| *a | Cutout |
| *b | Guide (C) |
| *c | Guide (B) |
![]() |
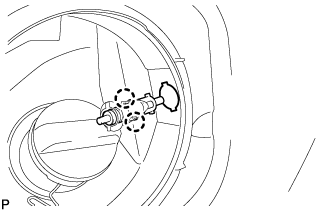
Disengage the 2 claws and remove the fuel filler opening lid lock retainer.
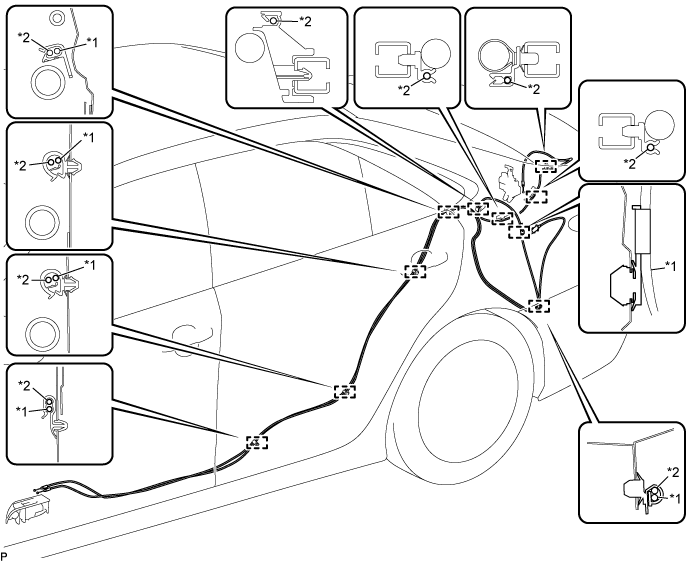
Disengage the 10 clamps and remove the fuel lid lock control cable sub-assembly and luggage door lock control cable sub-assembly.

| *1 | Fuel Lid Lock Control Cable Sub-assembly | *2 | Luggage Door Lock Control Cable Sub-assembly |
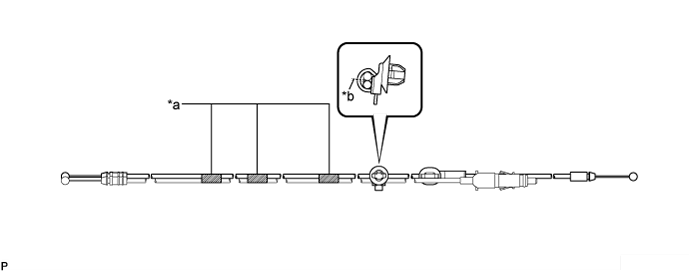
Using a knife, cut off the clamp as shown in the illustration.

| *a | Tape | *b | Cut |
Remove the clamp.
Remove the 3 pieces of tape and fuel lid lock control cable sub-assembly.