 |
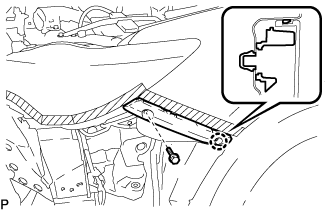
Engage the claw.
FRONT BUMPER (for TMMK Made) > REASSEMBLY |
| 1. INSTALL FRONT BUMPER SIDE RETAINER LH |
|
Engage the claw.
Install the front bumper side retainer LH with the bolt.
| 2. INSTALL FRONT BUMPER SIDE RETAINER RH |
| 3. INSTALL FRONT BUMPER REINFORCEMENT SUB-ASSEMBLY |
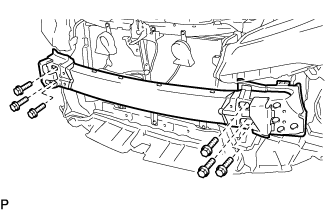 |
Install the front bumper reinforcement sub-assembly with the 6 bolts.
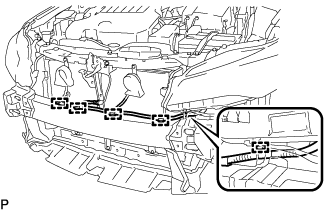 |
Engage each clamp.
| 4. INSTALL NO. 2 FRONT BUMPER SUPPORT SPACER SUB-ASSEMBLY |
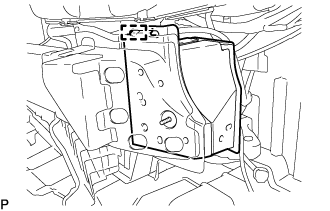 |
Engage the guide.
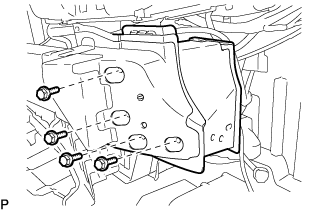 |
Install the No. 2 front bumper support spacer sub-assembly with the 4 bolts.
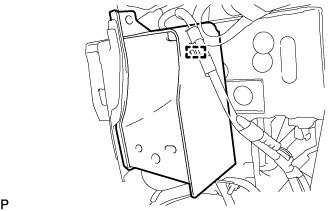 |
Engage the clamp.
| 5. INSTALL FRONT BUMPER ENERGY ABSORBER |
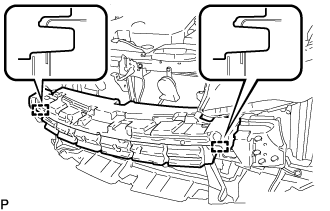 |
Engage the 2 guides to install the front bumper energy absorber.
| 6. INSTALL RADIATOR GRILLE EMBLEM ASSEMBLY |
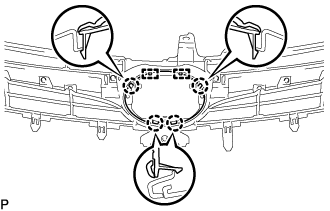 |
Engage the 2 pins and 4 claws.
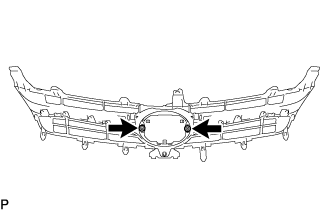 |
Install the radiator grille emblem assembly to the radiator grille with the 2 screws.
| 7. INSTALL RADIATOR GRILLE SUB-ASSEMBLY |
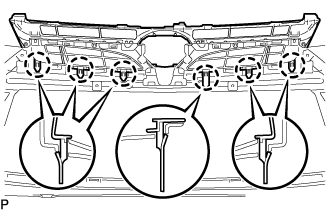 |
Engage the 6 claws.
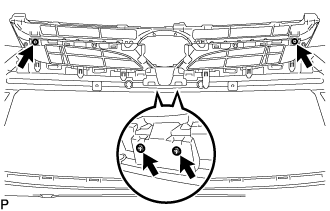 |
Install the radiator grille sub-assembly with the 4 screws.
| 8. INSTALL NO. 1 LOWER RADIATOR GRILLE |
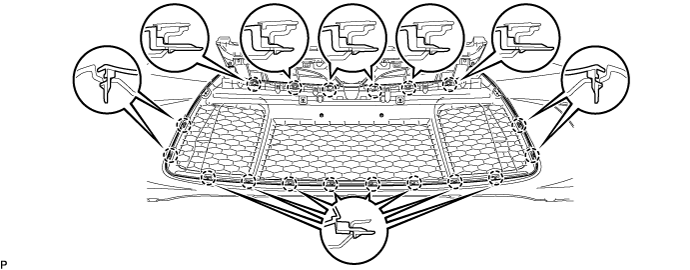
Engage the 18 claws.
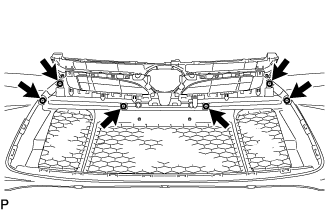 |
Install the No. 1 lower radiator grille with the 6 screws.
| 9. INSTALL FRONT FENDER LINER RETAINER |
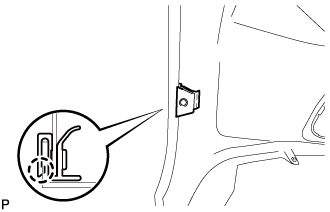 |
Engage the claw to install the front fender liner retainer.
| 10. INSTALL FRONT BUMPER EXTENSION MOUNTING BRACKET |
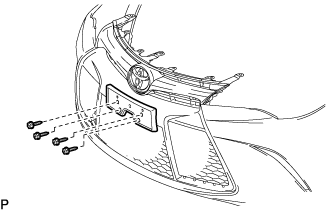 |
Install the front bumper extension mounting bracket with the 4 screws.
| 11. INSTALL FRONT TURN SIGNAL LIGHT ASSEMBLY LH |
Install the front turn signal light assembly with the 2 screws.
| 12. INSTALL FRONT TURN SIGNAL LIGHT ASSEMBLY RH |