 |
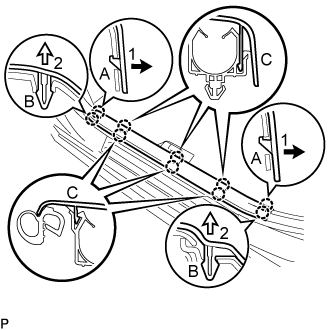
Disengage the 2 claws (A) in the direction indicated by the arrows (1) shown in the illustration.
ROOM TEMPERATURE SENSOR (for TMMK Made) > REMOVAL |
| 1. REMOVE FRONT DOOR SCUFF PLATE LH |
|
Disengage the 2 claws (A) in the direction indicated by the arrows (1) shown in the illustration.
Disengage the 2 claws (B) in the direction indicated by the arrows (2) shown in the illustration.
Disengage the 6 claws (C) to remove the front door scuff plate LH.
| 2. REMOVE COWL SIDE TRIM SUB-ASSEMBLY LH |
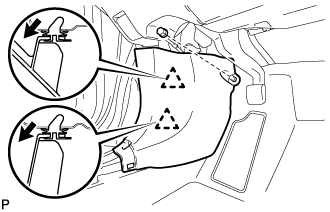 |
Remove the clip.
Pull the cowl side trim sub-assembly LH as shown in the illustration to disengage the 2 clips and remove the cowl side trim sub-assembly LH.
| 3. DISCONNECT FRONT DOOR OPENING TRIM WEATHERSTRIP LH |
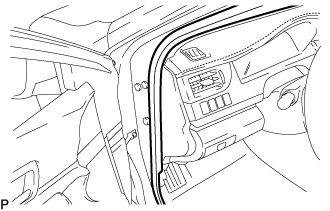 |
Disconnect the front door opening trim weatherstrip LH.
| 4. REMOVE INSTRUMENT SIDE PANEL LH |
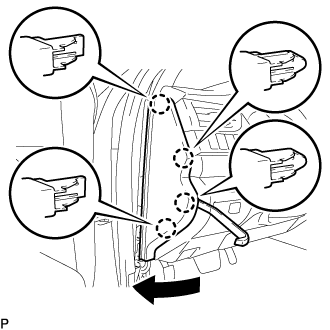 |
Using a moulding remover, disengage the 4 claws as shown in the illustration.
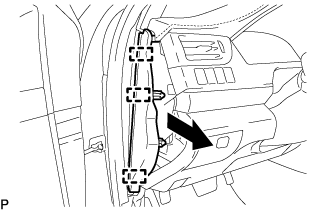 |
Disengage the 3 guides and remove the instrument side panel LH as shown in the illustration.
| 5. DISCONNECT HOOD LOCK CONTROL LEVER SUB-ASSEMBLY |
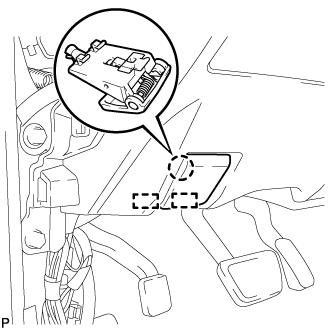 |
Disengage the claw and 2 guides to disconnect the hood lock control lever sub-assembly.
| 6. REMOVE LOWER NO. 1 INSTRUMENT PANEL FINISH PANEL ASSEMBLY |
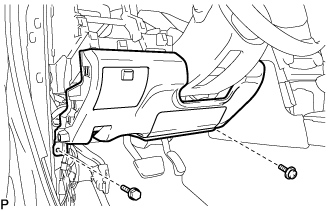 |
Remove the bolt <B> and screw <C> or <D>.
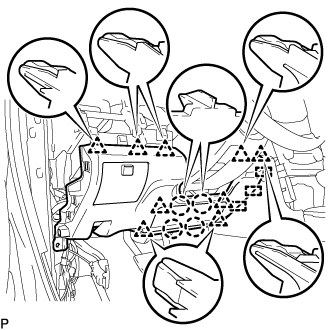 |
Disengage the 4 claws, 9 clips and 3 guides to remove the lower No. 1 instrument panel finish panel assembly.
| 7. REMOVE ROOM TEMPERATURE SENSOR (COOLER THERMISTOR) |
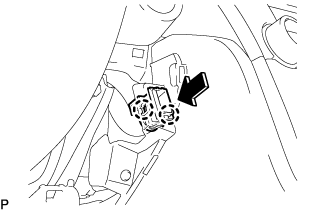 |
Disengage the 2 claws as shown in the illustration.
Disconnect the cooler thermistor hose and connector, and remove the room temperature sensor (cooler thermistor).