 |
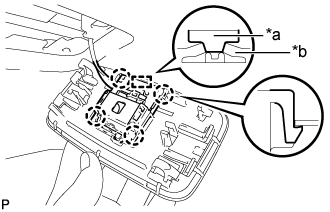
Align the switch parts shown in the illustration and engage the 4 claws to install the room light switch base to the No. 1 room light housing.
| *a | Switch Part of Room Light Switch Base |
| *b | Switch Part of No. 1 Room Light Housing |
ROOM LIGHT (for TMMK Made) > INSTALLATION |
| 1. INSTALL NO. 1 ROOM LIGHT ASSEMBLY (w/o Sliding Roof) |
|
Align the switch parts shown in the illustration and engage the 4 claws to install the room light switch base to the No. 1 room light housing.
| *a | Switch Part of Room Light Switch Base |
| *b | Switch Part of No. 1 Room Light Housing |
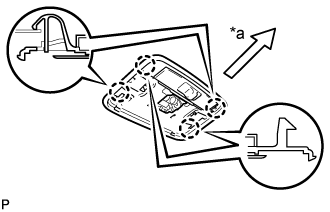 |
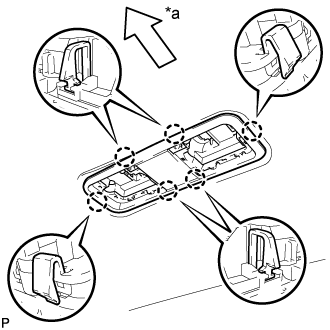
Engage the 4 claws to install the No. 1 room light housing.
| *a | Front |
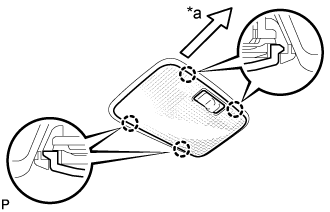 |
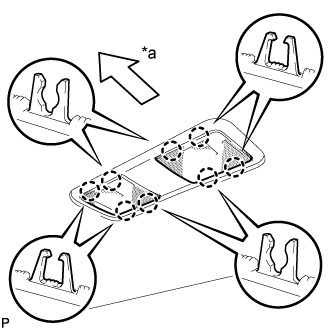
Engage the 4 claws to install the No. 1 room light lens.
| *a | Front |
| 2. INSTALL SPOT LIGHT ASSEMBLY (w/ Sliding Roof) |
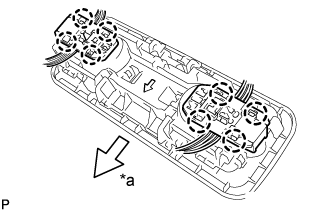 |
Engage the 8 claws to install the map light sub-assembly to the spot light housing as shown in the illustration.
| *a | Front |
 |
Engage the 6 claws to install the spot light housing.
| *a | Front |
 |
Engage the 8 claws to install the 2 spot light lenses.
| *a | Front |