Home › Engine / Hybrid System ยท 2AR-FE › ENGINE MECHANICAL › REAR CRANKSHAFT OIL SEAL

REAR CRANKSHAFT OIL SEAL > INSTALLATION

for Preparation Click here


1. INSTALL REAR ENGINE OIL SEAL
  1. Apply MP grease to the lip of a new oil seal.

    NOTICE:
    1. Do not allow foreign matter to contact the lip of the oil seal.
    2. Do not allow MP grease to contact the dust seal.


    A195810E01
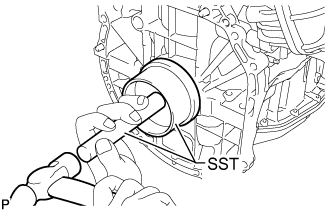
  1. Using SST and a hammer, tap in the oil seal until its surface is flush with the edges of the cylinder block and crankcase.

    SST
    09223-15030  
    09950-70010   (09951-07150)

    NOTICE:
    1. Keep the lip of the oil seal free from foreign matter.
    2. Do not tap in the oil seal at an angle.


2. INSTALL DRIVE PLATE AND RING GEAR SUB-ASSEMBLY


    A195875E05
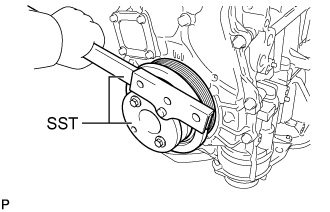
  1. Using SST, hold the crankshaft.

    SST
    09213-54015  
    09330-00021  

    HINT:
    SST (Crankshaft pulley holding tool) Fixing bolt part No. : 91551-80650(2 pcs)

  1. Clean the bolts and their installation holes.


    A196850
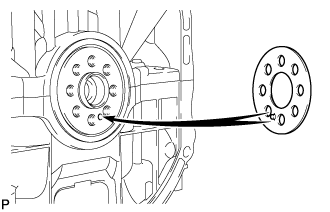
  1. Install the front drive plate spacer.

    HINT:
    Align the pin of the front drive plate spacer with the pin hole of the crankshaft.


    A196851E03
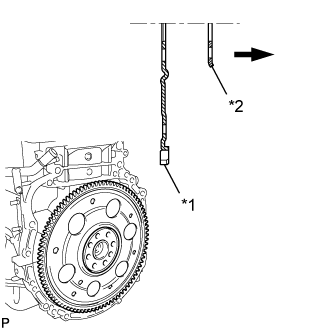
  1. Install the drive plate and rear drive plate spacer onto the crankshaft.
    Text in Illustration 
    *1
    Drive Plate
    *2
    Rear Drive Plate Spacer
    V100135
    Transaxle Side


    A192239E03
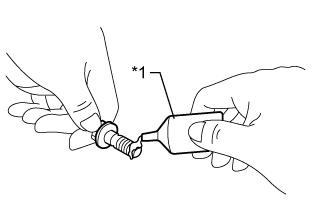
  1. Apply a few drops of adhesive to 2 or 3 threads at the tip of each of the 8 bolts.
    Text in Illustration 
    *1
    Adhesive

    Adhesive:
    Toyota Genuine Adhesive 1324, Three Bond 1324 or equivalent


    A196849E01
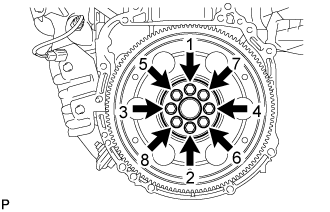
  1. Install and uniformly tighten the 8 bolts in the sequence shown in the illustration.

    Torque:
    98 N*m{ 999 kgf*cm , 72 ft.*lbf }

    NOTICE:
    Do not start the engine for at least an hour after installing the drive plate.


3. INSTALL AUTOMATIC TRANSAXLE ASSEMBLY