 |
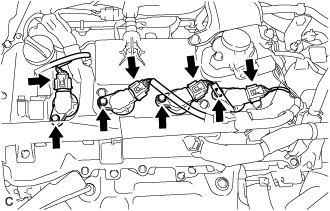
Disconnect the 4 ignition coil assembly connectors.
OIL PUMP > REMOVAL |
| 1. INSTALL ENGINE ASSEMBLY TO ENGINE STAND |
| 2. REMOVE IGNITION COIL ASSEMBLY |
|
Disconnect the 4 ignition coil assembly connectors.
Remove the 4 bolts and 4 ignition coil assemblies from the cylinder head cover sub-assembly.
| 3. DISCONNECT NO. 2 VENTILATION HOSE |
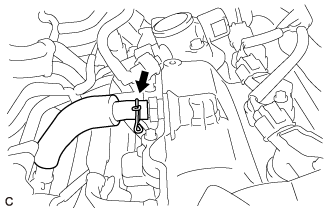 |
Slide the clip and disconnect the No. 2 ventilation hose from the PCV valve (ventilation valve sub-assembly).
| 4. REMOVE FUEL PUMP PROTECTOR |
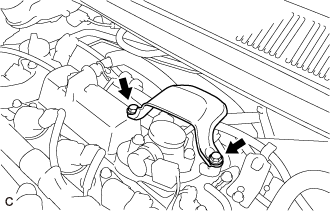 |
Remove the 2 bolts and fuel pump protector from the cylinder head cover sub-assembly.
| 5. DISCONNECT FUEL TUBE SUB-ASSEMBLY |
Disconnect the fuel tube sub-assembly from the No. 1 fuel pipe.
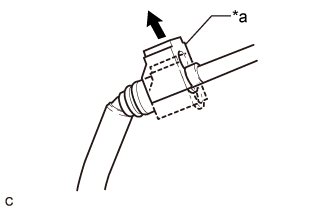 |
Pull off the fuel tube connector cover.
| *a | Fuel Tube Connector Cover |
 | Pull off |
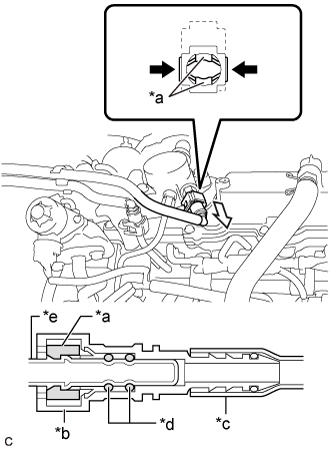 |
Pinch the retainer of the fuel tube connector, and then pull the fuel tube connector off of the fuel pipe.
| *a | Retainer |
| *b | Fuel Tube Connector |
| *c | Nylon Tube |
| *d | O-ring |
| *e | Fuel Pipe |
| Pinch |
 | Pull |
If the fuel tube connector and fuel pipe are stuck, push and pull the fuel tube connector to release it. Pull the fuel tube connector off of the fuel pipe carefully.
Check that there is no foreign matter on the sealing surfaces of the disconnected fuel lines. Clean them if necessary.
Cover the disconnected fuel pipe and fuel tube connector with plastic bags to prevent damage and contamination.
| 6. REMOVE NO. 1 FUEL PIPE |
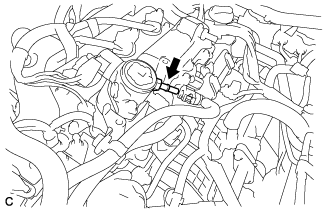 |
Remove the No. 1 fuel pipe and gasket from the fuel pump with seal sub-assembly.
| 7. REMOVE NO. 1 FUEL PIPE SUB-ASSEMBLY |
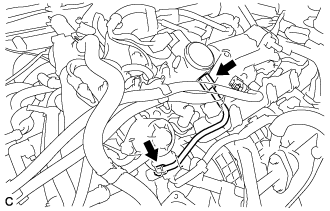 |
Using a 17 mm union nut wrench, loosen the 2 union nuts of the No. 1 fuel pipe sub-assembly.
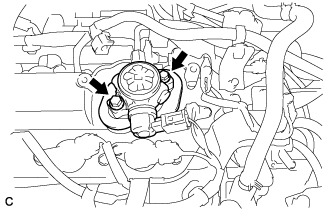 |
Loosen the 2 bolts of the fuel pump with seal sub- assembly.
Remove the No. 1 fuel pipe sub-assembly from the fuel delivery pipe sub-assembly and fuel pump with seal sub- assembly.
| 8. REMOVE FUEL PUMP WITH SEAL SUB-ASSEMBLY |
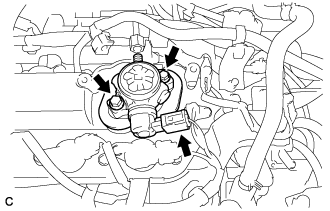 |
Disconnect the fuel pump with seal sub-assembly connector.
Remove the 2 bolts and fuel pump with seal sub- assembly from the cylinder head cover sub- assembly.
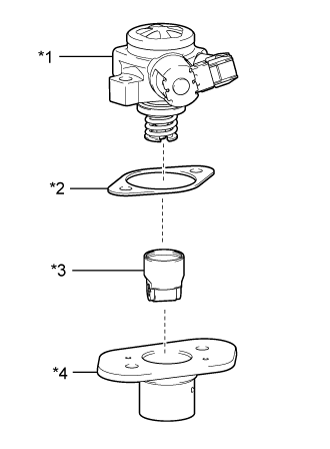 |
Remove the fuel pump lifter guide, fuel pump lifter assembly and fuel pump insulator from the fuel pump with seal sub-assembly.
| *1 | Fuel Pump with Seal Sub-assembly |
| *2 | Fuel Pump Insulator |
| *3 | Fuel Pump Lifter Assembly |
| *4 | Fuel Pump Lifter Guide |
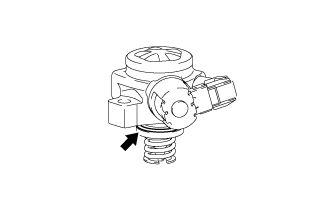 |
Remove the O-ring from the fuel pump sub- assembly.
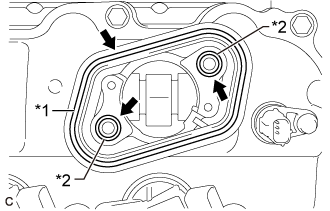 |
Remove the fuel pump spacer gasket from the cylinder head cover sub-assembly.
| *1 | Fuel Pump Spacer Gasket |
| *2 | O-ring |
Remove the 2 O-rings from the No. 4 camshaft bearing cap.
| 9. REMOVE EGR VALVE BRACKET |
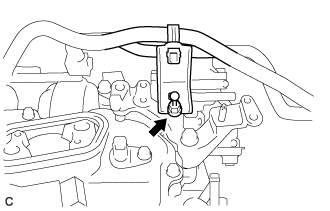 |
Remove the engine cover joint and separate the fuel hose bracket from the EGR valve bracket.
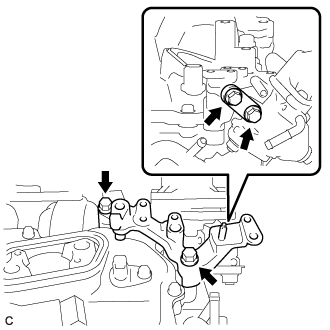 |
Remove the 4 bolts and 2 EGR valve brackets.
| 10. REMOVE CYLINDER HEAD COVER SUB-ASSEMBLY |
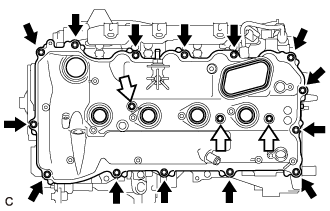 |
Remove the 17 bolts, 3 seal washers, cylinder head cover sub-assembly and cylinder head cover gasket.
| Bolt |
| Bolt with Seal Washer |
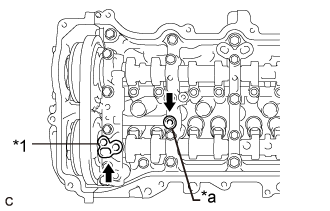 |
Remove the camshaft bearing cap oil hole gasket from the No. 1 camshaft bearing cap.
| *1 | Camshaft Bearing Cap Oil Hole Gasket |
| *a | Gasket |
Remove the gasket from the No. 2 camshaft bearing cap.
| 11. REMOVE CRANKSHAFT POSITION SENSOR |
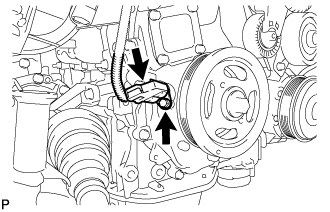 |
Disconnect the crankshaft position sensor connector.
Remove the bolt and crankshaft position sensor.
| 12. REMOVE CRANKSHAFT PULLEY |
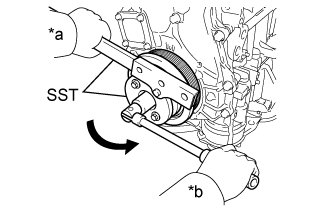 |
Using SST, hold the crankshaft pulley and loosen the crankshaft pulley set bolt. Further loosen the crankshaft pulley set bolt until 2 or 3 threads are screwed into the crankshaft.
| *a | Hold |
| *b | Turn |
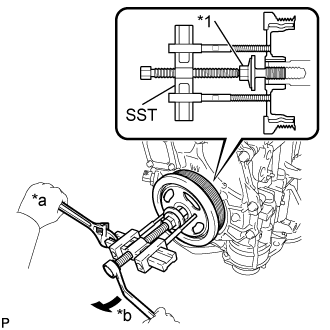 |
Using SST and the crankshaft pulley set bolt, remove the crankshaft pulley and crankshaft pulley set bolt.
| *1 | Crankshaft Pulley Set Bolt |
| *a | Hold |
| *b | Turn |
| 13. REMOVE CAMSHAFT TIMING OIL CONTROL SOLENOID ASSEMBLY |
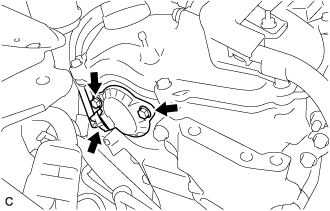 |
Disconnect the camshaft timing oil control solenoid assembly connector.
Remove the 2 bolts and camshaft timing oil control solenoid assembly from the timing chain cover sub-assembly.
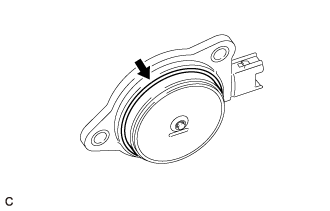 |
Remove the O-ring from the camshaft timing oil control solenoid assembly.
| 14. REMOVE V-RIBBED BELT TENSIONER ASSEMBLY |
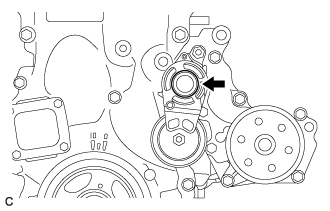 |
Remove the dust cover from the V-ribbed belt tensioner assembly.
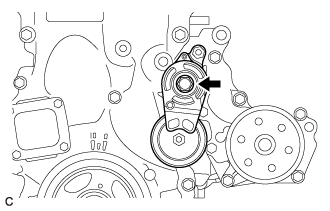 |
Remove the bolt and V-ribbed belt tensioner assembly from the water inlet housing.
| 15. REMOVE ENGINE MOUNTING BRACKET RH |
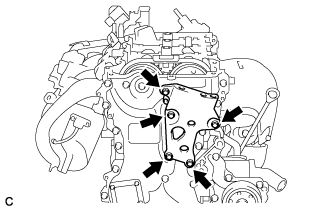 |
Remove the 5 bolts and engine mounting bracket RH.
| 16. REMOVE TIMING CHAIN COVER SUB-ASSEMBLY |
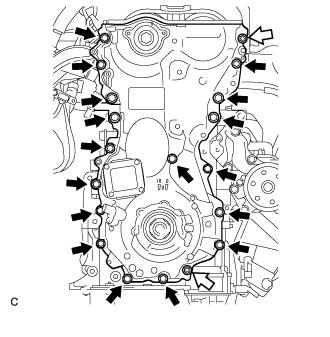 |
Remove the 17 bolts and 2 nuts.
| Bolt |
| Nut |
Remove the timing chain cover sub-assembly by prying between the timing chain cover sub-assembly and cylinder head sub-assembly, camshaft housing sub-assembly, cylinder block and stiffening crankcase assembly with a screwdriver as shown in the illustration.
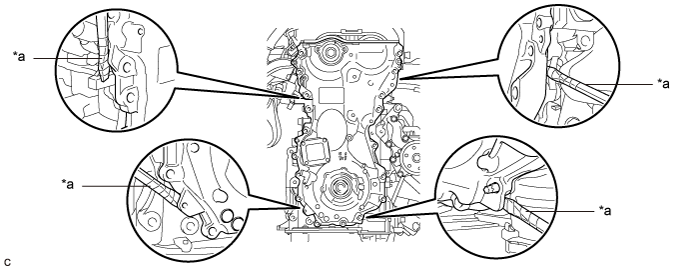
| *a | Protective Tape | - | - |
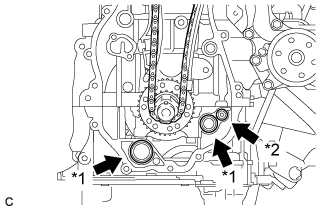 |
Remove the 2 oil pump gaskets and oil hole cover gasket from the stiffening crankcase assembly.
| *1 | Oil Pump Gasket |
| *2 | Oil Hole Cover Gasket |
| 17. REMOVE TIMING CHAIN COVER OIL SEAL |
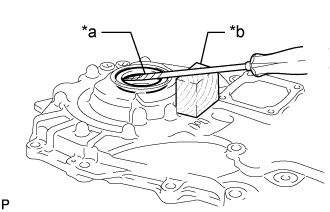 |
Using a screwdriver and wooden block, pry out the timing chain cover oil seal.
| *a | Protective Tape |
| *b | Wooden Block |