 |
Apply protective tape to the area shown in the illustration.
| *a | Protective Tape |
OUTER REAR VIEW MIRROR (for TMC, TMMR Made) > DISASSEMBLY |
| 1. REMOVE OUTER MIRROR (except TMC Made) |
| 2. REMOVE OUTER MIRROR (for TMC Made) |
|
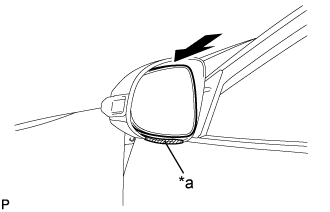
Apply protective tape to the area shown in the illustration.
| *a | Protective Tape |
Push the upper part of the mirror surface and tilt it.
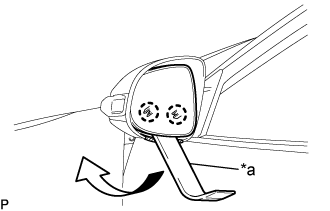 |
Using a moulding remover, disengage the 2 claws at the lower part of the outer mirror as shown in the illustration.
| *a | Moulding Remover |
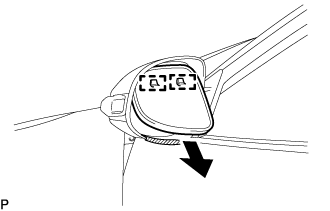 |
Disengage the 2 guides as shown in the illustration.
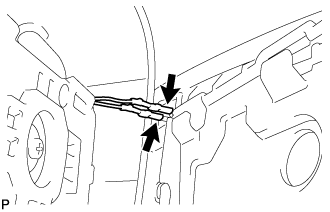 |
Disconnect the 2 connectors and remove the outer mirror.
| 3. REMOVE OUTER MIRROR COVER (except TMC Made) |
| 4. REMOVE OUTER MIRROR COVER (for TMC Made) |
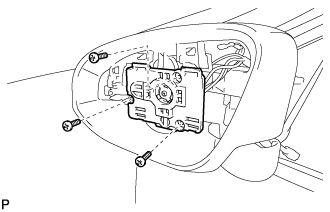 |
Remove the 3 screws.
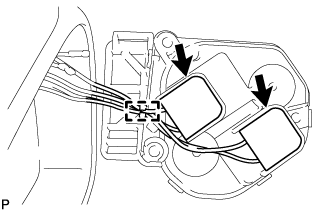 |
Disengage the clamp.
Disconnect the 2 connectors and remove the mirror actuator.
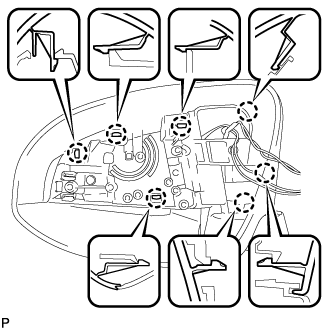 |
Disengage the 7 claws and remove the outer mirror cover.
| 5. REMOVE SIDE TURN SIGNAL LIGHT ASSEMBLY |
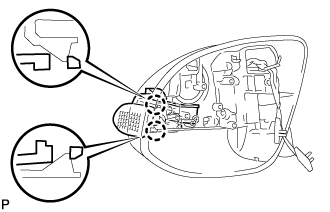 |
Disengage the 2 claws.
Disconnect the connector and remove the side turn signal light assembly.
| 6. REMOVE OUTER MIRROR RETRACTOR (for TMC Made) |
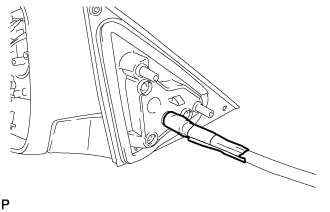 |
Remove the vinyl tape.
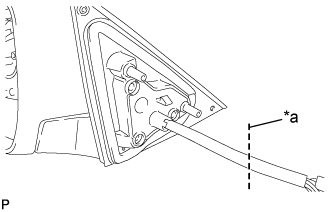 |
Cut the wire harness at the position shown in the illustration.
| *a | Cut |
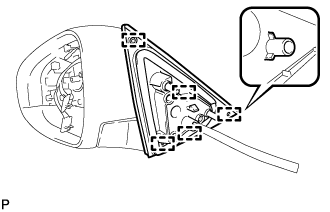 |
Disengage the 5 pins and remove the gasket.
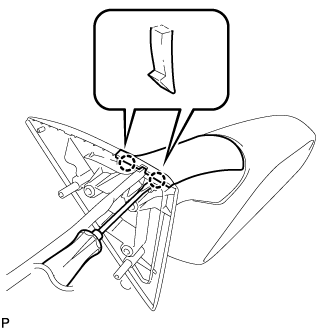 |
Using a screwdriver, disengage the 2 claws.
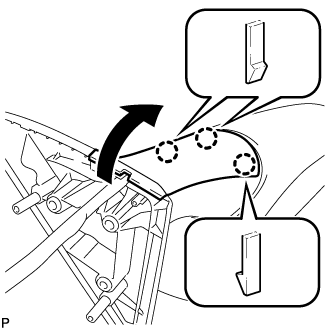 |
Disengage the 3 claws and remove the lower cover as shown in the illustration.
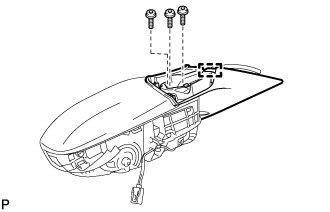 |
Disengage the clamp.
Using a T25 "TORX" socket wrench, remove the 3 screws and base.
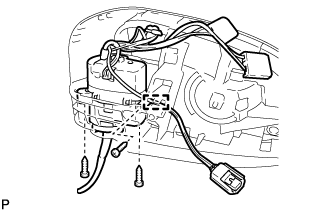 |
Disengage the clamp.
Remove the 3 screws.
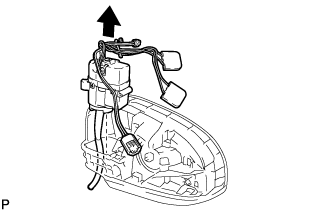 |
Remove the frame sub-assembly and wire harness as shown in the illustration.
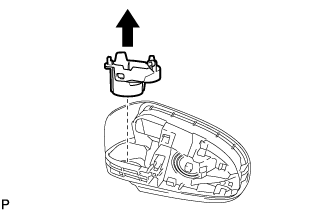 |
Remove the support as shown in the illustration.