 |
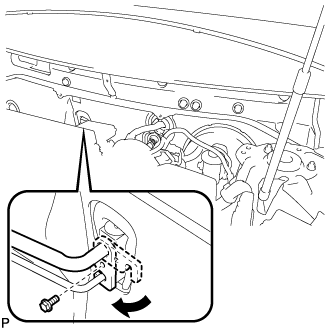
Rotate the hook connector as shown in the illustration.
COOLER EXPANSION VALVE (for TMMK Made) > INSTALLATION |
| 1. INSTALL COOLER EXPANSION VALVE |
Sufficiently apply compressor oil to 2 new O-rings and the fitting surfaces of the cooler expansion valve.
Install 2 new O-rings to the No. 1 cooler evaporator sub-assembly.
Using a 4 mm hexagon socket wrench, install the cooler expansion valve with the 2 hexagon bolts.
| 2. CONNECT AIR CONDITIONER TUBE AND ACCESSORY ASSEMBLY |
Remove the vinyl tape from the air conditioner tube and accessory assembly.
Sufficiently apply compressor oil to a new O-ring and the fitting surface of the air conditioner tube and accessory assembly.
Install the O-ring to the air conditioner tube and accessory assembly.
Connect the air conditioner tube and accessory assembly.
| 3. CONNECT SUCTION HOSE SUB-ASSEMBLY |
Remove the vinyl tape from the suction hose sub-assembly.
Sufficiently apply compressor oil to a new O-ring and the fitting surface of the suction hose sub-assembly.
Install the O-ring to the suction hose sub-assembly.
Connect the suction hose sub-assembly.
|
Rotate the hook connector as shown in the illustration.
Insert the pipe joint into the fitting hole securely and install the bolt.
| 4. INSTALL FRONT OUTER COWL TOP PANEL SUB-ASSEMBLY |
Install the front outer cowl top panel sub-assembly with the 10 bolts.
Engage the 2 clamps to install the wire harness to the front outer cowl top panel sub-assembly.
w/ Windshield Deicer System:
Connect the connector.
Engage the 2 clamps to install the wire harness to the front outer cowl top panel sub-assembly.
w/ Heated Windshield Defroster System:
Connect the 2 connectors.
Engage the 4 clamps to install the wire harness to the front outer cowl top panel sub-assembly.
| 5. INSTALL WINDSHIELD WIPER MOTOR AND LINK ASSEMBLY |
| 6. CHARGE AIR CONDITIONING SYSTEM WITH REFRIGERANT |
Perform vacuum purging using a vacuum pump or appropriate equipment.
Charge the air conditioning system with refrigerant.
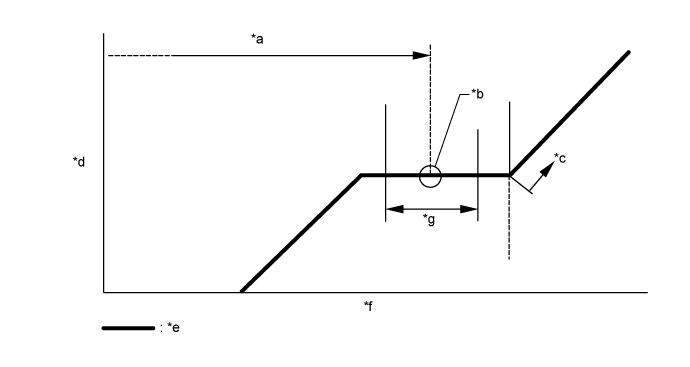
| *a | Standard Charge Amount | *b | Mean Value in Proper Range |
| *c | Overcharged | *d | High Pressure |
| *e | Sub-cool System | *f | Refrigerant Amount |
| *g | +/-50 g (+/-1.76 oz) | - | - |
| 7. WARM UP ENGINE |
Keep the A/C switch on for at least 2 minutes to warm up the compressor.
| 8. INSPECT FOR REFRIGERANT LEAK |
After recharging the air conditioning system with refrigerant, inspect for refrigerant leaks using a halogen leak detector.
Carry out the test under the following conditions:
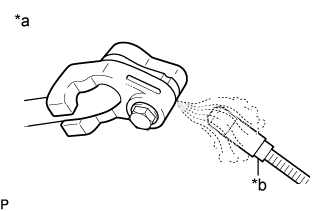 |
Using a halogen leak detector, inspect for refrigerant leaks from the air conditioning system.
| *a | Inspect for Leak |
| *b | Halogen Leak Detector |
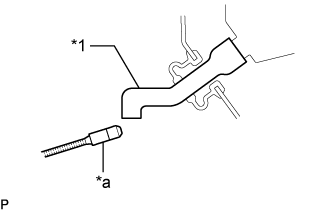 |
Bring the halogen leak detector close to the drain cooler hose with the detector power off, and then turn the detector on.
| *1 | Drain Cooler Hose |
| *a | Halogen Leak Detector |
If a refrigerant leak is not detected from the drain cooler hose, remove the blower motor control from the cooling unit. Insert the halogen leak detector sensor into the unit and check for a leak.
Disconnect the pressure sensor connector and leave it for approximately 20 minutes. Bring the halogen leak detector close to the pressure sensor and check for a leak.