 |
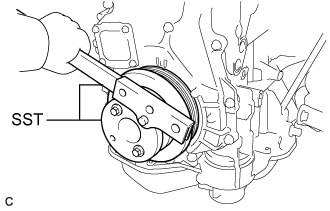
Using SST, hold the crankshaft pulley.
- SST
- 09213-54015
09330-00021
- HINT:
- Part number of installation bolt for SST (crankshaft pulley holding tool): 91551-80650 (quantity: 2)
REAR CRANKSHAFT OIL SEAL > REMOVAL |
| 1. REMOVE AUTOMATIC TRANSAXLE ASSEMBLY |
| 2. REMOVE DRIVE PLATE AND RING GEAR SUB-ASSEMBLY |
Using height adjustment attachments and plate lift attachments, place the engine assembly on a flat level surface.
|
Using SST, hold the crankshaft pulley.
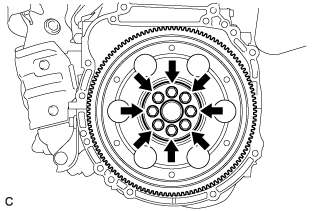 |
Remove the 8 bolts, rear drive plate spacer, drive plate and ring gear sub-assembly and front drive plate spacer.
| 3. REMOVE REAR ENGINE OIL SEAL |
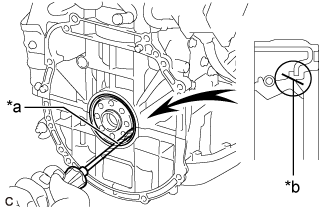 |
Using a knife, cut off the lip of the rear engine oil seal.
| *a | Protective Tape |
| *b | Cut Position |
Using a screwdriver, pry out the rear engine oil seal.