HEATING / AIR CONDITIONING BLOWER UNIT REASSEMBLY
PROCEDURE

 87130K
1.INSTALL NO. 1 BLOWER DAMPER SERVO SUB-ASSEMBLY (for 1-tier Type)
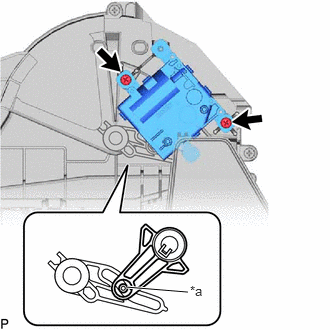
| *a | Link |
Connect the link of the No. 1 blower damper servo sub-assembly to the groove on the lever of the blower assembly as shown in the illustration.
Install the No. 1 blower damper servo sub-assembly with the 2 screws.
87130K
2.INSTALL NO. 1 BLOWER DAMPER SERVO SUB-ASSEMBLY (for 2-tier Type)
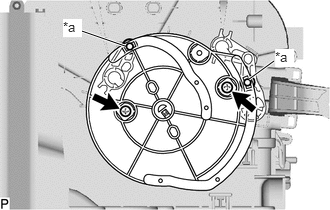
| *a | Link |
Connect the 2 links of the blower assembly to the 2 grooves on the plate of the No. 1 blower damper servo sub-assembly as shown in the illustration.
Install the No. 1 blower damper servo sub-assembly with the 2 screws.
87103B
3.INSTALL BLOWER MOTOR WITH FAN SUB-ASSEMBLY
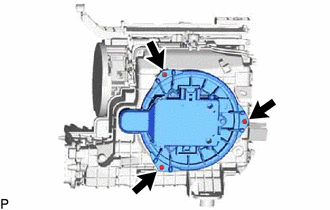
Install the blower motor with fan sub-assembly with the 3 screws.
- NOTICE:
-
Replace the blower motor with fan sub-assembly if it has been dropped or subjected to a severe impact.
87139C
4.INSTALL CLEAN AIR FILTER (for 1-tier Type)
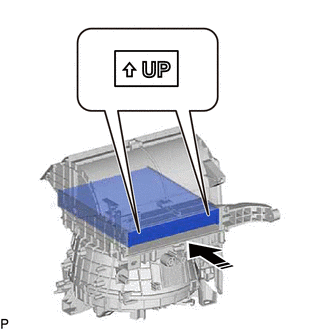

|
Install in this Direction |
Install the clean air filter as shown in the illustration.
- NOTICE:
-
Make sure that the "UP" mark are facing the correct direction before installing the clean air filter.
87139C
5.INSTALL CLEAN AIR FILTER (for 2-tier Type)
Engage the 2 guides on the cutout side of the air filter case and then engage the 2 guides as shown in the illustration to install the clean air filter.
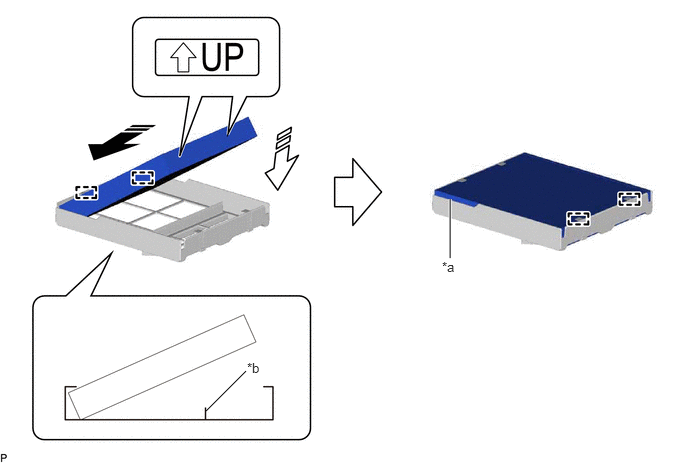
| *a | Cutout | *b | Rib |
|
|
Install in this Direction (1) | 
|
Install in this Direction (2) |
- NOTICE:
- ·
Make sure that the "UP" marks are facing the correct direction before installing the clean air filter.
·Make sure that there is no clearance between the clean air filter and air filter case and that the clean air filter is not deformed.
|
|
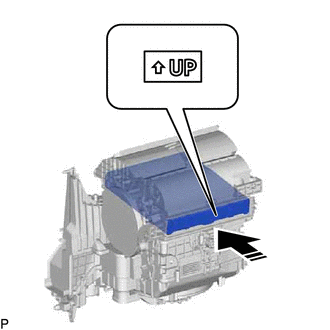
Install in this Direction |
Install the air filter sub-assembly as shown in the illustration.
- NOTICE:
-
Make sure that the "UP" mark is facing the correct direction before installing the air filter sub-assembly.
88899M
6.INSTALL AIR FILTER COVER PLATE
|
|
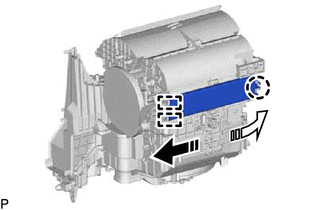
Install in this Direction (1) |
|
|
Install in this Direction (2) |
Engage the 2 guides and claw as indicated by the arrows, in the order shown in the illustration to install the air filter cover plate.