REAR SUSPENSION REAR TRAILING ARM REMOVAL
CAUTION / NOTICE / HINT
The necessary procedures (adjustment, calibration, initialization, or registration) that must be performed after parts are removed and installed, or replaced during rear trailing arm assembly removal/installation are shown below.
| Replaced Part or Performed Procedure | Necessary Procedure | Effect/Inoperative Function when Necessary Procedure not Performed | Link |
|---|---|---|---|
| Rear wheel alignment adjustment | Perform system variant learning and acceleration sensor zero point calibration. | ·
VSC disabled or malfunctioning ·
DTCs are output ·
Slip indicator light illuminated ·
ABS warning light illuminated |
( ) |
| Suspension, tires
(The vehicle height changes because of suspension or tire replacement.) |
Rear television camera assembly optical axis (Back camera position setting) | Parking assist monitor system | ()for Initialization
( )for Calibration
|
| Perform headlight ECU sub-assembly LH initialization | Lighting system (EXT) | ()
|
- HINT:
- ·
Use the same procedure for the RH side and LH side.
·The following procedure is for the LH side.
PROCEDURE

 1.REMOVE REAR WHEEL
58399D
2.REMOVE NO. 2 FLOOR UNDER COVER (w/ Cover)
for LH Side:
Click hereSuspension>REAR SUSPENSION>REAR STABILIZER BAR>REMOVAL
58398F
3.REMOVE NO. 1 FLOOR UNDER COVER (w/ Cover)
for RH Side:
Click hereSuspension>REAR SUSPENSION>REAR STABILIZER BAR>REMOVAL
890C0A
4.SEPARATE NO. 2 PARKING BRAKE WIRE ASSEMBLY
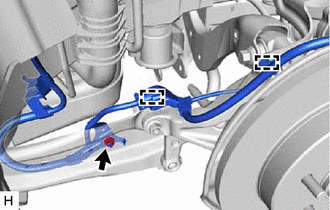
Disengage the 2 clamps.
Remove the nut and separate the No. 2 parking brake wire assembly from the rear flexible hose bracket and rear trailing arm assembly.
48840A
5.REMOVE REAR STABILIZER LINK ASSEMBLY
48780E
6.REMOVE REAR TRAILING ARM ASSEMBLY
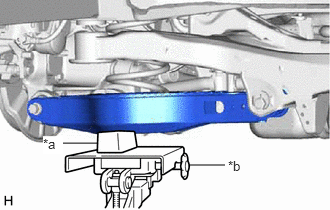
| *a | Wooden Block |
| *b | Transmission Jack |
Using a transmission jack and a wooden block, support the rear No. 2 suspension arm assembly.
- NOTICE:
- ·
When jacking up the rear No. 2 suspension arm assembly, be sure to jack it up slowly.
·Make sure to perform this operation with the vehicle kept as low as possible.
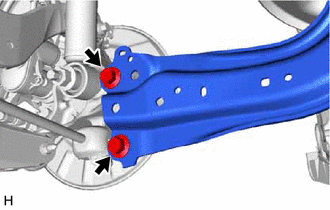
Remove the 2 bolts and separate the rear trailing arm assembly from the rear axle carrier sub-assembly.
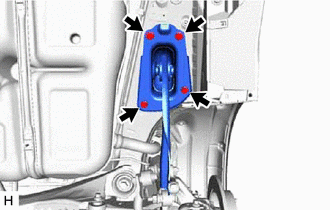
Remove the 4 bolts and rear trailing arm assembly.
48738
7.REMOVE REAR SUSPENSION ARM COVER
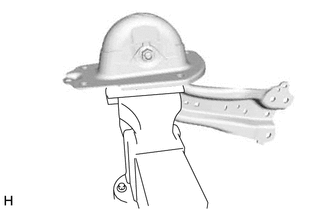
Secure the rear trailing arm assembly in a vise using aluminum plates.
- NOTICE:
-
Do not overtighten the vise.
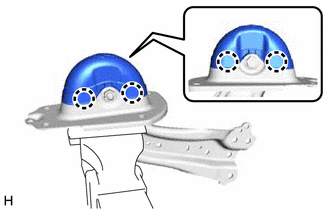
Disengage the 4 claws and remove the rear suspension arm cover.
48727
8.REMOVE REAR SUSPENSION ARM BRACKET
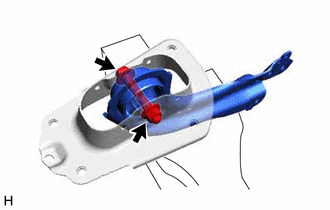
Remove the bolt, nut and rear suspension arm bracket from the rear trailing arm assembly.