MIRROR (EXT) OUTER REAR VIEW MIRROR REASSEMBLY
CAUTION / NOTICE / HINT
- HINT:
- ·
Use the same procedure for the RH side and LH side.
·The following procedure is for the LH side.
PROCEDURE

 87966
1.INSTALL OUTER MIRROR RETRACTOR (w/ Power Retract Mirror)
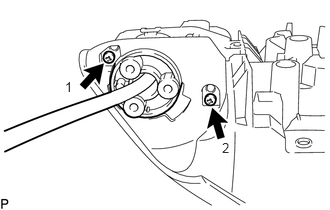
Install the 2 screws in the order shown in the illustration.
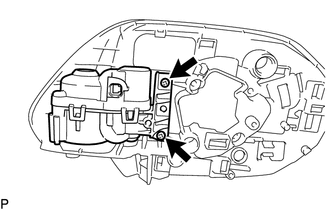
Install a new frame sub-assembly to the housing with the 2 screws.
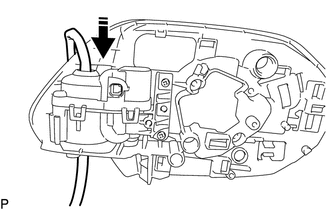

|
Install in this Direction |
Pass a new wire harness sub-assembly through the frame sub-assembly as shown in the illustration.
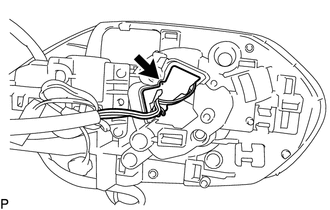
Connect the connector.
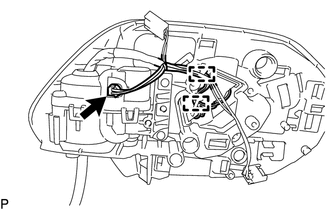
Engage the 2 clamps.
Connect the connector.
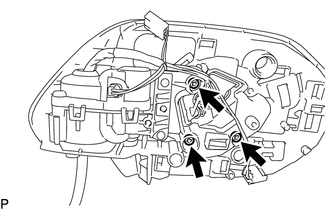
Install the actuator sub-assembly with the 3 screws.
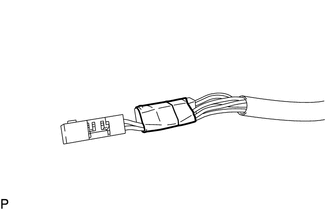
Wind vinyl tape around the wire harness sub-assembly to secure it.
Pass the wire harness sub-assembly through the base sub-assembly.
Remove the vinyl tape.
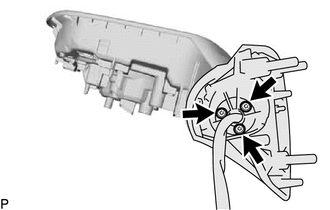
Using a T25 "TORX" socket wrench, install the base sub-assembly with 3 new screws.
- NOTICE:
-
When installing the base sub-assembly, check that the wire harness sub-assembly is not caught between the base sub-assembly and body. Failure to do so may cause a short circuit.
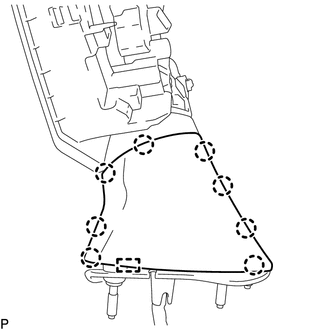
Engage the guide and 8 claws to install a new lower cover.
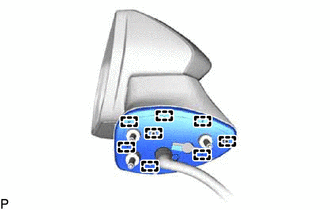
Pass the wire harness sub-assembly through a new gasket sub-assembly and engage the 8 guides to install the gasket sub-assembly.
- NOTICE:
-
Make sure there is no clearance between the gasket sub-assembly and base sub-assembly.
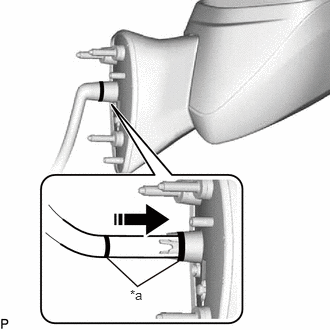
| *a | Marking |
|
|
Install in this Direction |
Adjust the wire harness sub-assembly so that the marking is at the position shown in the illustration.
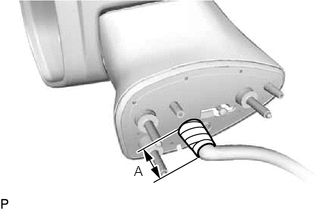
Wind vinyl tape around the wire harness sub-assembly to secure it.
| Area | Measurement |
|---|---|
| A | 40 mm (1.57 in.) |
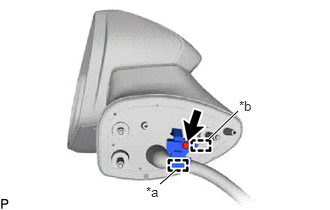
| *a | Clamp |
| *b | Guide |
Engage the guide.
Install the bracket with the screw.
Engage the clamp.
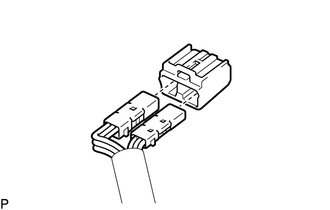
Connect each connector to a new adapter.
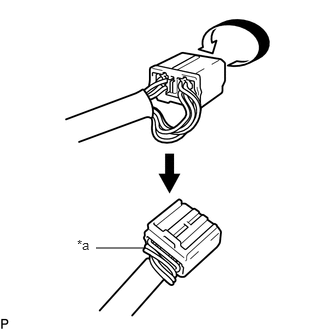
| *a | Wire Harness Routing |
Route the longer part of the wire harness sub-assembly as shown in the illustration.
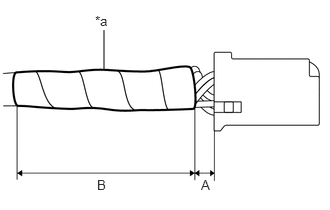
| *a | Vinyl Tape |
Wind vinyl tape around the wire harness sub-assembly to secure it.
| Area | Measurement |
|---|---|
| A | 0 to 5.0 mm (0 to 0.1969 in.) |
| B | 50 mm (1.97 in.) |
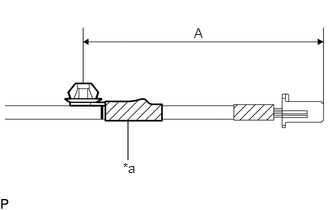
| *a | Vinyl Tape |
Wind vinyl tape around the clamp to secure it.
| Area | Measurement |
|---|---|
| A | 185 mm (7.28 in.) |
81740
2.INSTALL SIDE TURN SIGNAL LIGHT ASSEMBLY
3.INSTALL NO. 2 OUTER MIRROR COVER
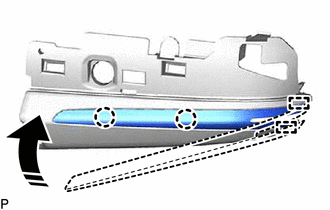
|
|
Install in this Direction |
Engage the 2 guides and 2 claws to install the No. 2 outer mirror cover as shown in the illustration.
4.INSTALL OUTER MIRROR HOLE COVER ASSEMBLY
87945
5.INSTALL OUTER MIRROR COVER
87961
6.INSTALL OUTER MIRROR