U761E AUTOMATIC TRANSMISSION / TRANSAXLE SHIFT LEVER INSTALLATION
PROCEDURE

 1.INSTALL TRANSMISSION FLOOR SHIFT ASSEMBLY
Connect the shift lock control ECU connector.
Engage the clamp to connect the wire harness to the transmission floor shift assembly.
Connect the transmission control switch connector.
Engage the clamp to connect the wire harness to the transmission floor shift assembly.
Install the clip to the No. 1 console box duct.
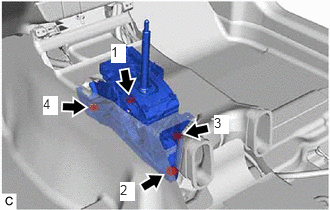
Temporarily install the transmission floor shift assembly to the vehicle body with the 4 bolts.
Tighten the 4 bolts in the order shown in the illustration.
- Torque:
- 12 N*m (122 kgf*cm, 9 ft.*lbf)
33820B
2.CONNECT TRANSMISSION CONTROL CABLE ASSEMBLY
- NOTICE:
-
Before connecting the transmission control cable assembly, check that the shift lever is in N.
- HINT:
-
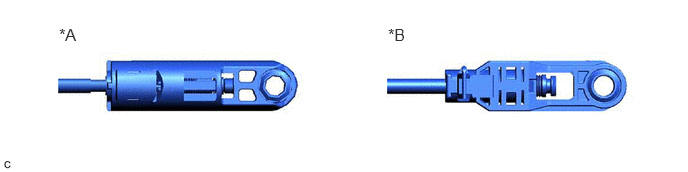
Whether the transmission control cable assembly is type A or type B can be determined by the shape of the end.
 0.615,0.26 0.917,0.458 0.302,0.198 12 false *A 4.042,0.26 4.333,0.479 0.292,0.219 12 false *B
*A Type A *B Type B
for Type A:
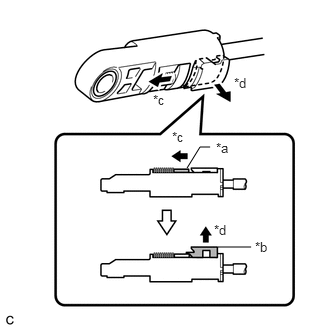
| *a | Slider |
| *b | Lock Piece |
| *c | Slide |
| *d | Pull |
Slide the slider of the transmission control cable assembly in the direction indicated by the arrow in the illustration and pull the lock piece outward.
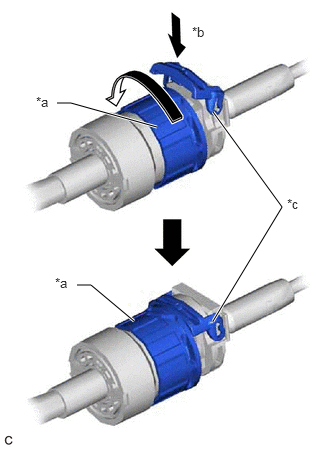
| *a | Lock Nut |
| *b | Push in |
| *c | Stopper |
Turn the lock nut of the transmission control cable assembly counterclockwise. While holding the lock nut, push in the stopper.
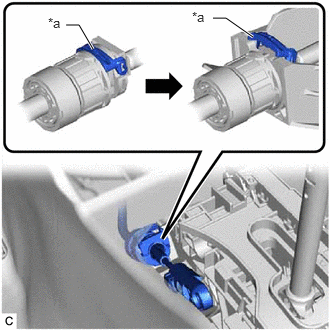
| *a | Stopper |
Connect the transmission control cable assembly to the transmission floor shift assembly.
- NOTICE:
-
After installation, check that the outer part of the stopper is as shown in the illustration.
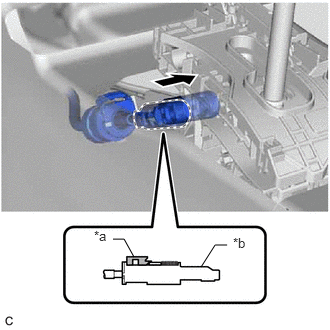
| *a | Lock Piece |
| *b | Adjuster Case |
Connect the transmission control cable assembly to the transmission floor shift assembly.
- NOTICE:
- ·
Check that the lock piece is pulled out.
·Push the end of the transmission control cable assembly all the way to the base of the transmission floor shift assembly pin.
·Connect the transmission control cable assembly so that the lock piece faces the driver side.
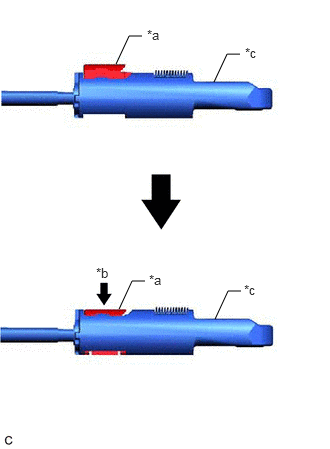
| *a | Lock Piece |
| *b | Push in |
| *c | Adjuster Case |
Push the lock piece into the adjuster case.
- NOTICE:
- ·
Check that the shift lever is in N.
·Securely push in the lock piece until the slider lock is engaged.
After adjusting the shift lever position, check the position and operation of the shift lever. If there is a problem, adjust the shift lever position again.
for Type B:
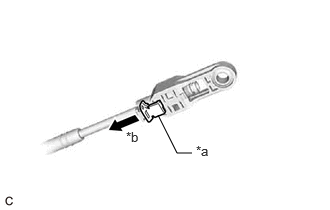
| *a | Adjuster Case Cover |
| *b | Slide |
Slide the adjuster case cover in the direction shown by the arrow.
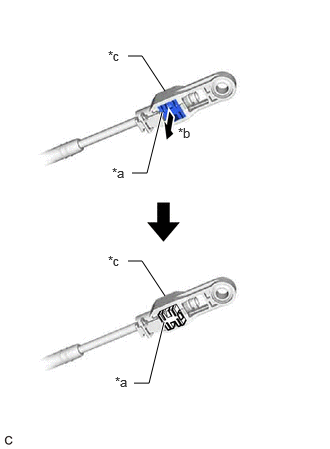
| *a | Lock Piece |
| *b | Pull Out |
| *c | Adjuster Case |
Using a precision screwdriver, pull out the lock piece of the adjuster case.
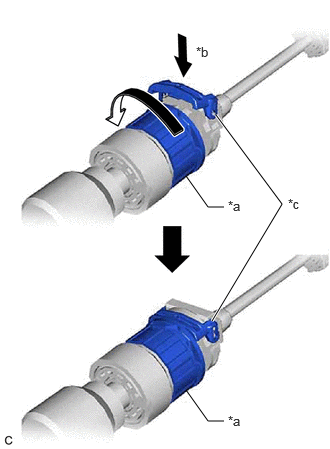
| *a | Lock Nut |
| *b | Push in |
| *c | Stopper |
Turn the lock nut of the transmission control cable assembly counterclockwise. While holding the lock nut, push in the stopper.
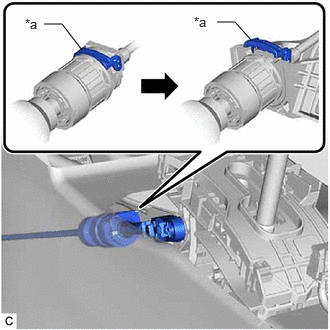
| *a | Stopper |
Connect the transmission control cable assembly to the transmission floor shift assembly.
- NOTICE:
-
After installation, check that the outer part of the stopper is as shown in the illustration.
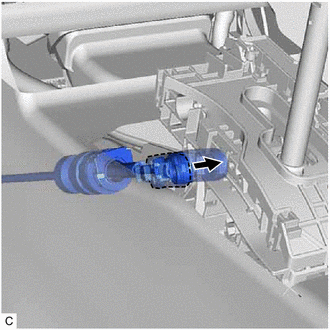
Connect the transmission control cable assembly to the transmission floor shift assembly.
- NOTICE:
- ·
Before connecting the transmission control cable assembly, check that the shift lever is in N.
- ·
Securely connect the end of the transmission control cable assembly to the transmission floor shift assembly.
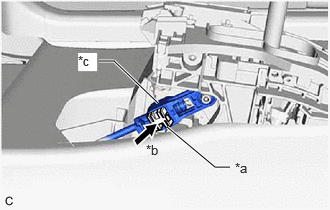
| *a | Lock Piece |
| *b | Push in |
| *c | Adjuster Case |
Push in the lock piece of the adjuster case to lock it.
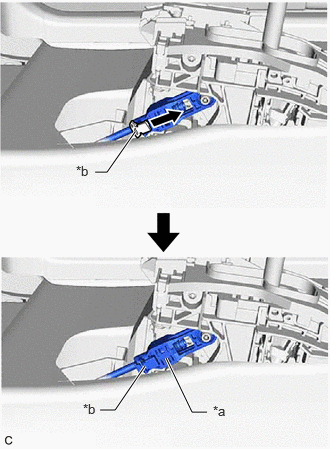
| *a | Lock Piece |
| *b | Adjuster Case Cover |
Move the adjuster case cover in the direction shown by the arrow.
- NOTICE:
-
If the adjuster case cover is not moved far enough so that the adjuster case cover engages the lock piece, the transmission control cable assembly will not be able to lock, and reliable shift operation will not be possible.
3.INSTALL CONSOLE BOX ASSEMBLY
33504F
4.INSTALL SHIFT LEVER KNOB SUB-ASSEMBLY
33554C
5.INSTALL SHIFT LOCK RELEASE BUTTON COVER
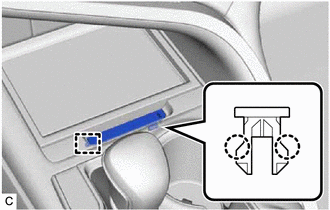
Engage the 2 claws and guide to install the shift lock release button cover to the rear upper console panel sub-assembly.
6.INSPECT SHIFT LEVER POSITION
7.ADJUST SHIFT LEVER POSITION