RM33A0E
_59
Vehicle Exterior
_065390
WINDOW / GLASS
_0352122
WINDSHIELD DEICER SWITCH
G
WINDOW / GLASS WINDSHIELD DEICER SWITCH INSPECTION
PROCEDURE

 84795
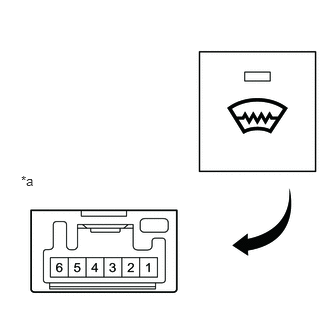
1.INSPECT FRONT WINDOW DEICER SWITCH
a.
0.219,1.802 0.531,2
0.313,0.198
10
false
*a
| *a | Component without harness connected
(Front Window Deicer Switch) |
Measure the resistance according to the value(s) in the table below.
- Standard Resistance:
Tester Connection Condition Specified Condition 5 - 2 Front window deicer switch pressed Below 1 Ω 5 - 2 Front window deicer switch not pressed 10 kΩ or higher
If the result is not as specified, replace the front window deicer switch.
b.
1.708,0.792 2.542,0.792
false
1.708,1.229 2.458,1.229
false
1.49,0.698 1.802,0.896
0.313,0.198
10
false
*a
1.5,1.135 1.813,1.333
0.313,0.198
10
false
*b
0.271,1.833 0.583,2.031
0.313,0.198
10
false
*c
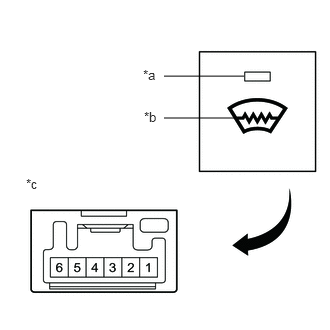
| *a | Indicator Light |
| *b | Illumination |
| *c | Component without harness connected
(Front Window Deicer Switch) |
Check that the indicator light illuminates.
- OK:
Battery Connection Specified Condition Battery positive (+) → 5
Battery negative (-) → 4Front window deicer switch indicator illuminates
If the result is not as specified, replace the front window deicer switch.
c.
Check that the illumination illuminates.
- OK:
Battery Connection Specified Condition Battery positive (+) → 6
Battery negative (-) → 1Front window deicer switch illumination illuminates
If the result is not as specified, replace the front window deicer switch.