AUDIO / VIDEO RADIO RECEIVER REMOVAL
PROCEDURE

 1. PRECAUTION (w/o Navigation System)
2. PRECAUTION (w/ Navigation System)
- NOTICE:
- ·
When performing the following work, the navigation system may restart when turning the power switch on (ACC) (due to radio and display receiver assembly and navigation ECU certification).
-Repair or replace the negative (-) auxiliary battery terminal due to it being disconnected or depleted.
-The radio and display receiver assembly or navigation ECU replacement or removal and installation.
·After replacing the radio and display receiver assembly, if "New software is not compatible with the system. Contact your dealer." is displayed on the multi-display, update the software of the navigation ECU.
Click hereAudio / Visual / Telematics>NAVIGATION / MULTI INFO DISPLAY>NAVIGATION SYSTEM>PRECAUTION
55900
3.REMOVE AIR CONDITIONING CONTROL ASSEMBLY
55480D
4.REMOVE LOWER INSTRUMENT PANEL FINISH PANEL ASSEMBLY
55405B
5.REMOVE CENTER INSTRUMENT CLUSTER FINISH PANEL SUB-ASSEMBLY (for 7 Inch Display)
55405B
6.REMOVE CENTER INSTRUMENT CLUSTER FINISH PANEL SUB-ASSEMBLY (for 9 Inch Display)
7.REMOVE CENTER INSTRUMENT CLUSTER FINISH PANEL ASSEMBLY
8.REMOVE RADIO AND DISPLAY RECEIVER ASSEMBLY WITH BRACKET (for 7 Inch Display)
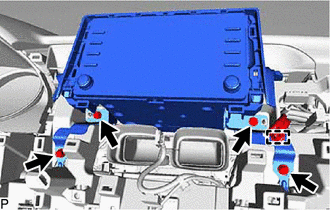
Disengage the clamp.
Remove the 4 bolts.
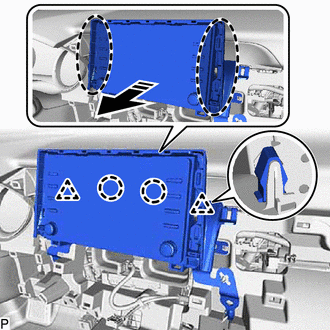

|
Place Hand Here |

|
Remove in this Direction |
Disengage the 2 clips and 2 claws as shown in the illustration.
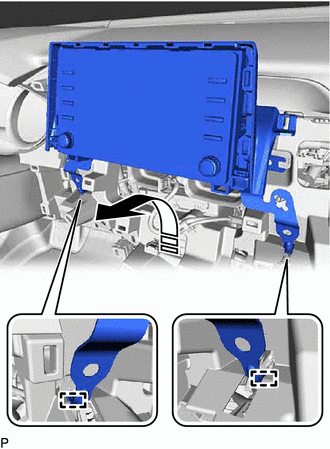
|
|
Remove in this Direction |
Disengage the 2 guides as shown in the illustration.
Disconnect each connector and remove the radio and display receiver assembly with bracket.
9.REMOVE RADIO AND DISPLAY RECEIVER ASSEMBLY WITH BRACKET (for 9 Inch Display)
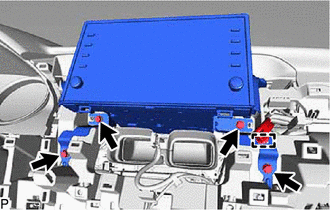
Disengage the clamp.
Remove the 4 bolts.
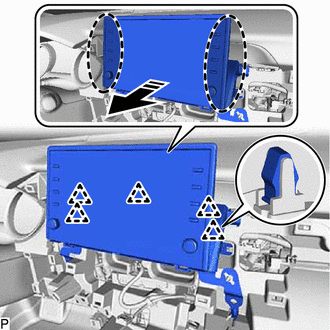
|
|
Place Hand Here |
|
|
Remove in this Direction |
Disengage the 5 clips as shown in the illustration.
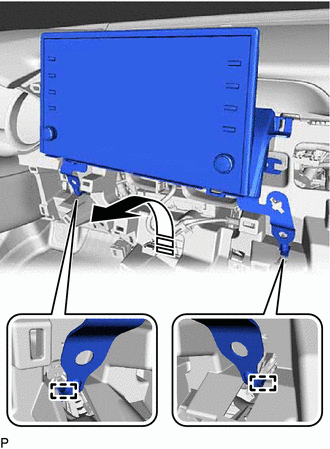
|
|
Remove in this Direction |
Disengage the 2 guides as shown in the illustration.
Disconnect each connector and remove the radio and display receiver assembly with bracket.
55422C
10.REMOVE CENTER INSTRUMENT CLUSTER FINISH UPPER PANEL ASSEMBLY (for 7 Inch Display)
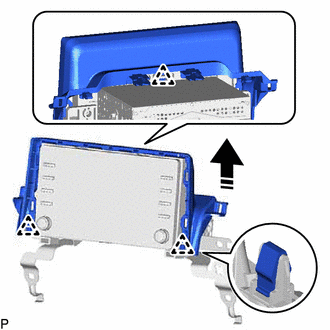
|
|
Remove in this Direction |
Disengage the 3 clips to remove the center instrument cluster finish upper panel assembly as shown in the illustration.
86212
11.REMOVE NO. 2 RADIO RECEIVER BRACKET
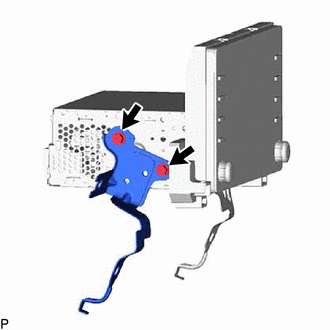
Remove the 2 screws and No. 2 radio receiver bracket.
86211
12.REMOVE NO. 1 RADIO RECEIVER BRACKET
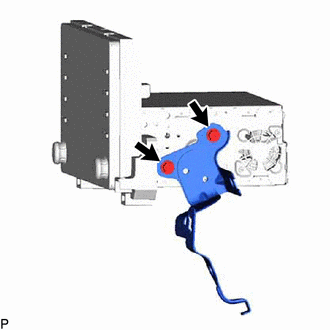
Remove the 2 screws and No. 1 radio receiver bracket.
86140A
13.REMOVE RADIO AND DISPLAY RECEIVER ASSEMBLY